DIY Tutorials

HTV Iron On Team Bride Tote Bags

This post contains affiliate links, meaning that if you click on a link I will recieve a small comission. This costs you nothing extra and I only promote products I use and love! You can read our full disclosure here

DIY HTV Iron On Team Bride Canvas Tote Bags #teambride #svgfiles #htvvinyl

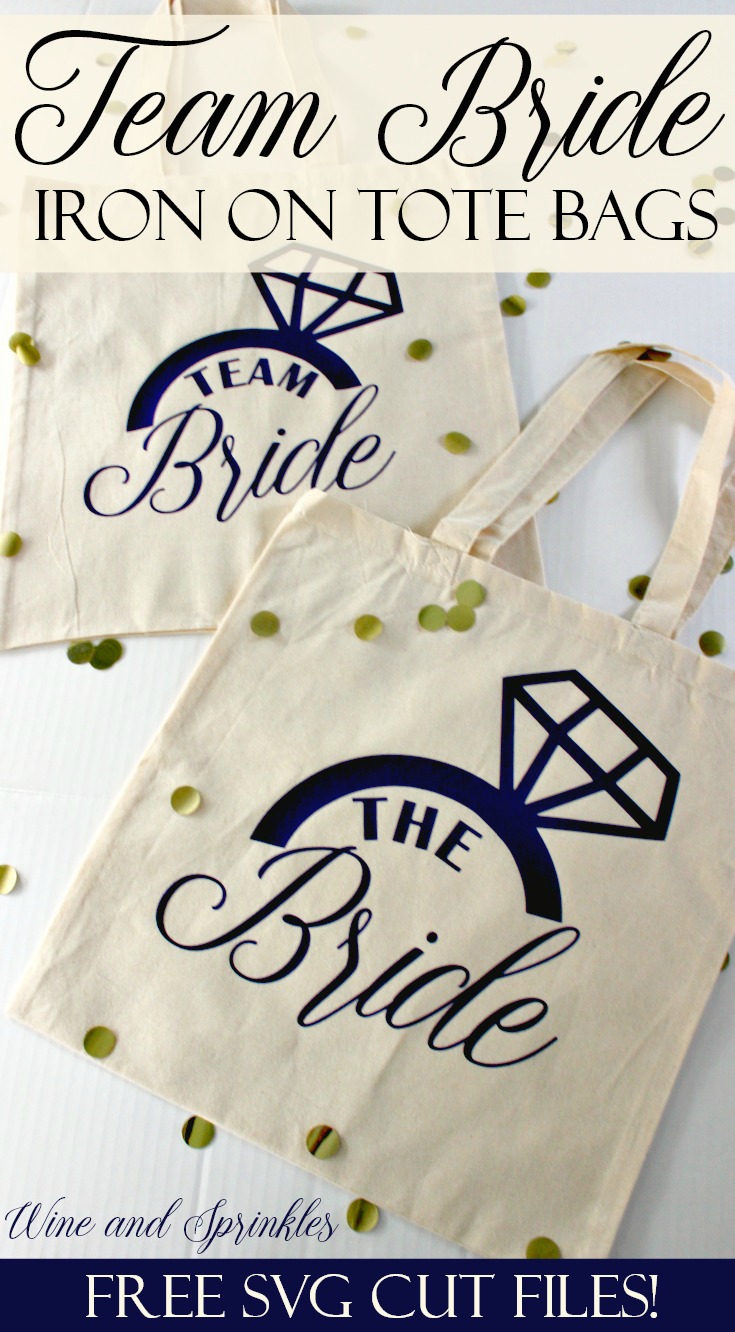
Now that you’ve got your own bridal tank tops and wine glasses, its time to do some crafting for the leading ladies in your life, you future bridesmaids! I started with tote bags because they are always nice for keeping a bunch of stuff in and moving things back and forth for DIY nights, getting ready the day of, or as overnight bags in general. :) I started with this basic design that can be used for any bridal party and are perfect for getting your dream team together to help you on your special day!

DIY HTV Iron On Team Bride Canvas Tote Bags #teambride #svgfiles #htvvinyl

I made these ones on standard canvas bags with purple vinyl, but the links I included below have bags in a variety of colors as well as HTV in a rainbow of choices! :) You will also notice that the Bride design is bigger than the team bride designs, I just always like the bride to pop a bit, even if the design is the same. :)

DIY HTV Iron On Team Bride Canvas Tote Bags #teambride #svgfiles #htvvinyl

1. After downloading the cut files, import them into the Cricut Software. After creating a new project, select Upload Image. Select the file you wish to upload and it will automatically take you to the final upload screen, where you can name the file the select Save. The SVG Files are sized so that they will automatically cut to the size you see in the photos, but if you want to change the size you can do so to fit the totes the way you like.

2. After selecting “Make It” Make sure to select the Mirror Mode on the cutting screen. Cut the design(s) in your choice of heat transfer vinyl (I used Purple Easyweed HTV) with the Iron On (for Easyweed Vinyl) or Iron On+ (for Glitter Vinyl) Setting on your Cricut, with the shiny side of the material down.

3. Weed the additional material off of the backing material so that, looking down with the shiny side up, you can see your design with the correct orientation.

DIY HTV Iron On Team Bride Canvas Tote Bags #teambride #svgfiles #htvvinyl

4. Iron your tote bag to remove any creases, then center the design in the middle of the tote bag. Arrange the design shiny side up, then cover with parchment paper. Make sure to keep the parchment paper between the design and the iron.

DIY HTV Iron On Team Bride Canvas Tote Bags #teambride #svgfiles #htvvinyl

5. Set your Iron to the second Highest setting and press the the iron down firmly on the design, not ironing but rather using it as a small heat press. I worked from the upper left to lower right on the design, pressing the iron on each part of the design for at least 15-20 seconds, then overlapping the last position as you move the iron across the design.

DIY HTV Iron On Team Bride Canvas Tote Bags #teambride #svgfiles #htvvinyl

6. Remove the backing from the design, leaving the design on the Tote Bags. Repeat with all the remaining totes.
DIY HTV Iron On Team Bride Canvas Tote Bags #teambride #svgfiles #htvvinyl

DIY Engaged AF Bridal Tank Top

This post contains affiliate links, meaning that if you click on a link I will recieve a small comission. This costs you nothing extra and I only promote products I use and love! You can read our full disclosure here

DIY Iron on Engaged AF Bridal Tank Tops #engagedaf #htvvinyl #cricut

What better way to celebrate being engaged than with some fun wearables that you can rock throughout your wedding planning time? Its basically the only time you can wear them and if you make them yourself, they can be very inexpensive too! :) I started this year off with one of my favorite just engaged tank top sayings and it makes me wish I was engaged again and planning a wedding this year! :)

DIY Iron on Engaged AF Bridal Tank Tops #engagedaf #htvvinyl #cricut

I made this tank top with Confetti Glitter HTV and loved the look of it and they have tons of different colors to choose from if this gold isn’t really your color. :) And if you have the Cricut already, this project costs less than $10! Pair it with a Wedding Planning Wine Glass or any of the Swag Under $15 we showed last week for a great just engaged vibe to get you through the fun (or stress) of wedding planning. :)

Supplies:
Blank Tank Tops
Easyweed Heat Transfer Vinyl or Glitter Heat Transfer Vinyl
Craft Cutter and Tool Set
Adhesive Mat
Tank Top Design Cut Files

1. After downloading the cut files, import them into the Cricut Software. After creating a new project, select Upload Image. Select the file you wish to upload and it will automatically take you to the final upload screen, where you can name the file the select Save. The SVG Files are sized so that they will automatically cut to the size you see in the photos, but if you want to change the size you can do so to fit the tank tops the way you like.

2. After selecting “Make It” Make sure to select the Mirror Mode on the cutting screen. Cut the design in your choice of heat transfer vinyl (I used Gold Confetti Glitter HTV) with the Iron On (for Easyweed Vinyl) or Iron On+ (for Glitter Vinyl) Setting on your Cricut, with the shiny side of the material down.

3. Weed the additional material off of the backing material so that, looking down with the shiny side up, you can see your design with the correct orientation.

DIY Iron on Engaged AF Bridal Tank Tops #engagedaf #htvvinyl #cricut

4. Iron your tank top to remove any creases, then center the design over the top half of the tank top. Arrange the design shiny side up, then cover with parchment paper. Make sure to keep the parchment paper between the design and the iron.

DIY Iron on Engaged AF Bridal Tank Tops #engagedaf #htvvinyl #cricut

5. Set your Iron to the second Highest setting and press the the iron down firmly on the design, not ironing but rather using it as a small heat press. I worked from the upper left to lower right on the design, pressing the iron on each part of the design for at least 30 seconds, then overlapping the last position as you move the iron across the design.

DIY Iron on Engaged AF Bridal Tank Tops #engagedaf #htvvinyl #cricut

6. Remove the backing from the design, leaving the design on the tank top.

DIY Iron on Engaged AF Bridal Tank Tops #engagedaf #htvvinyl #cricut

This is a great project to start your journey into DIY wedding crafting, its easy to weed, a good size for a tank top but can be easily ironed on with just a few ironed “presses” to finish it up and not a lot of small or thin lines that could pull up if you didn’t iron it long enough. If you are ready to try more tank tops, check out our other tank top projects here!

DIY Iron on Engaged AF Bridal Tank Tops #engagedaf #htvvinyl #cricut

DIY Wedding Planning Wine Glass

This post contains affiliate links, meaning that if you click on a link I will recieve a small comission. This costs you nothing extra and I only promote products I use and love! You can read our full disclosure here

Do it Yourself Wedding Planning Wine Glass #engaged #svgfiles #cricut #wine

Happy New Year and congratulations to all the new future brides that got engaged over the holiday season! :) What better way than to celebrate and help you get through the wedding planning process than a lovely diy wine glass!

Do it Yourself Wedding Planning Wine Glass #engaged #svgfiles #cricut #wine

I made one in a Champagne Glitter Vinyl and another in a Turquoise Vinyl, but if you are new to weeding small vinyl designs I would recommend not using the glitter vinyl. In addition, its easiest to smooth the design from the middle to the top, then middle to the bottom to deal with the curvature of the glass.

Do it Yourself Wedding Planning Wine Glass #engaged #svgfiles #cricut #wine

1. After downloading the cut files, import them into the Cricut Software. After creating a new project, select Upload Image. Select the file you wish to upload and it will automatically take you to the final upload screen, where you can name the file the select Save. 

2. Cut the design(s) in your choice of permanent adhesive vinyl with the Vinyl Setting on your Cricut. The SVG Files are sized so that they will automatically cut to the size you see in the photos, but if you want to change the size you can do so to fit another sized glass than the ones we recommend. :)

Do it Yourself Wedding Planning Wine Glass #engaged #svgfiles #cricut #wine

3. Once the designs are cut, weed away the extra vinyl and cut a piece of transfer taper to 3" x 3.5". Cut away any excess backing from the vinyl design and smooth transfer tape over the design, aligning it to the top of the text (“this is my”). I also aligned mine so that one set of the 1/2” blocks on the transfer tape were above the text so the it was easy to align on the glass.Using the smoother tool, smooth the tape to the vinyl, removing any air bubbles.

Do it Yourself Wedding Planning Wine Glass #engaged #svgfiles #cricut #wine

4. Remove the transfer tape, making sure that the whole of the design transfers from the vinyl backing to the transfer tape.

Do it Yourself Wedding Planning Wine Glass #engaged #svgfiles #cricut #wine

5. Now, transfer the design to your glass. align the top of the transfer tape to the lip of the glass, as shown below. Smooth down the middle of the transfer tape to about the middle of the design, then smooth the design around the curve of the glass from the middle of the design to the edges. Smooth any air bubbles out of the vinyl, but don’t worry about the crinkling of the transfer tape with the curved surface.

Do it Yourself Wedding Planning Wine Glass #engaged #svgfiles #cricut #wine

6. Remove the transfer tape to leave the design on the glass. Any additional bubbles in the design can now be smoothed out with either your fingers or the smoother tool. The letters are small enough that I only had one to smooth and it did quite easily. :)

Do it Yourself Wedding Planning Wine Glass #engaged #svgfiles #cricut #wine

And now you have the perfect wine glass to help you or your new favorite bride get through the fun and stress of planning a wedding! :)

Do it Yourself Wedding Planning Wine Glass #engaged #svgfiles #cricut #wine


Monogram HTV Iron On Koozies

This post contains affiliate links, meaning that if you click on a link I will recieve a small comission. This costs you nothing extra and I only promote products I use and love! You can read our full disclosure here

DIY Iron On Monogrammed Koozies #cricutprojects #cricut #koozies #monogram

With all the fun I’ve had putting monograms on Tank Tops and Tote Bags, I decided to include koozies in the mix since its such an easy project if you have a little extra HTV lying around, and in my case I also had some extra koozies! Like the other monogram projects, you can easily design them in the Cricut Craft Cutter Software and size them however you like for your koozie. :)

DIY Iron On Monogrammed Koozies #cricutprojects #cricut #koozies #monogram

Supplies:
Blank Koozies
Easyweed Heat Transfer Vinyl or Glitter Heat Transfer Vinyl
Craft Cutter and Tool Set
Adhesive Mat

Designing Your Monogram:

1. First, if you don't already own a Monogram style font, download one. The font I used is called Free Monogram Font from DaFont.com and it worked perfectly for what I wanted, and as the name implies its totally free!

2. Now, open a new project in your Cricut design software and create a text box. Select the Monogram font from your font choices and use it to type the initials for your monogram.

DIY Iron On Monogrammed Koozies #cricutprojects #cricut #koozies #monogram

3. If you are using the font I mentioned, for smaller side letters you use lower case letters and for the center letter you use uppercase letters. For example, my initials on the monogram shown are typed in as "aCl" .

DIY Iron On Monogrammed Koozies #cricutprojects #cricut #koozies #monogram

4. Next, overlap your letters by changing the letter spacing of your font. I chose -2 for the spacing of my letters but it is better to mess with it a little bit to find out what looks best to you.

DIY Iron On Monogrammed Koozies #cricutprojects #cricut #koozies #monogram

5. Once all your letters are spaced to your satisfaction, select the "Weld" tool to combine your letters into a single set of cutting curves. 

DIY Iron On Monogrammed Koozies #cricutprojects #cricut #koozies #monogram

6. Now,  you can size your monogram to whatever size you like best; I made them 3" wide.

7. Finally, cut the monograms on your choice of vinyl. I used the Iron On+ setting for Glitter HTV and the Standard Iron On Setting for regular Easyweed Vinyl. Make sure that you select the "Mirror" Function and load your Iron On material Shiny side down so that your design cuts correctly! :)

Transferring your Design

8. Once your design is cut, weed away the extra material, leaving only your monogram.

9. Arrange the Monogram such that it is in the center of the koozie. Arrange the design shiny side up, then cover with parchment paper. Make sure to keep the parchment paper between the design and the iron.

DIY Iron On Monogrammed Koozies #cricutprojects #cricut #koozies #monogram

10. Set your Iron to the second Highest setting and press the the iron down firmly on the design, not ironing but rather using it as a small heat press. I worked from the upper left to lower right on the design, pressing the iron on each part of the design for about 20 seconds, covering the entire design and parchment paper.

DIY Iron On Monogrammed Koozies #cricutprojects #cricut #koozies #monogram

11. Remove the backing from the design, leaving the Monogram on the Koozie. Repeat with all the remaining Koozies.

DIY Iron On Monogrammed Koozies #cricutprojects #cricut #koozies #monogram

Future Mrs. Bachelorette Flasks

This post contains affiliate links, meaning that if you click on a link I will recieve a small comission. This costs you nothing extra and I only promote products I use and love! You can read our full disclosure here

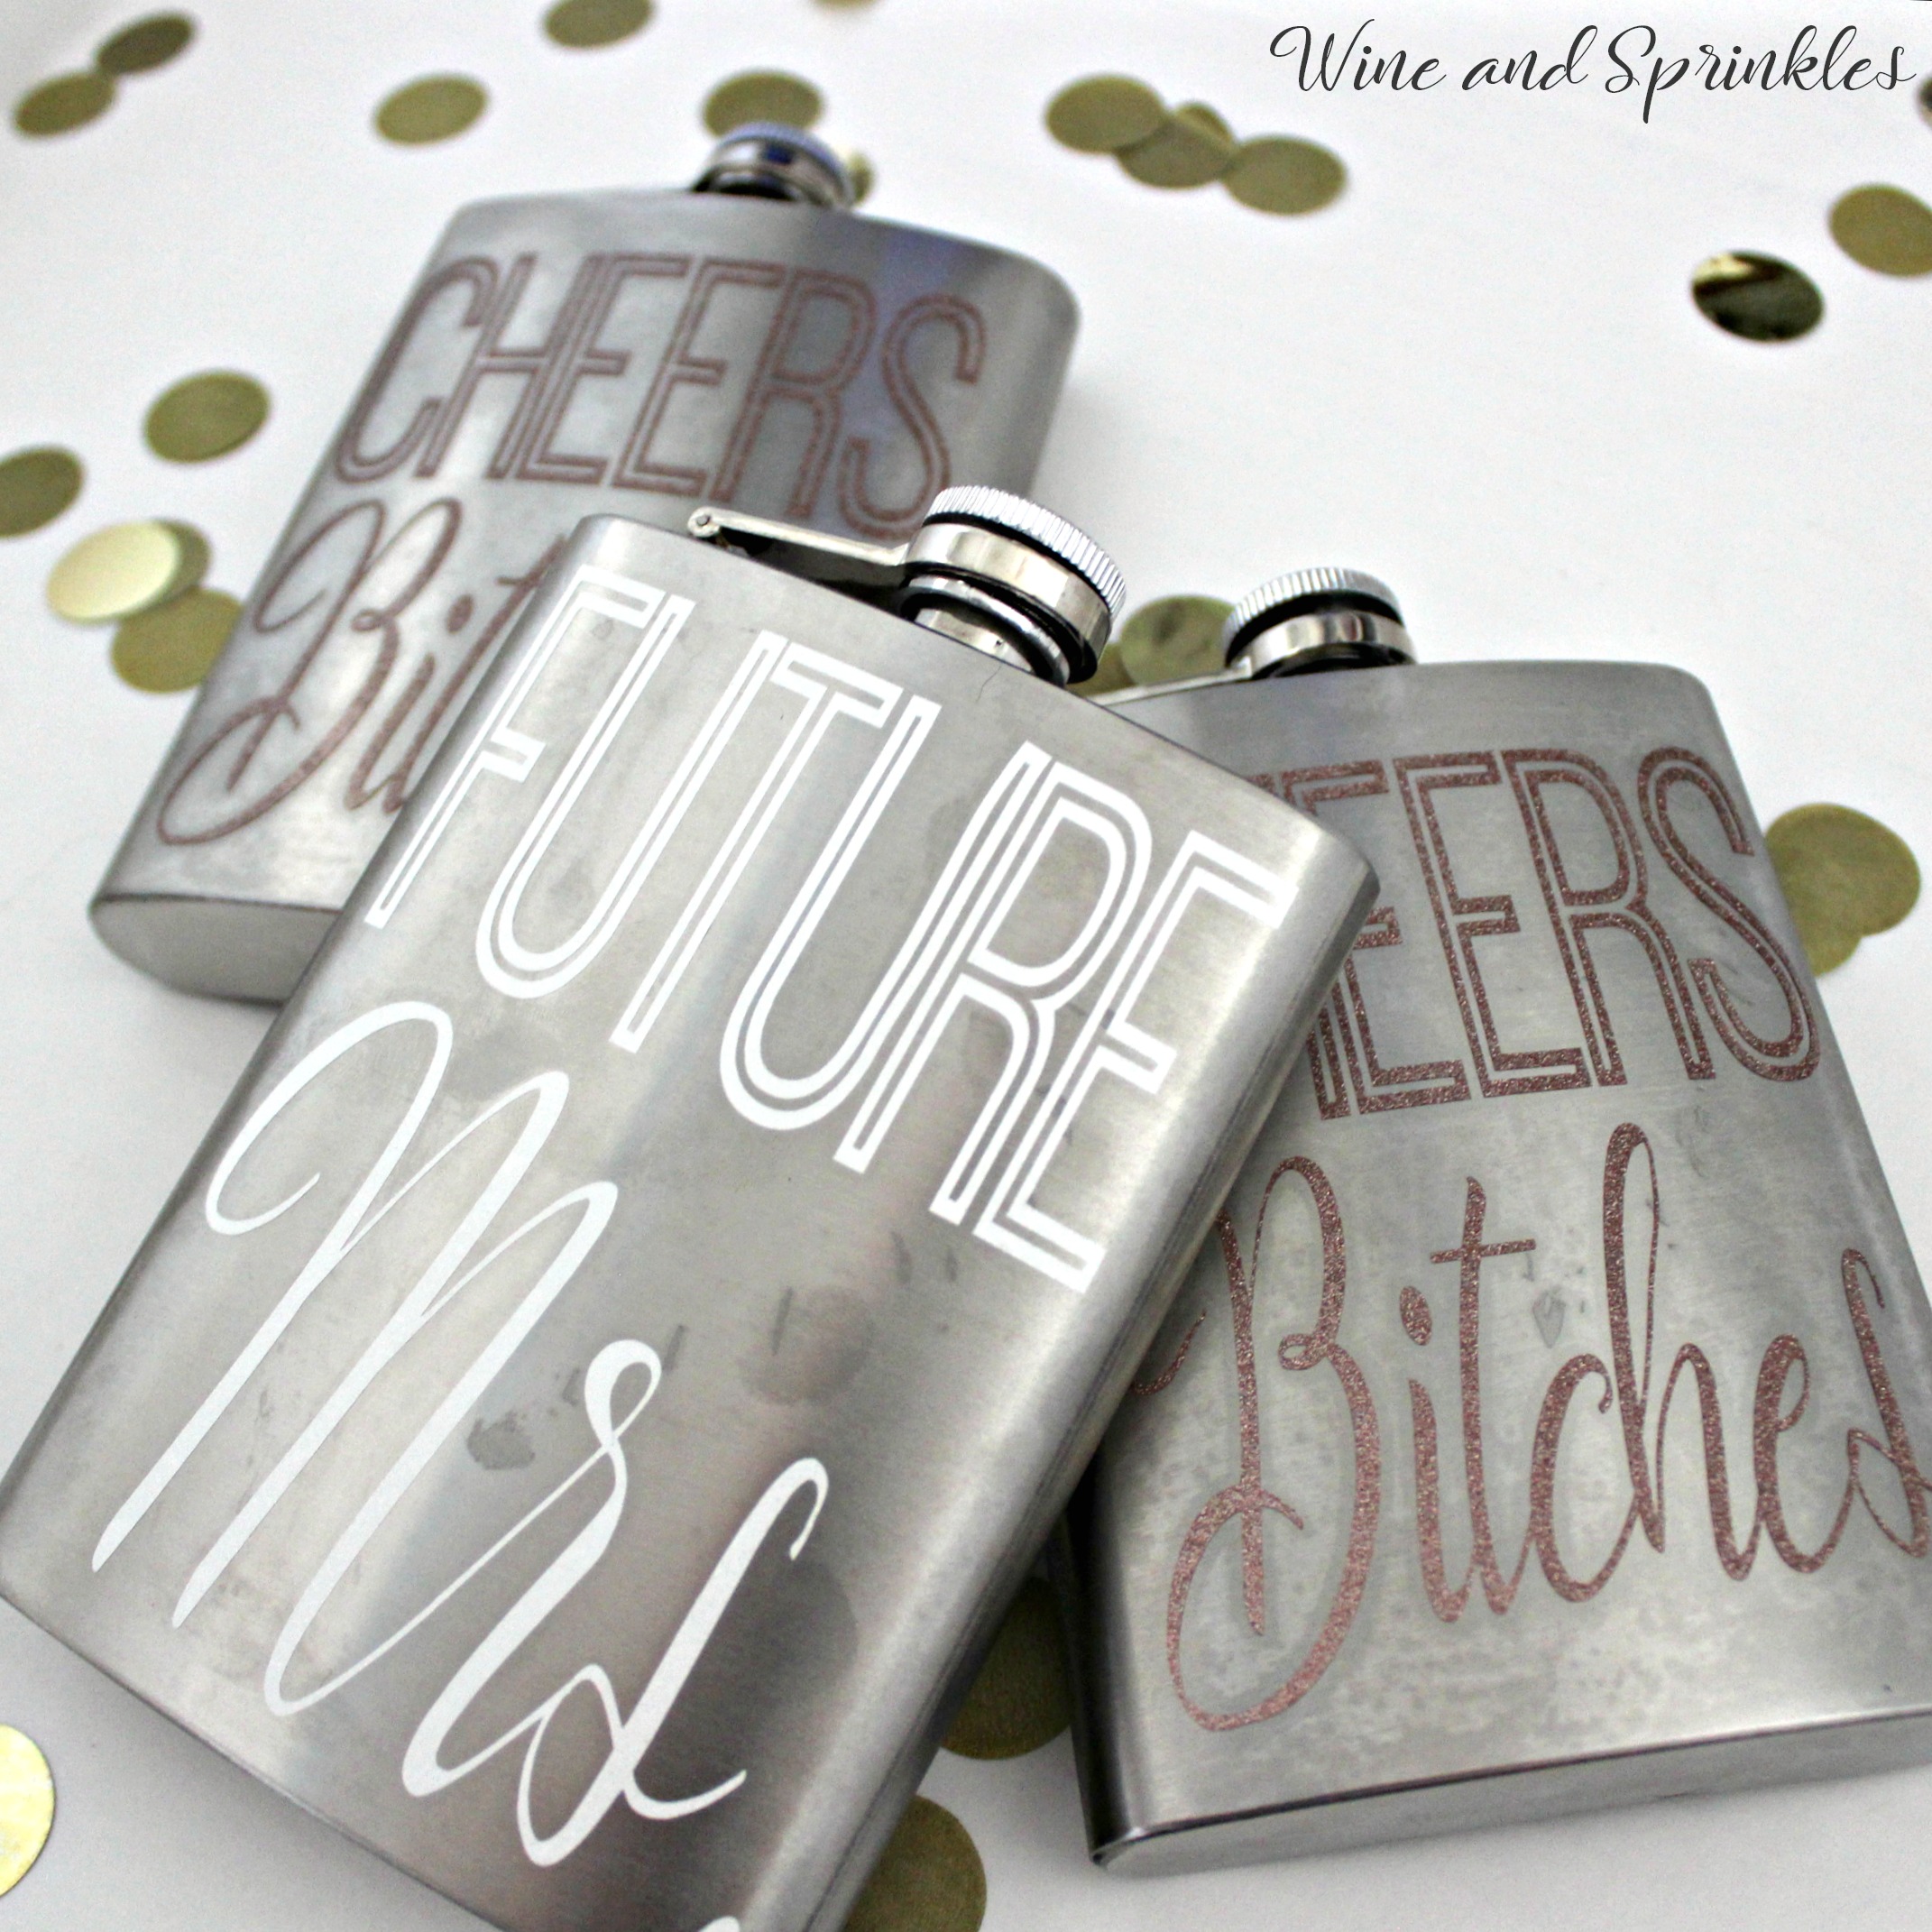
DIY Vinyl Cheer Bitches Bachelorette Party Flasks #bachelorette #cricutprojects #diywedding

More Bachelorette party flasks are here! :) I had so much fun when I first started designing different flasks, I ended up with a whole bunch of different designs that I’ll be publishing every few weeks and will be continuing to design more so there are oodles of options!

DIY Vinyl Cheer Bitches Bachelorette Party Flasks #bachelorette #cricutprojects #diywedding

For these flasks, weeding is what you need to be careful of as both types of text are more delicate than some of the bolder fonts, but the results are well worth it! Just be patient and you shouldn’t have any difficulties. :)

DIY Vinyl Cheer Bitches Bachelorette Party Flasks #bachelorette #cricutprojects #diywedding

1. After downloading the cut files, import them into the Cricut Software. After creating a new project, select Upload Image. Select the file you wish to upload and it will automatically take you to the final upload screen, where you can name the file the select Save. 

2. Cut the design(s) in your choice of permanent adhesive vinyl with the Vinyl Setting on your Cricut. The SVG Files are sized so that they will automatically cut to the size you see in the photos, but if you want to change the size you can do so by BLAH

DIY Vinyl Cheer Bitches Bachelorette Party Flasks #bachelorette #cricutprojects #diywedding

3. Once the designs are cut, weed away the extra vinyl and cut a piece of transfer taper to 3.5" x 5". Cut away any excess backing from the vinyl design and smooth transfer tape over the design, aligning it to the top of the text (i.e. the “Cheers” or “Future”) with 1 -1/2” block above the text, as shown below. Using the smoother tool, smooth the tape to the vinyl, removing any air bubbles. The transfer tape should overlap the backing of the design, so that you can stick the tape to an object with the backing still on the design.

DIY Vinyl Cheer Bitches Bachelorette Party Flasks #bachelorette #cricutprojects #diywedding

4. Now, transfer the design to your flask. If you are comfortable centering the designs you can remove the tape from the backing and directly place the design on the flask. If not, arrange the design to be centered on the flask before removing the backing, sticking it with the overlapping transfer tape.

DIY Vinyl Cheer Bitches Bachelorette Party Flasks #bachelorette #cricutprojects #diywedding

5. Once your design is placed to your satisfaction, carefully peel the tape off the backing, transferring the vinyl to the transfer tape while not unsticking it from the flask. Remove the backing then smooth the design onto the flask, once again using the smoother to remove any air bubbles.

DIY Vinyl Cheer Bitches Bachelorette Party Flasks #bachelorette #cricutprojects #diywedding

6. Remove the transfer tape to leave the design on the flask, then repeat the process for all the additional flasks.

DIY Vinyl Cheer Bitches Bachelorette Party Flasks #bachelorette #cricutprojects #diywedding


DIY Iron On Bride Tribe Wedding Koozies

This post contains affiliate links, meaning that if you click on a link I will recieve a small comission. This costs you nothing extra and I only promote products I use and love! You can read our full disclosure here

DIY Bride Tribe Iron On Wedding Koozies  #diywedding #koozies #bridetribe #cricutprojects

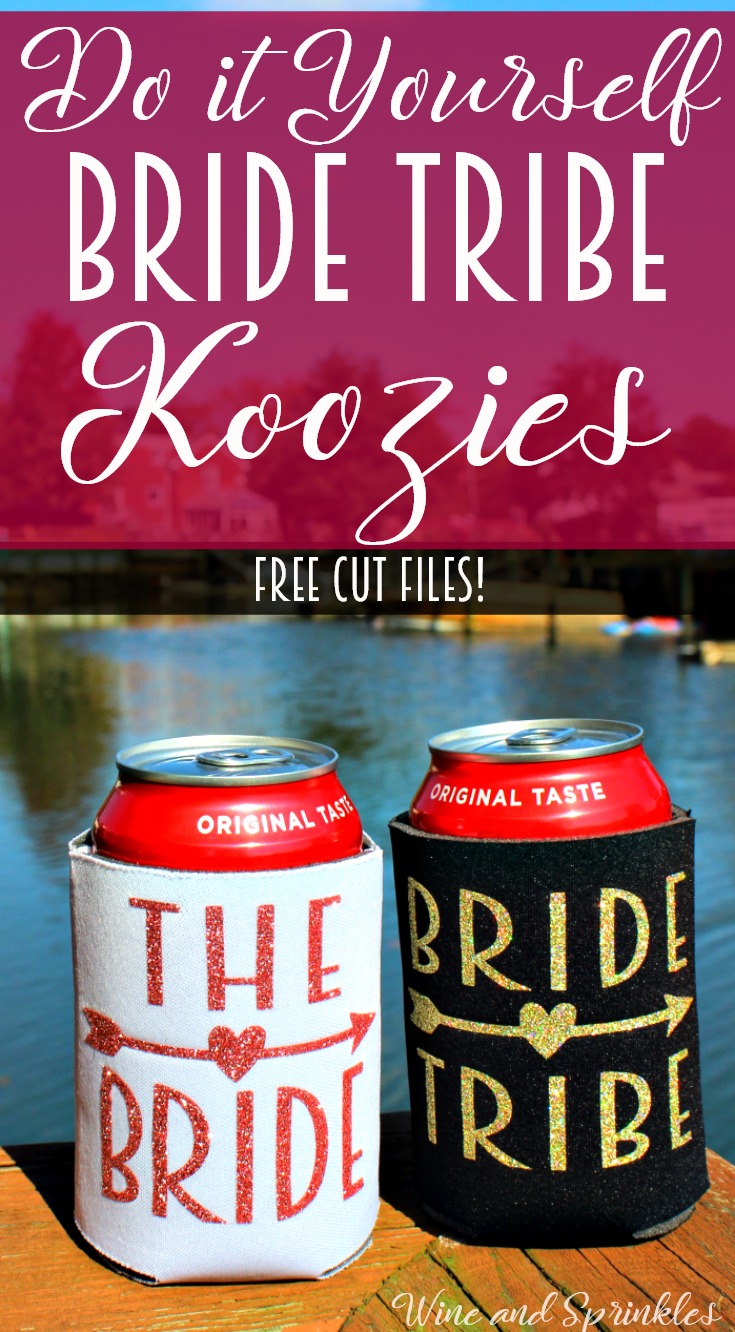
After making my Groomsman Brew Crew Koozies, I couldn’t leave the lovely ladies of the bridal party out of the koozie fun! So I started simple with some fun glittery Bride Tribe koozies. :)

DIY Bride Tribe Iron On Wedding Koozies  #diywedding #koozies #bridetribe #cricutprojects

I used a mix of Rose Gold Glitter HTV, Gold Confetti HTV, and Old Gold Easyweed HTV with a mix of white and black koozies and all of them turned out great! They are super easy to make and are perfect not only as bachelorette party favors but for bridesmaids proposals or any pre-wedding event. :)

DIY Bride Tribe Iron On Wedding Koozies  #diywedding #koozies #bridetribe #cricutprojects

Personally my favorite combination is below: with The Bride in Rose Gold Glitter on a white Koozie and the maids sporting Gold Confetti on black Bride Tribe Koozies; luckily there are dozens of color options so you can easily customize the colors to exactly what you want. :)

DIY Bride Tribe Iron On Wedding Koozies  #diywedding #koozies #bridetribe #cricutprojects

1. After downloading the cut files, import them into the Cricut Software. After creating a new project, select Upload Image. Select the file you wish to upload and it will automatically take you to the final upload screen, where you can name the file the select Save. The SVG Files are sized so that they will automatically cut to the size you see in the photos, but if you want to change the size you can do so to fit the tank tops the way you like.

2. After selecting “Make It” Make sure to select the Mirror Mode on the cutting screen. Cut the design(s) in your choice of heat transfer vinyl (I used Rose Gold Glitter, Gold Confetti Glitter and Old Gold Easyweed HTV) with the Iron On (for Easyweed Vinyl) or Iron On+ (for Glitter Vinyl) Setting on your Cricut, with the shiny side of the material down.

3. Weed the additional material off of the backing material so that, looking down with the shiny side up, you can see your design with the correct orientation.

DIY Bride Tribe Iron On Wedding Koozies  #diywedding #koozies #bridetribe #cricutprojects

4. Center the design in the middle of the koozie. Arrange the design shiny side up, then cover with parchment paper. Make sure to keep the parchment paper between the design and the iron.

DIY Bride Tribe Iron On Wedding Koozies  #diywedding #koozies #bridetribe #cricutprojects

5. Set your Iron to the second Highest setting and press the the iron down firmly on the design, not ironing but rather using it as a small heat press. The koozie design should be completely covered by the iron. Pressing the iron on the design for 15 - 30 seconds, mine took only 20 seconds. :)

DIY Bride Tribe Iron On Wedding Koozies  #diywedding #koozies #bridetribe #cricutprojects

6. Remove the backing from the design, leaving the design on the koozie. Repeat with all the remaining koozies.

DIY Bride Tribe Iron On Wedding Koozies  #diywedding #koozies #bridetribe #cricutprojects

DIY Brew Crew Groomsman Koozies

This post contains affiliate links, meaning that if you click on a link I will recieve a small comission. This costs you nothing extra and I only promote products I use and love! You can read our full disclosure here

DIY Iron On Brew Crew Groomsman Koozies #cricutprojects #groomsman #koozies #brewcrew

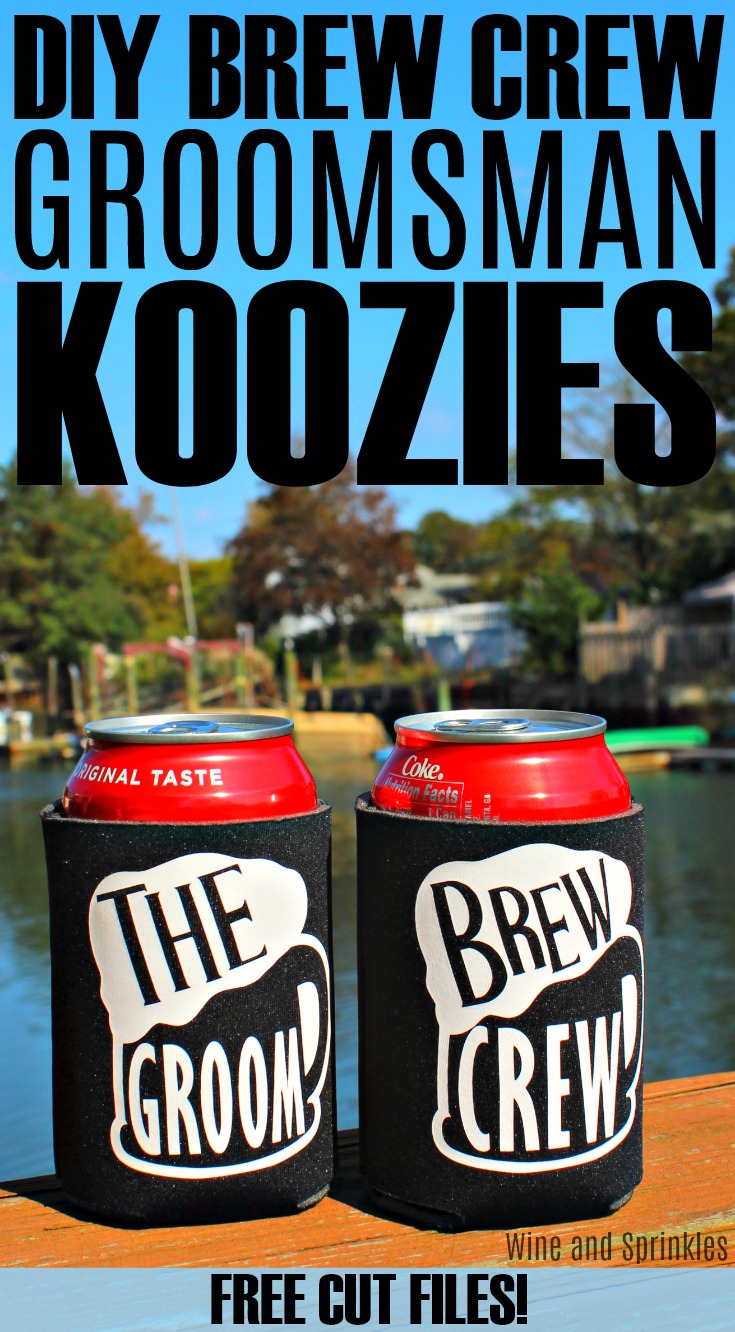
Koozies are a great favor for weddings, bachelor parties, or just as fun gifts for your wedding party. With my husband and his friends looking into cruises for a bachelor party next year, I got inspired to design a few koozies of my own!

DIY Iron On Brew Crew Groomsman Koozies #cricutprojects #groomsman #koozies #brewcrew

I had tons of fun designing these beer stein “Brew Crew” koozies; they go perfectly with a bar crawl, lake day, or any bachelor party where beer is plentiful (which let’s be honest, is most of them!). :)

DIY Iron On Brew Crew Groomsman Koozies #cricutprojects #groomsman #koozies #brewcrew

1. After downloading the cut files, import them into the Cricut Software. After creating a new project, select Upload Image. Select the file you wish to upload and it will automatically take you to the final upload screen, where you can name the file the select Save. The SVG Files are sized so that they will automatically cut to the size you see in the photos, but if you want to change the size you can do so to fit the koozies the way you like.

2. After selecting “Make It” Make sure to select the Mirror Mode on the cutting screen. Cut the design(s) in your choice of heat transfer vinyl (I used White Easyweed HTV) with the Iron On (for Easyweed Vinyl) or Iron On+ (for Glitter Vinyl) Setting on your Cricut, with the shiny side of the material down.

3. Weed the additional material off of the backing material so that, looking down with the shiny side up, you can see your design with the correct orientation.

DIY Iron On Brew Crew Groomsman Koozies #cricutprojects #groomsman #koozies #brewcrew

4. Center the design in the middle of the koozie. Arrange the design shiny side up, then cover with parchment paper. Make sure to keep the parchment paper between the design and the iron.

DIY Iron On Brew Crew Groomsman Koozies #cricutprojects #groomsman #koozies #brewcrew

5. Set your Iron to the second Highest setting and press the the iron down firmly on the design, not ironing but rather using it as a small heat press. The koozie design should be completely covered by the iron. Pressing the iron on the design for 15 - 30 seconds, mine took only 20 seconds. :)

DIY Iron On Brew Crew Groomsman Koozies #cricutprojects #groomsman #koozies #brewcrew

6. Remove the backing from the design, leaving the design on the koozie. Repeat with all the remaining koozies.

DIY Iron On Brew Crew Groomsman Koozies #cricutprojects #groomsman #koozies #brewcrew

DIY Iron On Nautical Bachelorette Tank Tops

This post contains affiliate links, meaning that if you click on a link I will recieve a small comission. This costs you nothing extra and I only promote products I use and love! You can read our full disclosure here

DIY Nautical Bachelorette Tank Tops #bachelorette #cricutprojects #feelingnauti #shipfaced

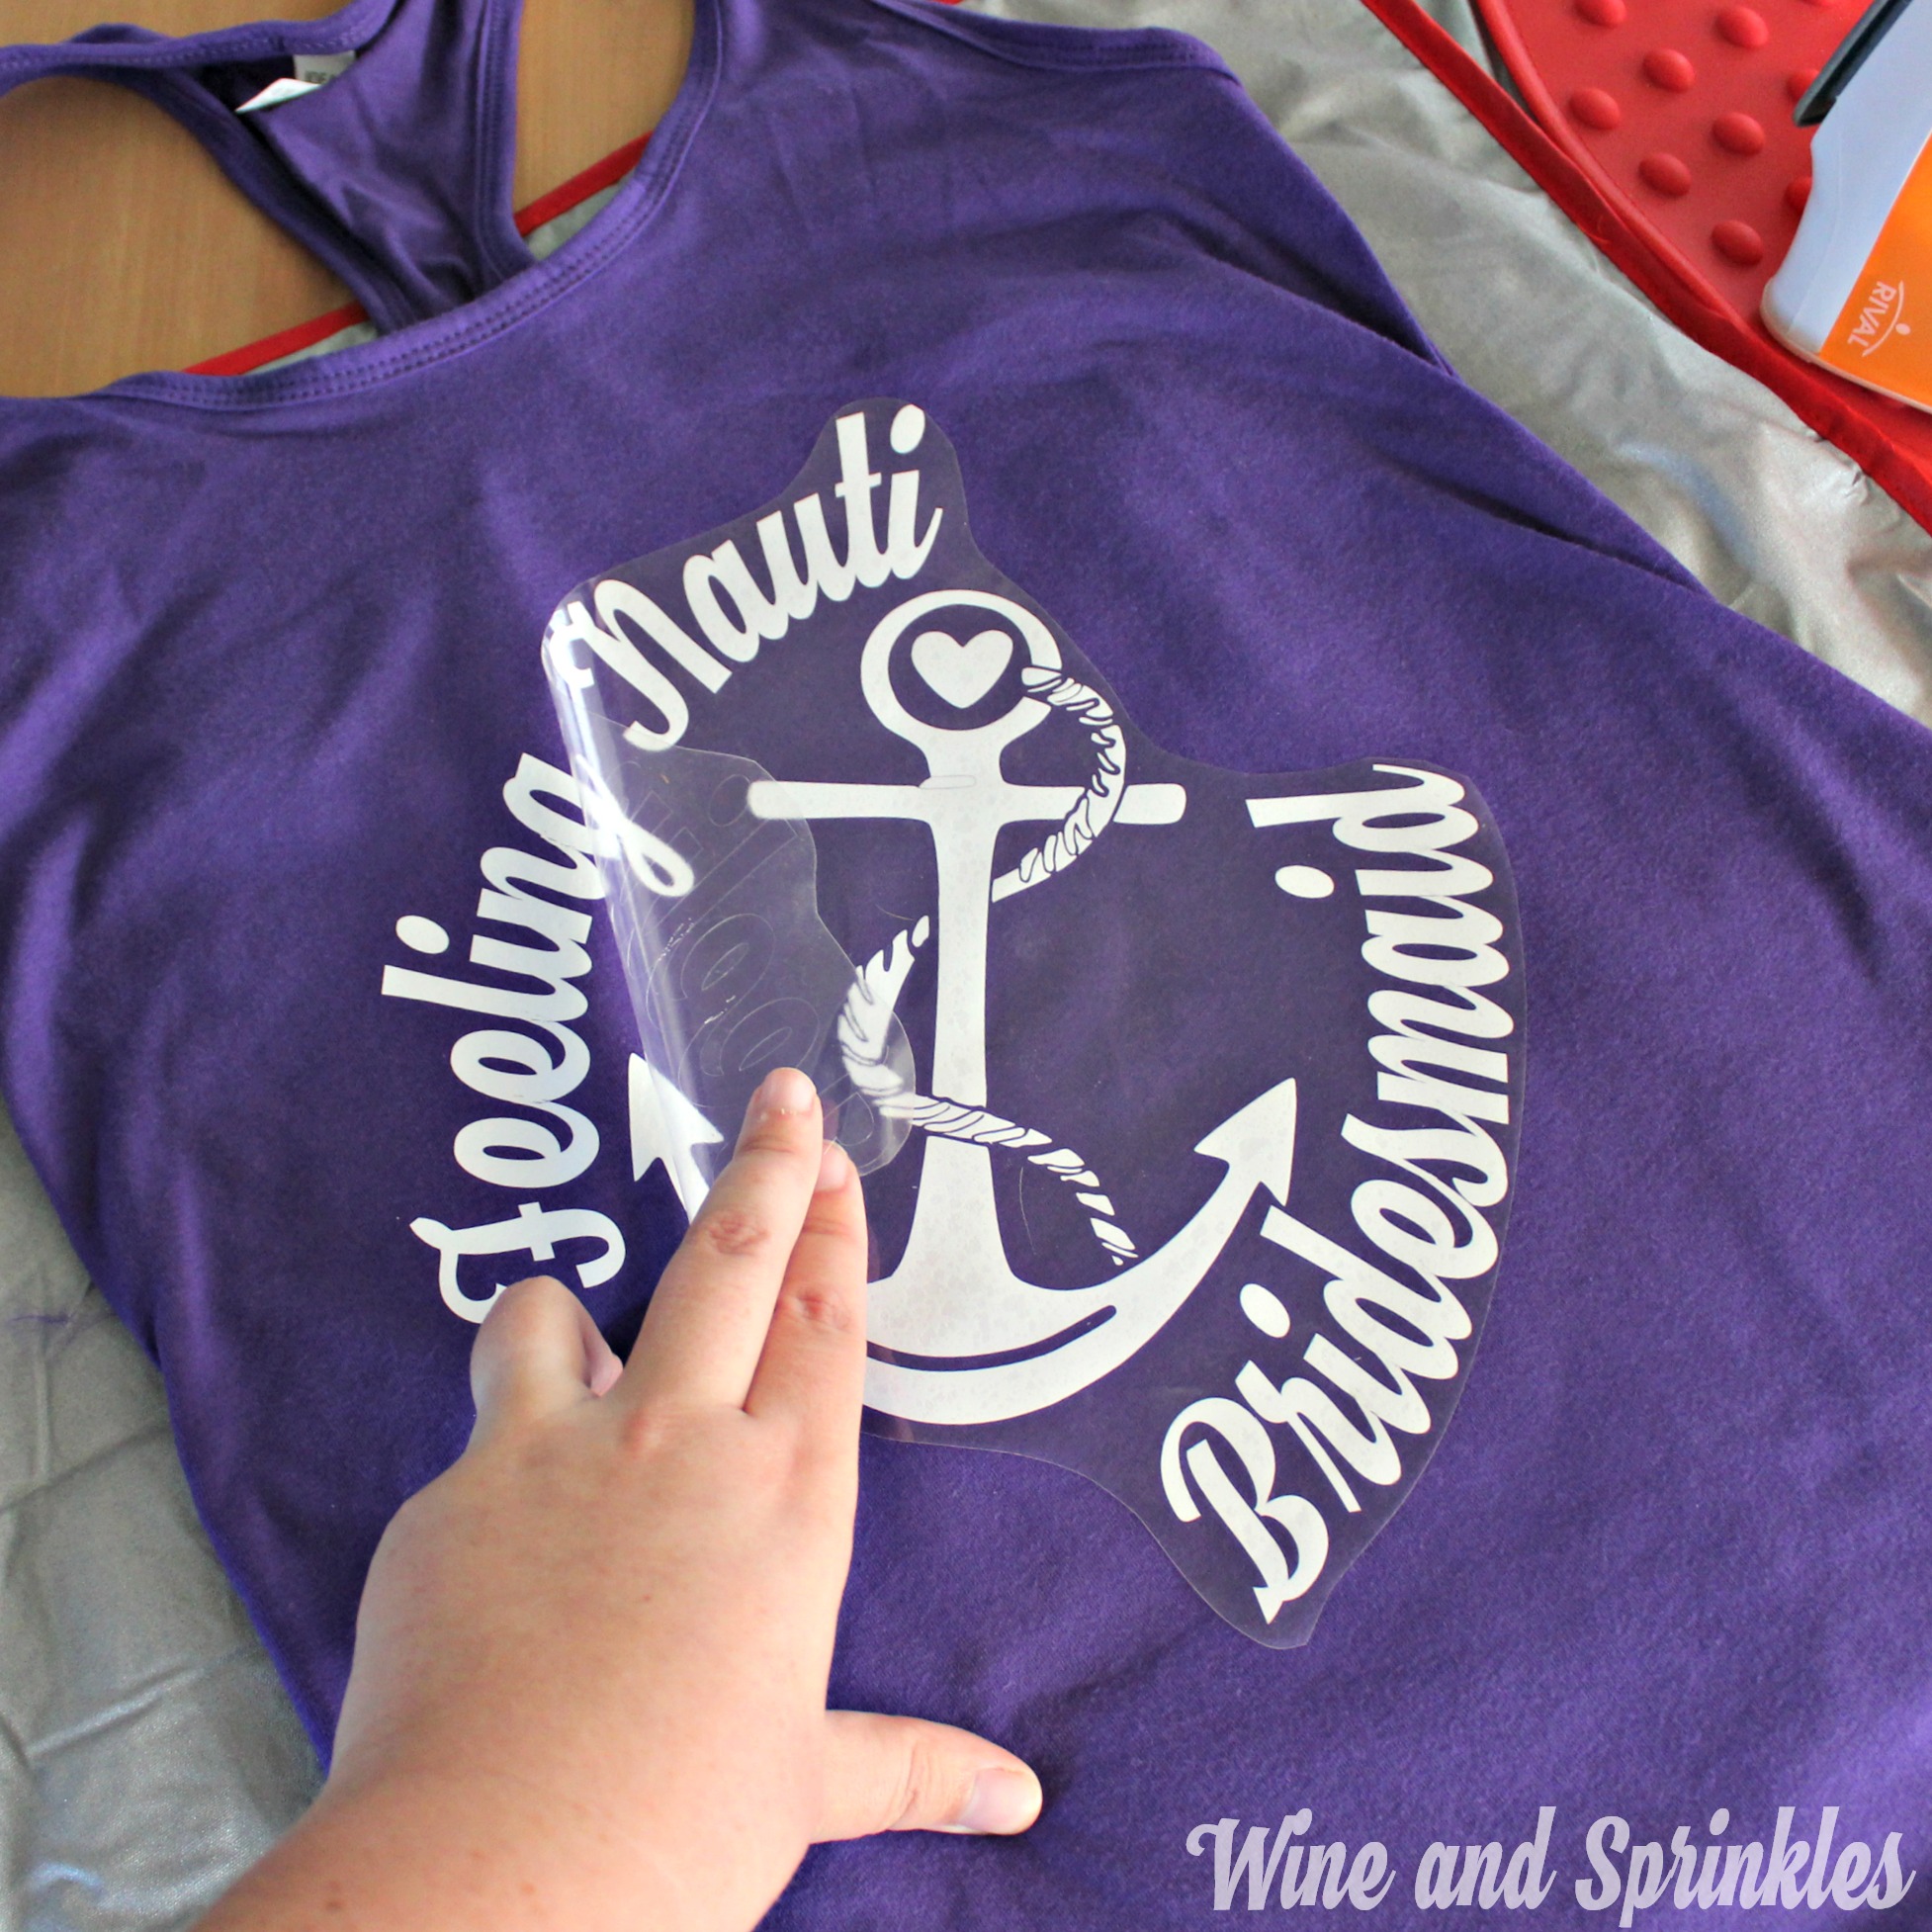
Whats better for a cruise bachelorette party than matching bridal party tank tops? :) I adored this design so much on tote bags I had to use it for tank tops as well and it looked great either way!

DIY Nautical Bachelorette Tank Tops #bachelorette #cricutprojects #feelingnauti #shipfaced

These are just as easy as their tote bag counter parts, and I adore the white and silver popping on darker, colorful tank tops! :)

IDIY Nautical Bachelorette Tank Tops #bachelorette #cricutprojects #feelingnauti #shipfaced

1. After downloading the cut files, import them into the Cricut Software. After creating a new project, select Upload Image. Select the file you wish to upload and it will automatically take you to the final upload screen, where you can name the file the select Save. The SVG Files are sized so that they will automatically cut to the size you see in the photos, but if you want to change the size you can do so to fit the tank tops the way you like.

2. After selecting “Make It” Make sure to select the Mirror Mode on the cutting screen. Cut the design(s) in your choice of heat transfer vinyl (I used Silver Glitter HTV and White HTV) with the Iron On (for Easyweed Vinyl) or Iron On+ (for Glitter Vinyl) Setting on your Cricut, with the shiny side of the material down.

3. Weed the additional material off of the backing material so that, looking down with the shiny side up, you can see your design with the correct orientation.

DIY Nautical Bachelorette Tank Tops #bachelorette #cricutprojects #feelingnauti #shipfaced

4. Iron your tank top to remove any creases, then center the design over the top half of the tank top. Arrange the design shiny side up, then cover with parchment paper. Make sure to keep the parchment paper between the design and the iron.

DIY Nautical Bachelorette Tank Tops #bachelorette #cricutprojects #feelingnauti #shipfaced

5. Set your Iron to the second Highest setting and press the the iron down firmly on the design, not ironing but rather using it as a small heat press. I worked from the upper left to lower right on the design, pressing the iron on each part of the design for at least 30 seconds, then overlapping the last position as you move the iron across the design.

DIY Nautical Bachelorette Tank Tops #bachelorette #cricutprojects #feelingnauti #shipfaced

6. Remove the backing from the design, leaving the design on the tank top. Repeat with all the remaining tank tops.

DIY Nautical Bachelorette Tank Tops #bachelorette #cricutprojects #feelingnauti #shipfaced

Nothing like matching tank tops to keep all your brides-mates accounted for and ready to party! What designs would you make for bachelorette tank tops? :)

DIY Nautical Bachelorette Tank Tops #bachelorette #cricutprojects #feelingnauti #shipfaced

Feeling Nauti Bridesmaid Flasks

This post contains affiliate links, meaning that if you click on a link I will recieve a small comission. This costs you nothing extra and I only promote products I use and love! You can read our full disclosure here

DIY Nautical Bachelorette Party Flasks #bachelorette #cricutprojects #shipfaced #feelingnauti

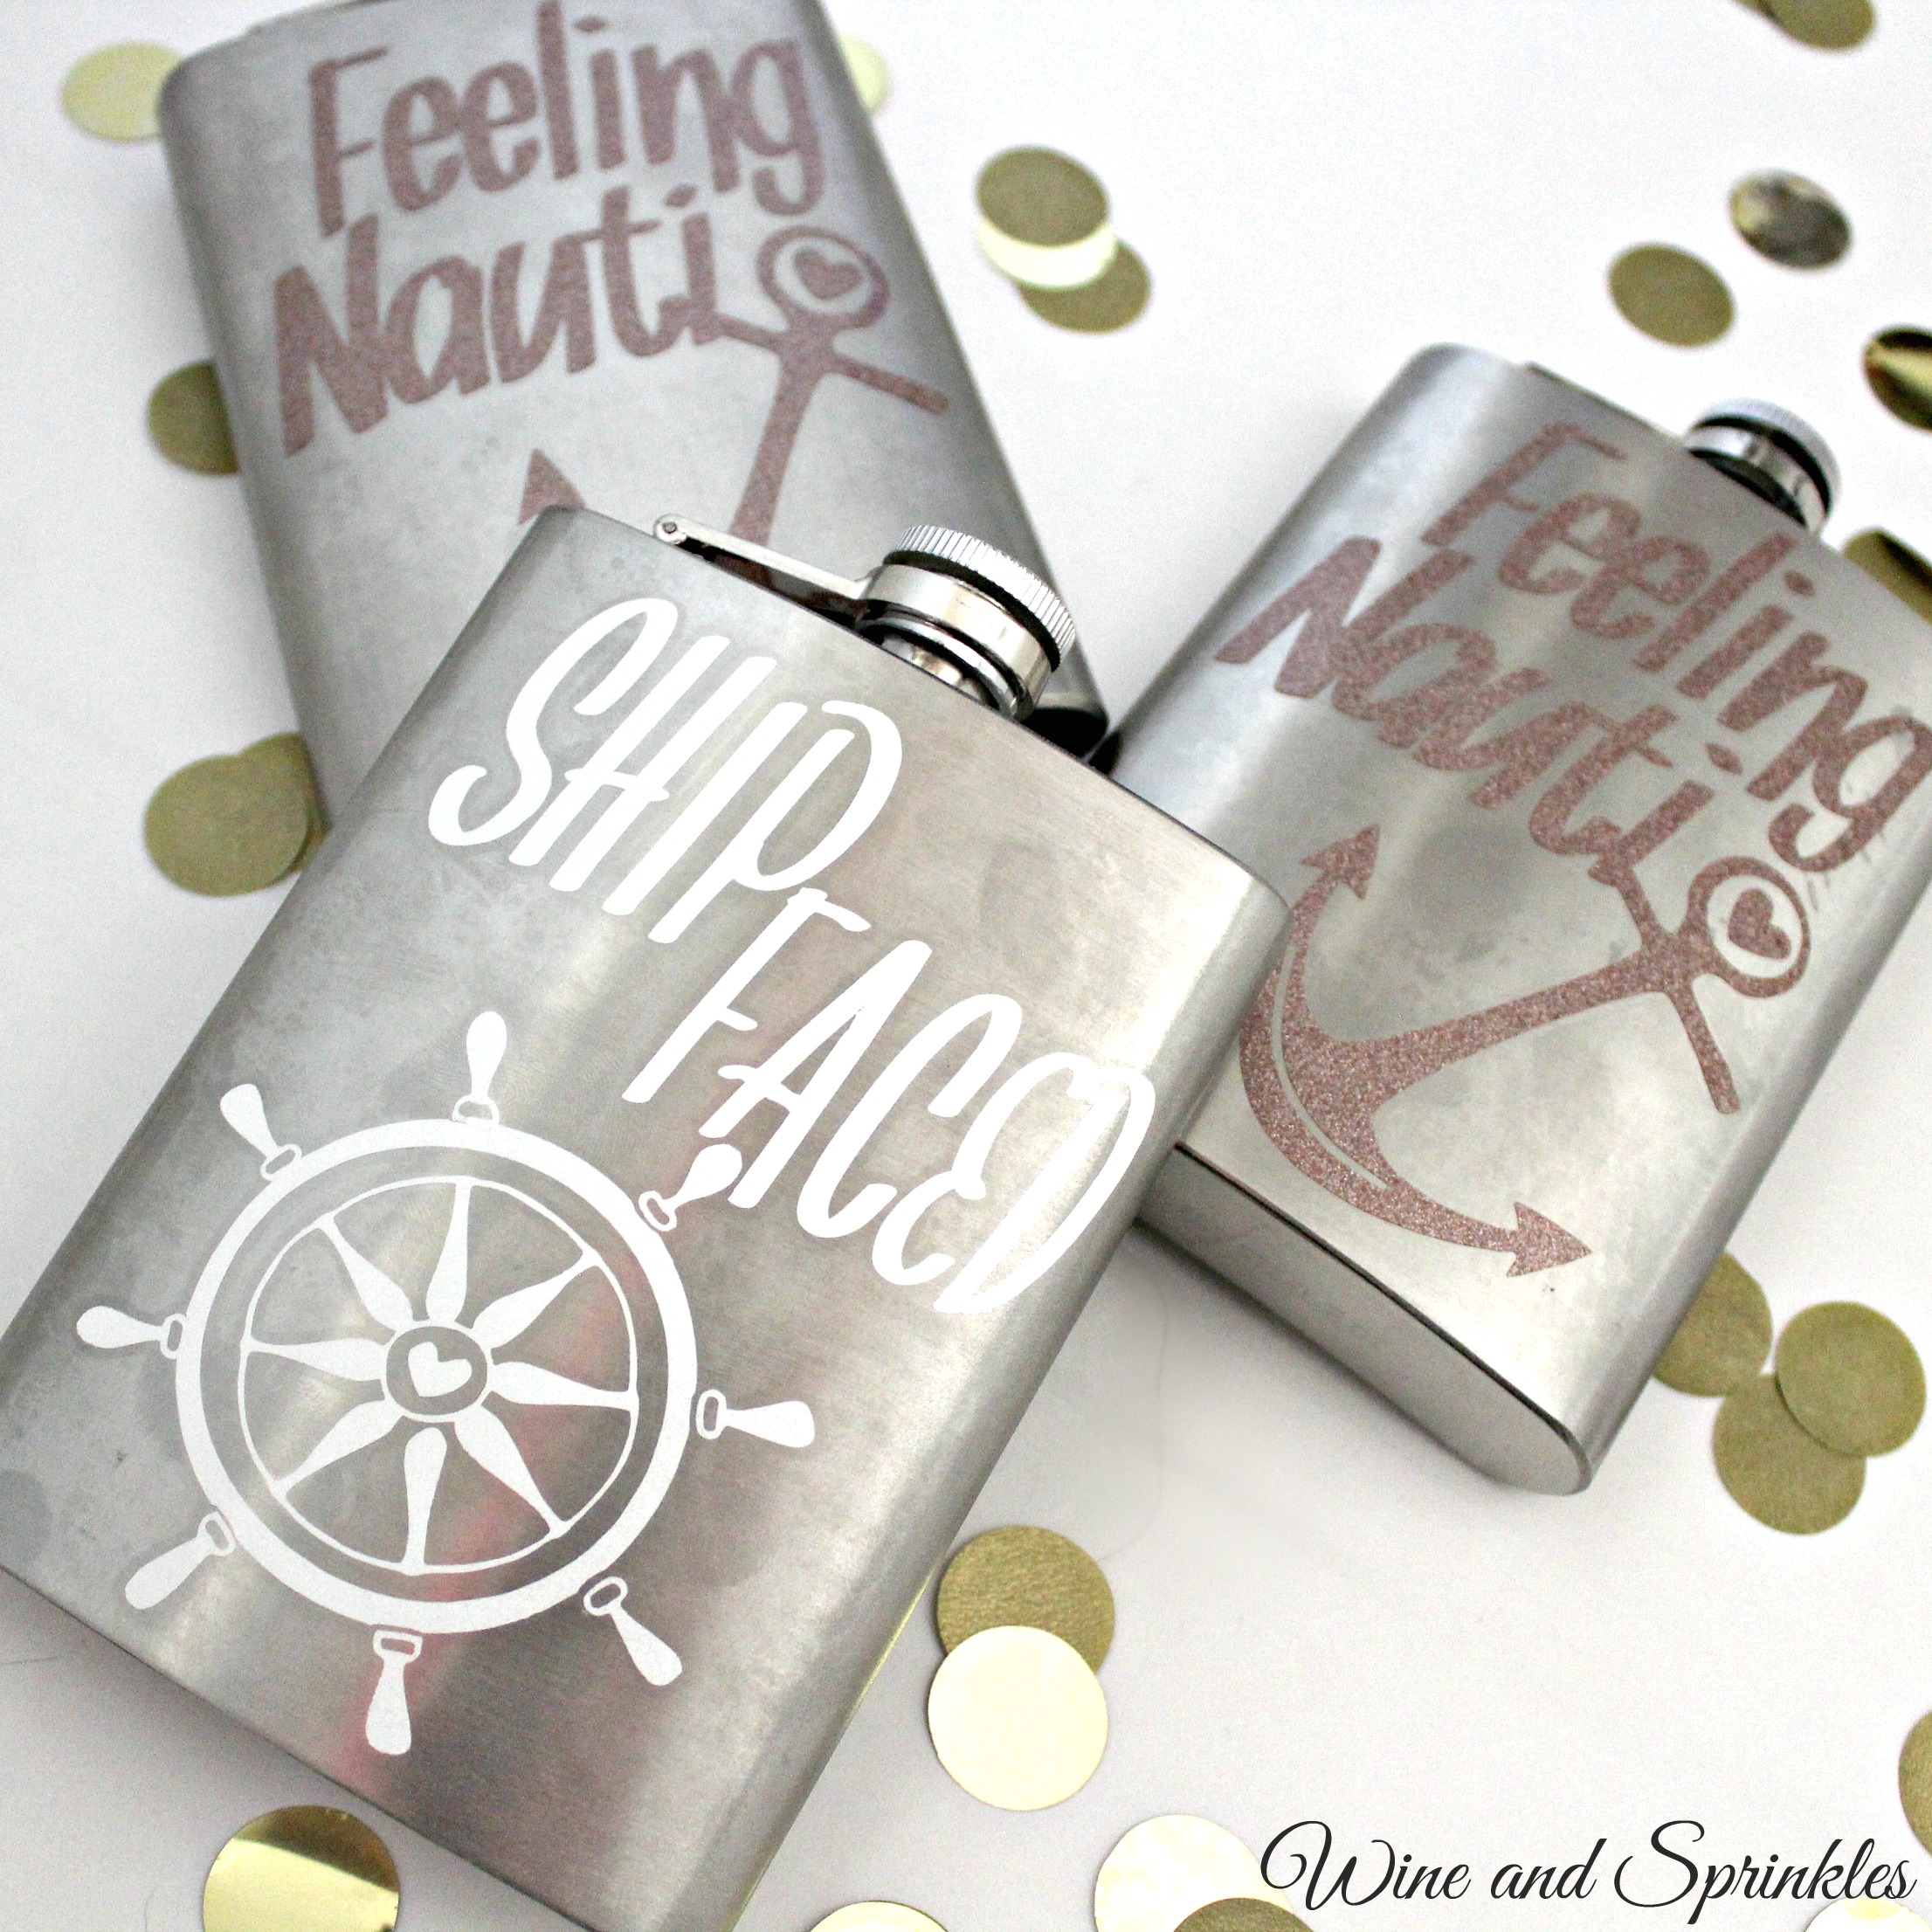
To go with our Feeling Nauti Tote Bags, I decided to also design a set of flasks along the same theme. After all, what better accessory for a bachelorette beach bag than a matching flask? :)

DIY Nautical Bachelorette Party Flasks #bachelorette #cricutprojects #shipfaced #feelingnauti

The big thing with these designs is to be careful wedding the bride’s “Shipfaced” flask, the words and outline are easy but the little details in the steering wheel can be a little tougher depending on how comfortable you are weeding vinyl. I didn’t need an extra, but since they don’t take that much vinyl to make I would recommend cutting an extra just in case. :)

DIY Nautical Bachelorette Party Flasks #bachelorette #cricutprojects #shipfaced #feelingnauti

1. After downloading the cut files, import them into the Cricut Software. After creating a new project, select Upload Image. Select the file you wish to upload and it will automatically take you to the final upload screen, where you can name the file the select Save. 

2. Cut the design(s) in your choice of permanent adhesive vinyl with the Vinyl Setting on your Cricut. The SVG Files are sized so that they will automatically cut to the size you see in the photos, but if you want to change the size you can do so.

DIY Nautical Bachelorette Party Flasks #bachelorette #cricutprojects #shipfaced #feelingnauti

3. Once the designs are cut, weed away the extra vinyl and cut a piece of transfer taper to 3.5" x 5". I found that the Cricut transfer tape was easiest for this since its grid lines are in 1/2” segments. Cut away any excess backing from the vinyl design and smooth transfer tape over the design, aligning it along the bottom of the top word (“Feeling” or “Ship”) 1 1/2” from the top of your transfer tape (3 blocks down if you are using Cricut Transfer tape)Using the smoother tool, smooth the tape to the vinyl, removing any air bubbles. The transfer tape should overlap the backing of the design, so that you can stick the tape to an object with the backing still on the design.

DIY Nautical Bachelorette Party Flasks #bachelorette #cricutprojects #shipfaced #feelingnauti

4. Now, transfer the design to your flask. If you are comfortable centering the designs you can remove the tape from the backing and directly place the design on the flask. If not, arrange the design to be centered on the flask before removing the backing, sticking it with the overlapping transfer tape.

5. Once your design is placed to your satisfaction, carefully peel the tape off the backing, transferring the vinyl to the transfer tape while not unsticking it from the flask. Remove the backing then smooth the design onto the flask, once again using the smoother to remove any air bubbles. I found it pretty easy to simply lift the design and transfer directly, as shown in teh photos below. Since the designs are not symmetrical, I simply aligned it to the center “block” of the transfer tape then made sure that the top of the transfer tape followed the top of the flask, as shown below.

DIY Nautical Bachelorette Party Flasks #bachelorette #cricutprojects #shipfaced #feelingnauti

6. Remove the transfer taper to leave the design on the flask, then repeat the process for all the additional flasks.

DIY Nautical Bachelorette Party Flasks #bachelorette #cricutprojects #shipfaced #feelingnauti

And now you have some cute and nautical bachelorette flasks for your favorite girls to help celebrate! :)

DIY Nautical Bachelorette Party Flasks #bachelorette #cricutprojects #shipfaced #feelingnauti


DIY Nautical Bachelorette Iron On Canvas Tote Bags

This post contains affiliate links, meaning that if you click on a link I will recieve a small comission. This costs you nothing extra and I only promote products I use and love! You can read our full disclosure here

DIY Nautical Bachelorette Iron On Canvas Tote Bags #beachwedding #cricutprojects #bachelorette #cruiseshipwedding

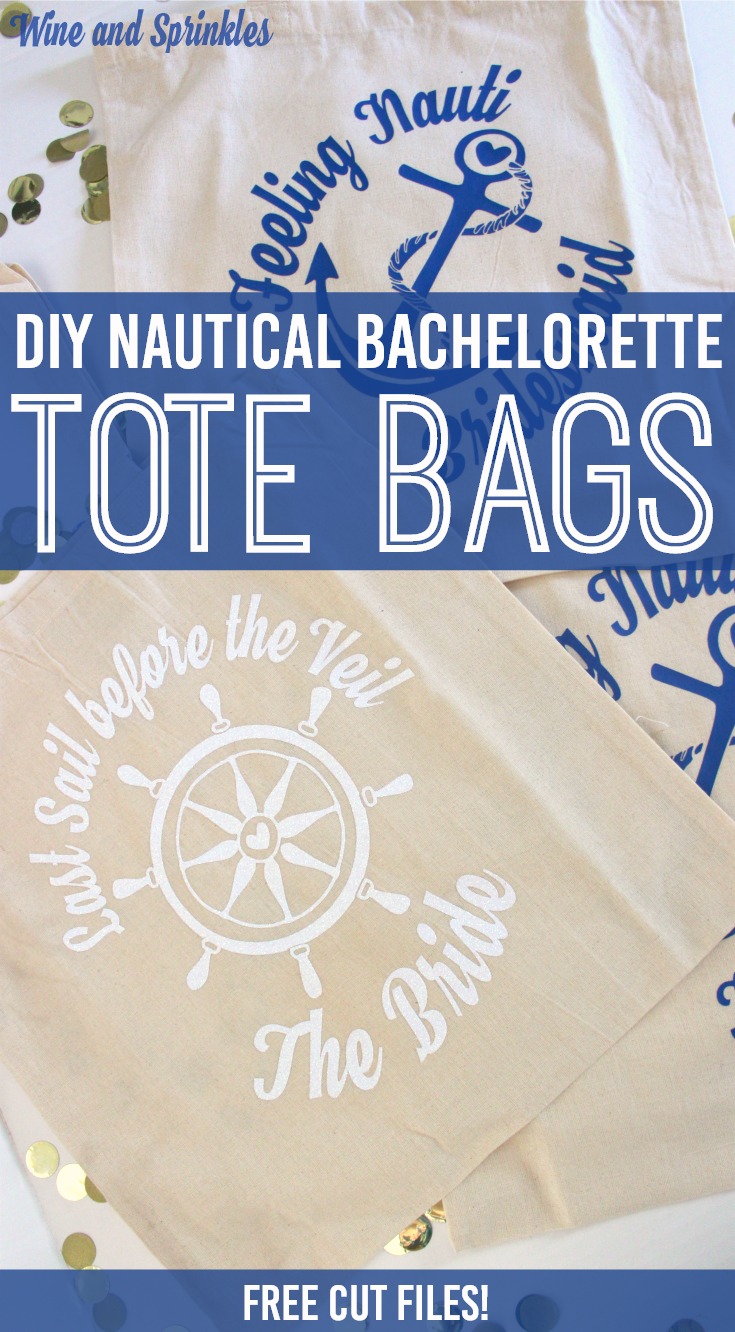
Who loves cruises for Bachelor and Bachelorette Parties? I know I do! I’ve had the fun of helping with one cruise ship wedding but I like it even more for bachelorette parties! To get in the spirit (and because I knew my husband will soon be attending a cruise bachelor party) these tote bags were born!

DIY Nautical Bachelorette Iron On Canvas Tote Bags #beachwedding #cricutprojects #bachelorette #cruiseshipwedding

These totes are surprisingly easy considering that the design is both large and more complex but just like the other files on this blog, the entire design can be easily downloaded all at once into your Cricut software, just make sure to cut out your design mirrored, with your HTV shiny side down! :)

DIY Nautical Bachelorette Iron On Canvas Tote Bags #beachwedding #cricutprojects #bachelorette #cruiseshipwedding

1. After downloading the cut files, import them into the Cricut Software. After creating a new project, select Upload Image. Select the file you wish to upload and it will automatically take you to the final upload screen, where you can name the file the select Save. The SVG Files are sized so that they will automatically cut to the size you see in the photos, but if you want to change the size you can do so to fit the tank tops the way you like.

2. After selecting “Make It” Make sure to select the Mirror Mode on the cutting screen. Cut the design(s) in your choice of heat transfer vinyl with the Iron On (for Easyweed Vinyl) or Iron On+ (for Glitter Vinyl) Setting on your Cricut, with the shiny side of the material down.

3. Weed the additional material off of the backing material so that, looking down with the shiny side up, you can see your design with the correct orientation.

DIY Nautical Bachelorette Iron On Canvas Tote Bags #beachwedding #cricutprojects #bachelorette #cruiseshipwedding

4. Iron your tank top to remove any creases, then center the design over the top half of the tank top. Arrange the design shiny side up, then cover with parchment paper. Make sure to keep the parchment paper between the design and the iron.

DIY Nautical Bachelorette Iron On Canvas Tote Bags #beachwedding #cricutprojects #bachelorette #cruiseshipwedding

5. Set your Iron to the second Highest setting and press the the iron down firmly on the design, not ironing but rather using it as a small heat press. I worked from the upper left to lower right on the design, pressing the iron on each part of the design for at least 30 seconds, then overlapping the last position as you move the iron across the design.

DIY Nautical Bachelorette Iron On Canvas Tote Bags #beachwedding #cricutprojects #bachelorette #cruiseshipwedding

6. Remove the backing from the design, leaving the design on the Tote Bag. Repeat with all the remaining totes.

DIY Nautical Bachelorette Iron On Canvas Tote Bags #beachwedding #cricutprojects #bachelorette #cruiseshipwedding

I absolutely adore how these came out and they were so easy to make! I can’t wait to try this design on tank tops and see how it turns out! :)

DIY Nautical Bachelorette Iron On Canvas Tote Bags #beachwedding #cricutprojects #bachelorette #cruiseshipwedding

Modern Wine Bottle Table Numbers

This post contains affiliate links, meaning that if you click on a link I will recieve a small comission. This costs you nothing extra and I only promote products I use and love! You can read our full disclosure here

DIY Vinyl Modern Wine Bottle Table Numbers - Free Cut Files! #cricutprojects #diywedding #tablenumbers

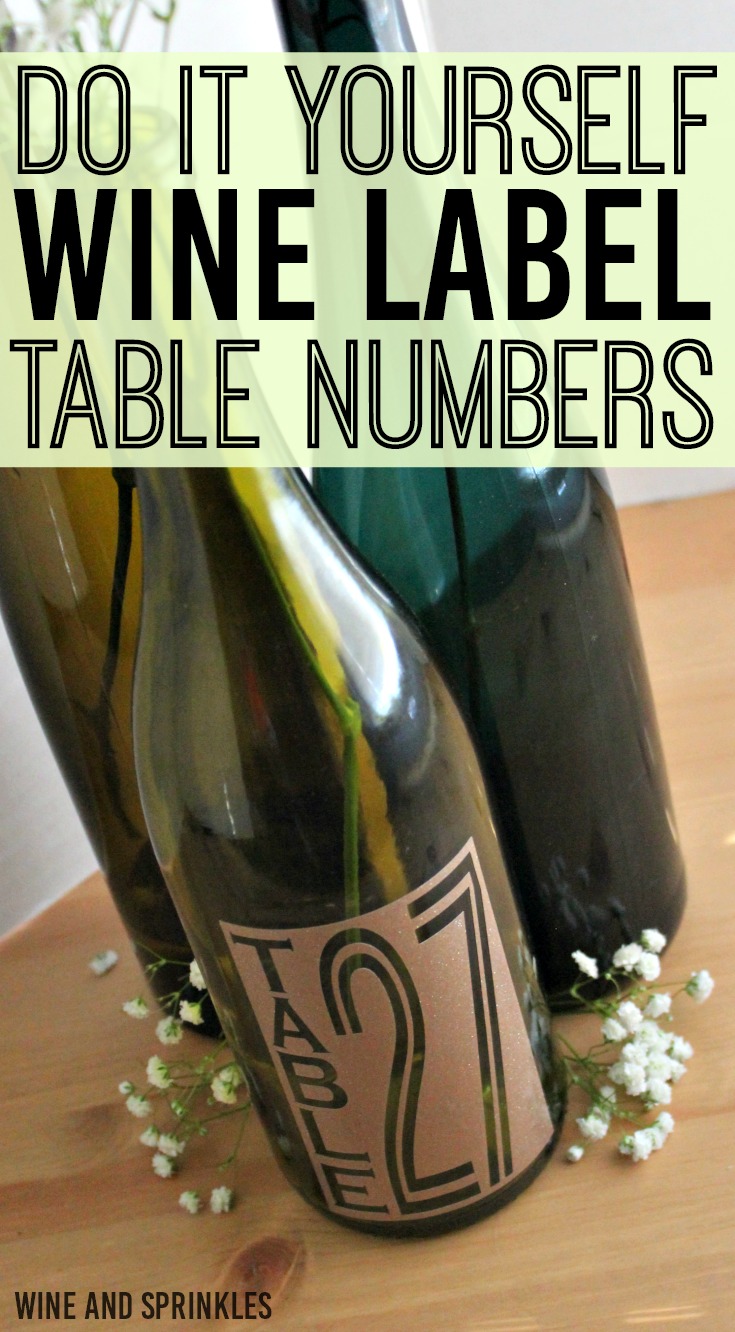
We are back for another take on Wine Bottle Table Numbers! I love wine bottle for centerpieces and having the table number on the bottle is a fun detail and a cheap way to make table numbers in general. I’ve made a couple before this and I own that there will likely be more in the future, there are so many possibilities! :)

DIY Vinyl Modern Wine Bottle Table Numbers - Free Cut Files! #cricutprojects #diywedding #tablenumbers

These designs I wanted to look similar to an actual wine bottle label as far as size, with the number cut out, but as it turns out I really liked them either way. By weeding out the numbers or removing the “label” part, you can have just the Table and number in vinyl or you can choose to remove the Text and numbers, making a more label-esque choice. These two choices could easily be alternated between or you can pick your favorite of the two!

DIY Vinyl Modern Wine Bottle Table Numbers - Free Cut Files! #cricutprojects #diywedding #tablenumbers

Supplies:
Empty Wine Bottles
Permanent Adhesive Vinyl
Transfer Tape
Craft Cutter and Tool Set
Adhesive Mat
Table Number Design Cut Files

1. First, soak your wine bottles in hot, soapy water to remove the labels and adhesive. I found it easiest to soak them for about 5 minutes, remove what l could, then once the label was completely removed clean up the last bits of adhesive with steel wool. :)

2. After downloading the cut files, import them into the Cricut Software. After creating a new project, select Upload Image. Select the file you wish to upload and it will automatically take you to the final upload screen, where you can name the file the select Save.  

3. Cut the design(s) in your choice of permanent adhesive vinyl with the Vinyl Setting on your Cricut. The SVG Files are sized so that they will automatically cut to the size you see in the photos, but if you want to change the size you can do so to fit the wine bottles the way you like.

DIY Vinyl Modern Wine Bottle Table Numbers - Free Cut Files! #cricutprojects #diywedding #tablenumbers

4. Once the designs are cut, weed away the extra vinyl and cut a piece of transfer taper to 3.5" x 5". You can weed these table numbers in two ways, either by weeding the numbers and text, leaving a rectangle with the Table number weeded, or by removing the rectangle, leaving the Table number in vinyl.

5. Cut away any excess backing and smooth transfer tape over the design. I aligned the rectangle table number along the gridelines of the transfer tape and for the numbers only style, I aligned the tape along the “T” and top of the number, as shown below. Using the smoother tool, smooth the tape to the vinyl, removing any air bubbles. The transfer tape should overlap the backing of the design, so that you can stick the tape to an object with the backing still on the design.

DIY Vinyl Modern Wine Bottle Table Numbers - Free Cut Files! #cricutprojects #diywedding #tablenumbers

6. Now, transfer the design to your bottle. If you are comfortable centering the designs you can remove the tape from the backing and directly place the design on the wine bottle. If not, arrange the design to the bottle before removing the backing, sticking it with the overlapping transfer tape.  I aligned mine to the bottom of the wine bottles, as shown in the photos below. I didn’t have much issue transferring the designs directly, but it never hurts to keep on the backing while you arrange it if you are nervous! :)

DIY Vinyl Modern Wine Bottle Table Numbers - Free Cut Files! #cricutprojects #diywedding #tablenumbers

6. Once your design is placed to your satisfaction, transfer the design to the bottle. If you kept on your backing, carefully peel the tape off the backing, transferring the vinyl to the transfer tape while not unsticking it from the bottle. Remove the backing then smooth the design onto the bottle. If you didn’t use the backing, smooth design onto the bottle, using your fingers to remove air bubbles.

DIY Vinyl Modern Wine Bottle Table Numbers - Free Cut Files! #cricutprojects #diywedding #tablenumbers

7. Remove the transfer tape to leave the design on the wine bottle, then repeat the process for all your additional table numbers.

DIY Vinyl Modern Wine Bottle Table Numbers - Free Cut Files! #cricutprojects #diywedding #tablenumbers

DIY Iron On Bachelorette Drinking Team Tank Tops

This post contains affiliate links, meaning that if you click on a link I will recieve a small comission. This costs you nothing extra and I only promote products I use and love! You can read our full disclosure here

Free Cut Files! - DIY Iron On Brides Drinking Team Bachelorette Tank Tops #diywedding #bacheloretteparty #buymeashot #cricutprojects

I’m always a fan of everyone having matching tank tops for bachelorette parties; it is such a nice way for everyone to be a part of the group and makes for wonderful pictures to commemorate all the fun! If you are worried that its too hard to make your own, enter these Bachelorette Drinking Team Tank Tops!

Free Cut Files! - DIY Iron On Brides Drinking Team Bachelorette Tank Tops #diywedding #bacheloretteparty #buymeashot #cricutprojects

I wanted to start more simple with my first set of bachelorette tank tops, and I love how they came out! I highly recommend Glitter Heat Transfer Vinyl for these, they came out stunning! :) And just like our other tutorials, these svg files are designed so that it is as easy as upload, cut, iron, done! :)

Free Cut Files! - DIY Iron On Brides Drinking Team Bachelorette Tank Tops #diywedding #bacheloretteparty #buymeashot #cricutprojects

1. After downloading the cut files, import them into the Cricut Software. After creating a new project, select Upload Image. Select the file you wish to upload and it will automatically take you to the final upload screen, where you can name the file the select Save. The SVG Files are sized so that they will automatically cut to the size you see in the photos, but if you want to change the size you can do so to fit the tank tops the way you like.

2. After selecting “Make It” Make sure to select the Mirror Mode on the cutting screen. Cut the design(s) in your choice of heat transfer vinyl (I used Gold Confetti Glitter HTV) with the Iron On (for Easyweed Vinyl) or Iron On+ (for Glitter Vinyl) Setting on your Cricut, with the shiny side of the material down.

3. Weed the additional material off of the backing material so that, looking down with the shiny side up, you can see your design with the correct orientation.

Free Cut Files! - DIY Iron On Brides Drinking Team Bachelorette Tank Tops #diywedding #bacheloretteparty #buymeashot #cricutprojects

4. Iron your tank top to remove any creases, then center the design over the top half of the tank top. Arrange the design shiny side up, then cover with parchment paper. Make sure to keep the parchment paper between the design and the iron.

Free Cut Files! - DIY Iron On Brides Drinking Team Bachelorette Tank Tops #diywedding #bacheloretteparty #buymeashot #cricutprojects

5. Set your Iron to the second Highest setting and press the the iron down firmly on the design, not ironing but rather using it as a small heat press. I worked from the upper left to lower right on the design, pressing the iron on each part of the design for at least 30 seconds, then overlapping the last position as you move the iron across the design.

Free Cut Files! - DIY Iron On Brides Drinking Team Bachelorette Tank Tops #diywedding #bacheloretteparty #buymeashot #cricutprojects

6. Remove the backing from the design, leaving the design on the tank top. Repeat with all the remaining tank tops.

Free Cut Files! - DIY Iron On Brides Drinking Team Bachelorette Tank Tops #diywedding #bacheloretteparty #buymeashot #cricutprojects

These tank tops are a beautiful and affordable option for a bar crawl bachelorette! What other Bachelorette tank tops would you like to see? :)

Free Cut Files! - DIY Iron On Brides Drinking Team Bachelorette Tank Tops #diywedding #bacheloretteparty #buymeashot #cricutprojects

Monogram Canvas Tote Bags

This post contains affiliate links, meaning that if you click on a link I will recieve a small comission. This costs you nothing extra and I only promote products I use and love! You can read our full disclosure here

DIY Monogram Bridal Canvas Tote Bags #diywedding #cricutprojects #monogram

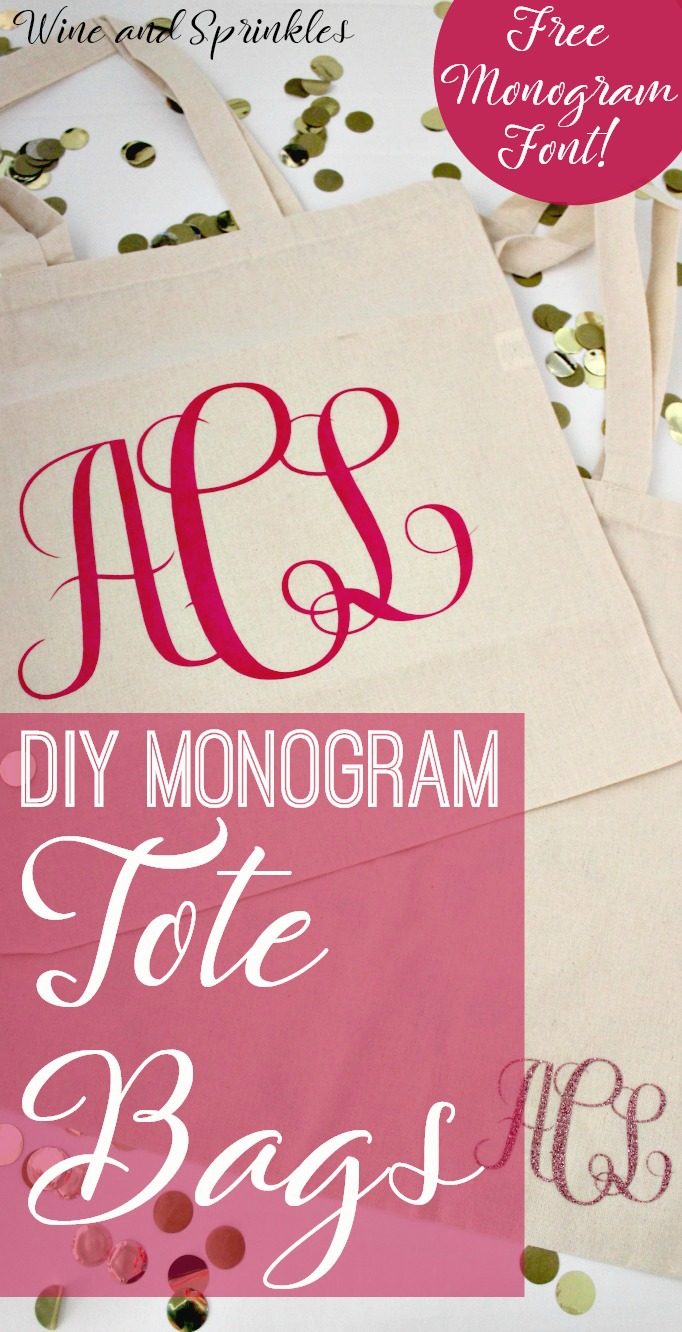
If there is one thing I adore on Etsy its all the monogrammed swag you can buy for yourself and your maids for your wedding! I love monogrammed items, but have always been nervous to try it myself because I assumed it would be difficult. Luckily, that was not the case! :)

DIY Monogram Bridal Canvas Tote Bags #diywedding #cricutprojects #monogram

I ended up finding a free monogram font (that I reference below) and it took all of 15 minutes of playing around with the software for my Cricut to easily make oodles of monograms, so I started with tote bags! Tote bags, especially canvas ones like these, are great for your wedding party for a beach or destination wedding where your maids will want a beach bag to throw their things in. :)

DIY Monogram Bridal Canvas Tote Bags #diywedding #cricutprojects #monogram

In this tutorial, I’ll go step by step to show you how to make monograms in your Cricut software for tote bags of your own or whatever else you want to monogram! :)

Supplies:
Blank Tote Bags
Easyweed Heat Transfer Vinyl or Glitter Heat Transfer Vinyl
Craft Cutter and Tool set
Adhesive Mat
Iron and Ironing Mat

Designing Your Monogram:

1. First, if you don't already own a Monogram style font, download one. The font I used is called Free Monogram Font from DaFont.com and it worked perfectly for what I wanted, and as the name implies its totally free!

2. Now, open a new project in your Cricut design software and create a text box. Select the Monogram font from your font choices and use it to type the initials for your monogram.

DIY Monogram Bridal Canvas Tote Bags #diywedding #cricutprojects #monogram

3. If you are using the font I mentioned, for smaller side letters you use lower case letters and for the center letter you use uppercase letters. For example, my initials on the monogram shown are typed in as "aCl" .

DIY Monogram Bridal Canvas Tote Bags #diywedding #cricutprojects #monogram

4. Next, overlap your letters by changing the letter spacing of your font. I chose -2 for the spacing of my letters but it is better to mess with it a little bit to find out what looks best to you.

DIY Monogram Bridal Canvas Tote Bags #diywedding #cricutprojects #monogram

5. Once all your letters are spaced to your satisfaction, select the "Weld" tool to combine your letters into a single set of cutting curves. 

DIY Monogram Bridal Canvas Tote Bags #diywedding #cricutprojects #monogram

6. Now,  you can size your monogram to whatever size you like best. For the small monograms, I made them 3" wide and for the large monograms, I made them 10.5" wide.

DIY Monogram Bridal Canvas Tote Bags #diywedding #cricutprojects #monogram

7. Finally, cut the monograms on your choice of vinyl. I used the Iron On+ setting for Glitter HTV and the Standard Iron On Setting for regular Easyweed Vinyl. Make sure that you select the "Mirror" Function and load your Iron On material Shiny side down so that your design cuts correctly! :)

DIY Monogram Bridal Canvas Tote Bags #diywedding #cricutprojects #monogram

Transferring your Design

8. Once your design is cut, weed away the extra material, leaving only your monogram.

DIY Monogram Bridal Canvas Tote Bags #diywedding #cricutprojects #monogram

9. Iron your Tote Bag to remove any creases, then arrange the Monogram where you want to transfer it on your tote. For large monograms I put it in the middle and for smaller monograms I preferred the lower right corner. Arrange the design shiny side up, then cover with parchment paper. Make sure to keep the parchment paper between the design and the iron.

DIY Monogram Bridal Canvas Tote Bags #diywedding #cricutprojects #monogram

10. Set your Iron to the second Highest setting and press the the iron down firmly on the design, not ironing but rather using it as a small heat press. I worked from the upper left to lower right on the design, pressing the iron on each part of the design for at least 30 seconds, then overlapping the last position as you move the iron across the design.

DIY Monogram Bridal Canvas Tote Bags #diywedding #cricutprojects #monogram

11. Remove the backing from the design, leaving the Monogram on the Tote Bag. Repeat with all the remaining Totes.

DIY Monogram Bridal Canvas Tote Bags #diywedding #cricutprojects #monogram

I was very pleasantly surprised with how easy these were to make and now have several other monogram projects in the wings to show bunches of different monogrammed projects! :) What are your favorite monogrammed items?

DIY Monogram Bridal Canvas Tote Bags #diywedding #cricutprojects #monogram

Wreath Wine Bottle Table Numbers

This post contains affiliate links, meaning that if you click on a link I will recieve a small comission. This costs you nothing extra and I only promote products I use and love! You can read our full disclosure here

DIY Wreath Wine Bottle Table Numbers #diywedding #cricutprojects #tablenumbers #winebottlecrafts

Wine bottle centerpieces are always a cost effective choice for the wine loving bride with bottles to spare, so I decided to spruce up the table numbers for such a centerpiece with some vinyl decals. They can be put on the bottles beforehand to designate your wedding tables and are a super easy project for your Cricut, literally load, cut, weed and stick.

DIY Wreath Wine Bottle Table Numbers #diywedding #cricutprojects #tablenumbers #winebottlecrafts

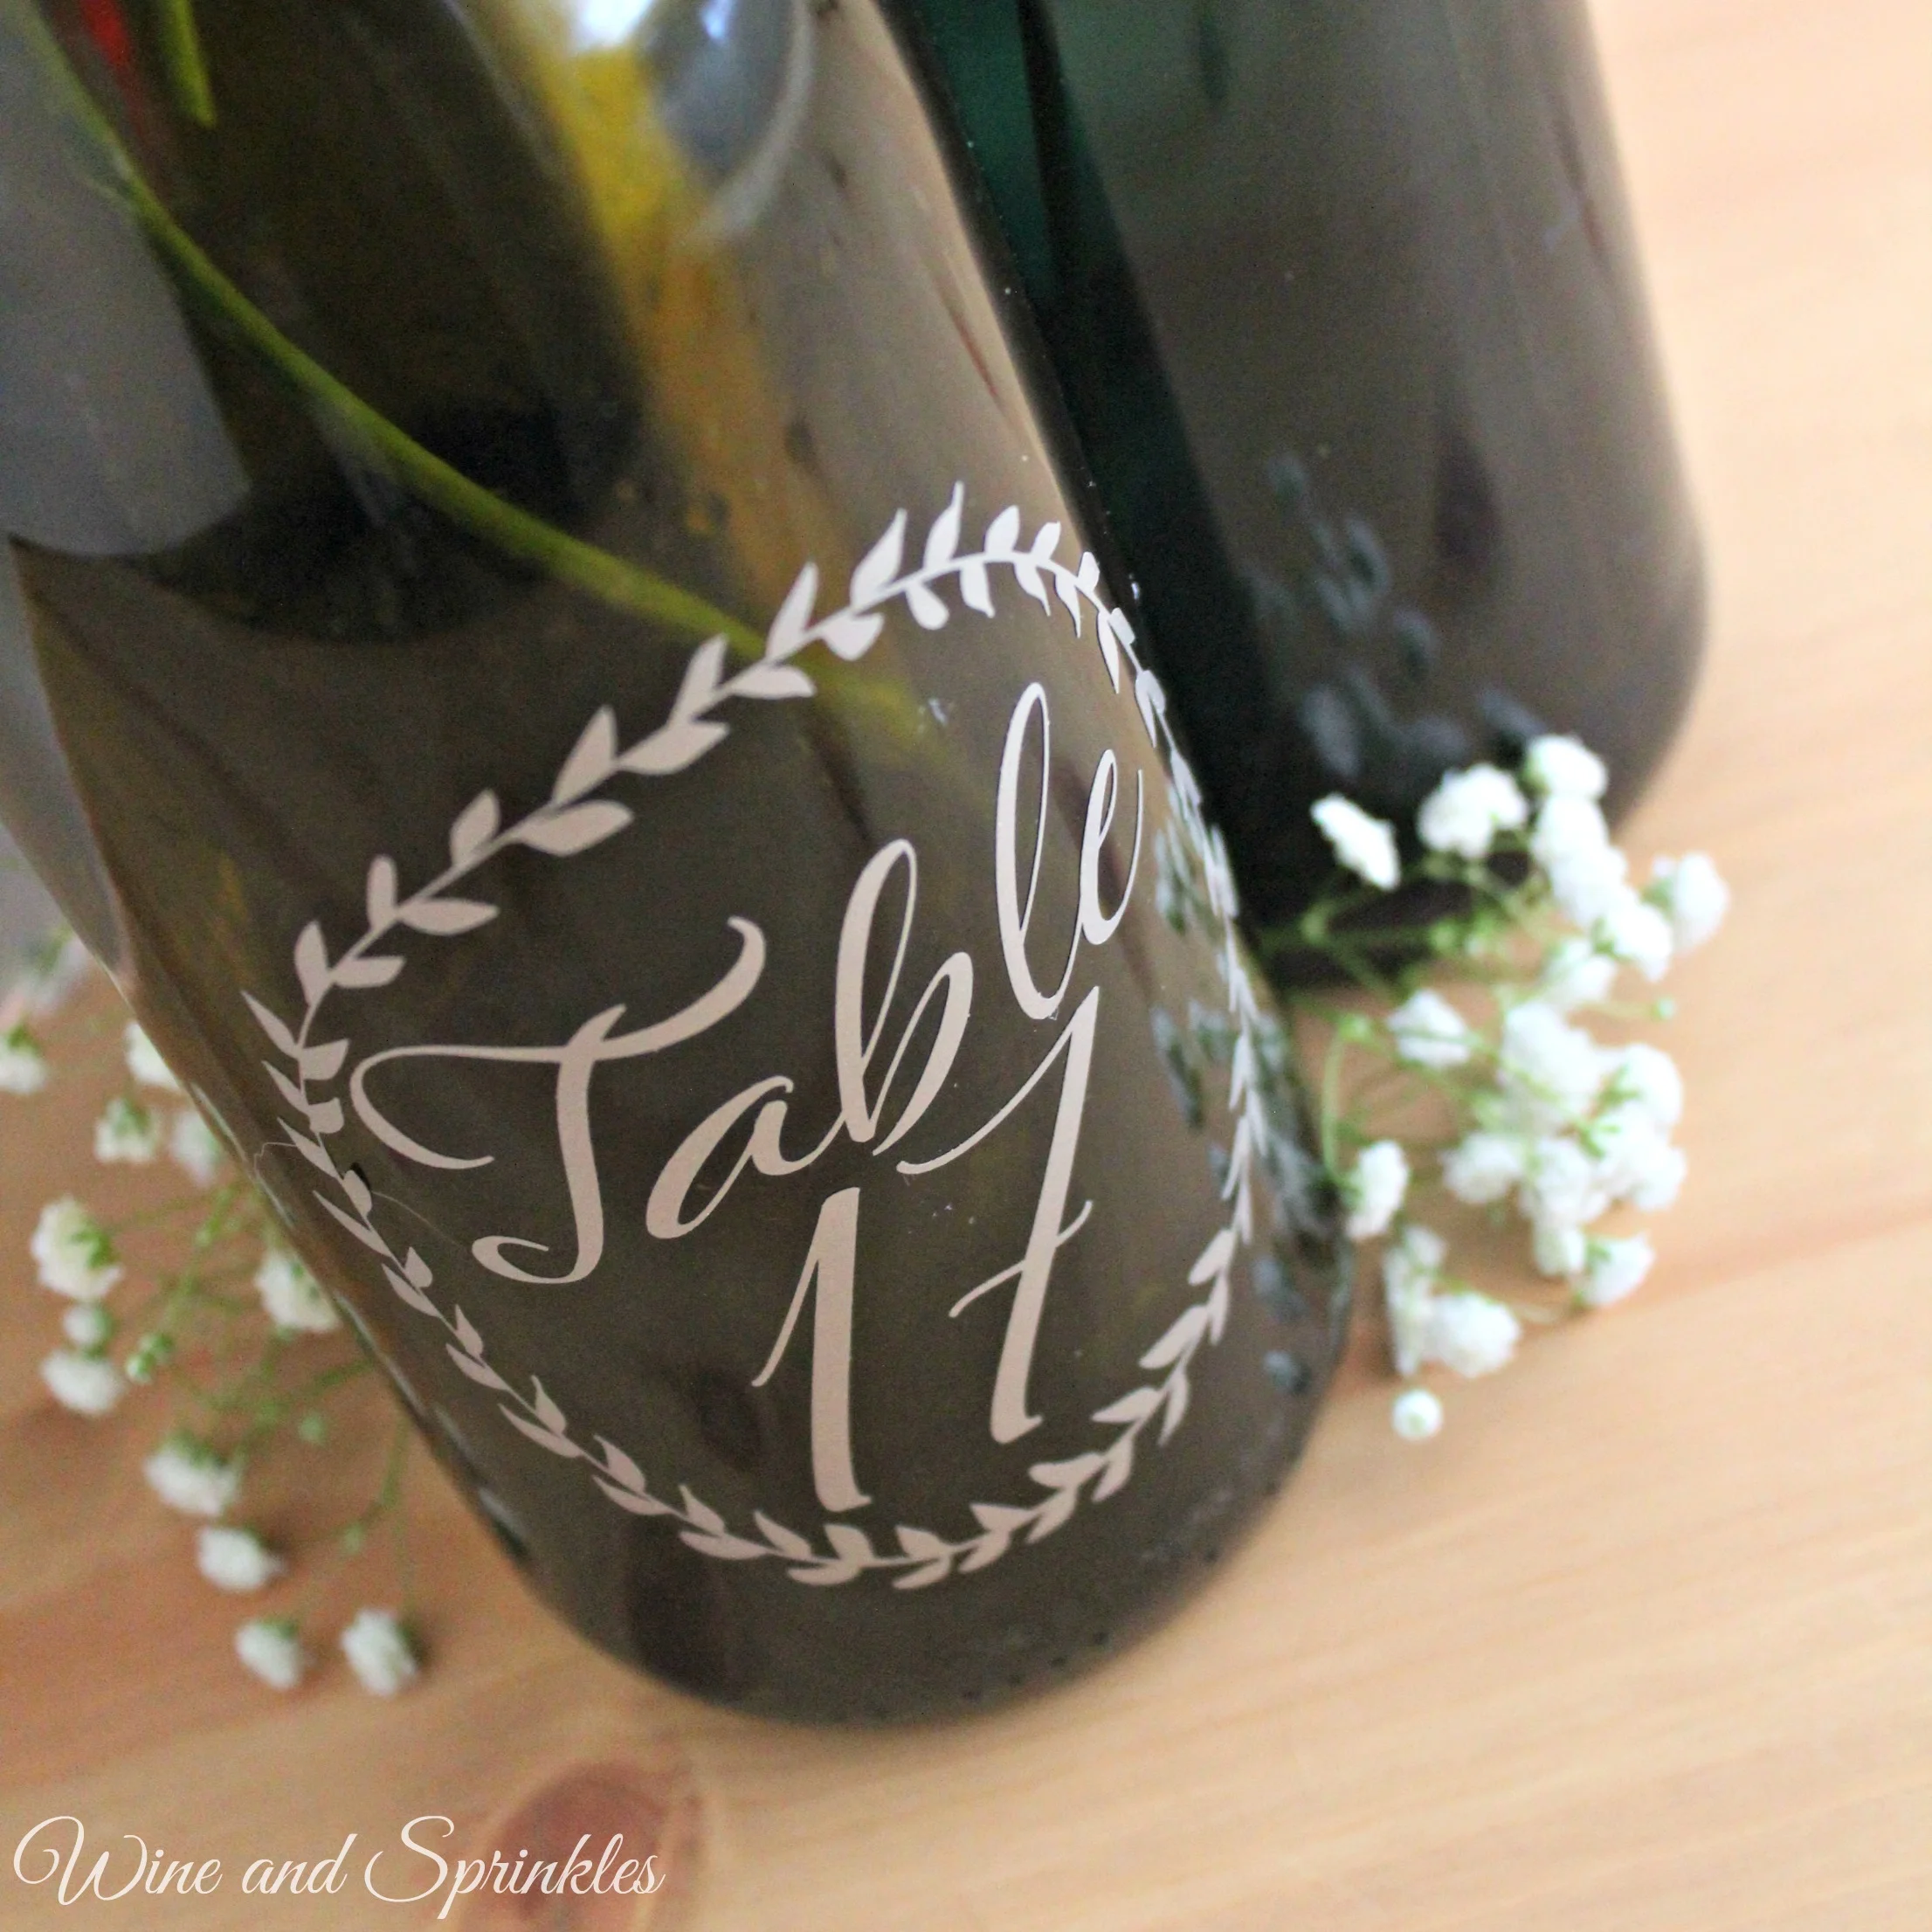
While I’ve made Wine Bottle Table numbers before, I couldn’t help thinking of some other design ideas over the last several months and so I decided to return to them and make a couple options so that you can better personalize your wine bottle centerpieces depending on your style. This first set is a fairly simply script set surrounded by a simple vine and leaf “wreath,” perfect for most wedding with natural elements.

DIY Wreath Wine Bottle Table Numbers #diywedding #cricutprojects #tablenumbers #winebottlecrafts

You will notice in the cut file downloads that there are both full sheets for groups of the table numbers and individual table numbers. Both types of files will be the same size of table number when cut so you can use either interchangeably. It is worth noting that, since the circling vine is thin, sometimes weeding these designs require a little care and extra attention. I did not have to redo any, but in case you have a problem, you can easily upload the single table number file to replace any table number casualties.

Supplies:
Empty Wine Bottles
Permanent Adhesive Vinyl
Transfer Tape
Craft Cutter and Tool Set
Adhesive Mat
Table Number Design Cut Files

1. First, soak your wine bottles in hot, soapy water to remove the labels and adhesive. I found it easiest to soak them for about 5 minutes, remove what l could, then once the label was completely removed clean up the last bits of adhesive with steel wool. :)

2. After downloading the cut files, import them into the Cricut Software. After creating a new project, select Upload Image. Select the file you wish to upload and it will automatically take you to the final upload screen, where you can name the file the select Save.  

3. Cut the design(s) in your choice of permanent adhesive vinyl with the Vinyl Setting on your Cricut. The SVG Files are sized so that they will automatically cut to the size you see in the photos, but if you want to change the size you can do so to fit the wine bottles the way you like.

DIY Wreath Wine Bottle Table Numbers #diywedding #cricutprojects #tablenumbers #winebottlecrafts

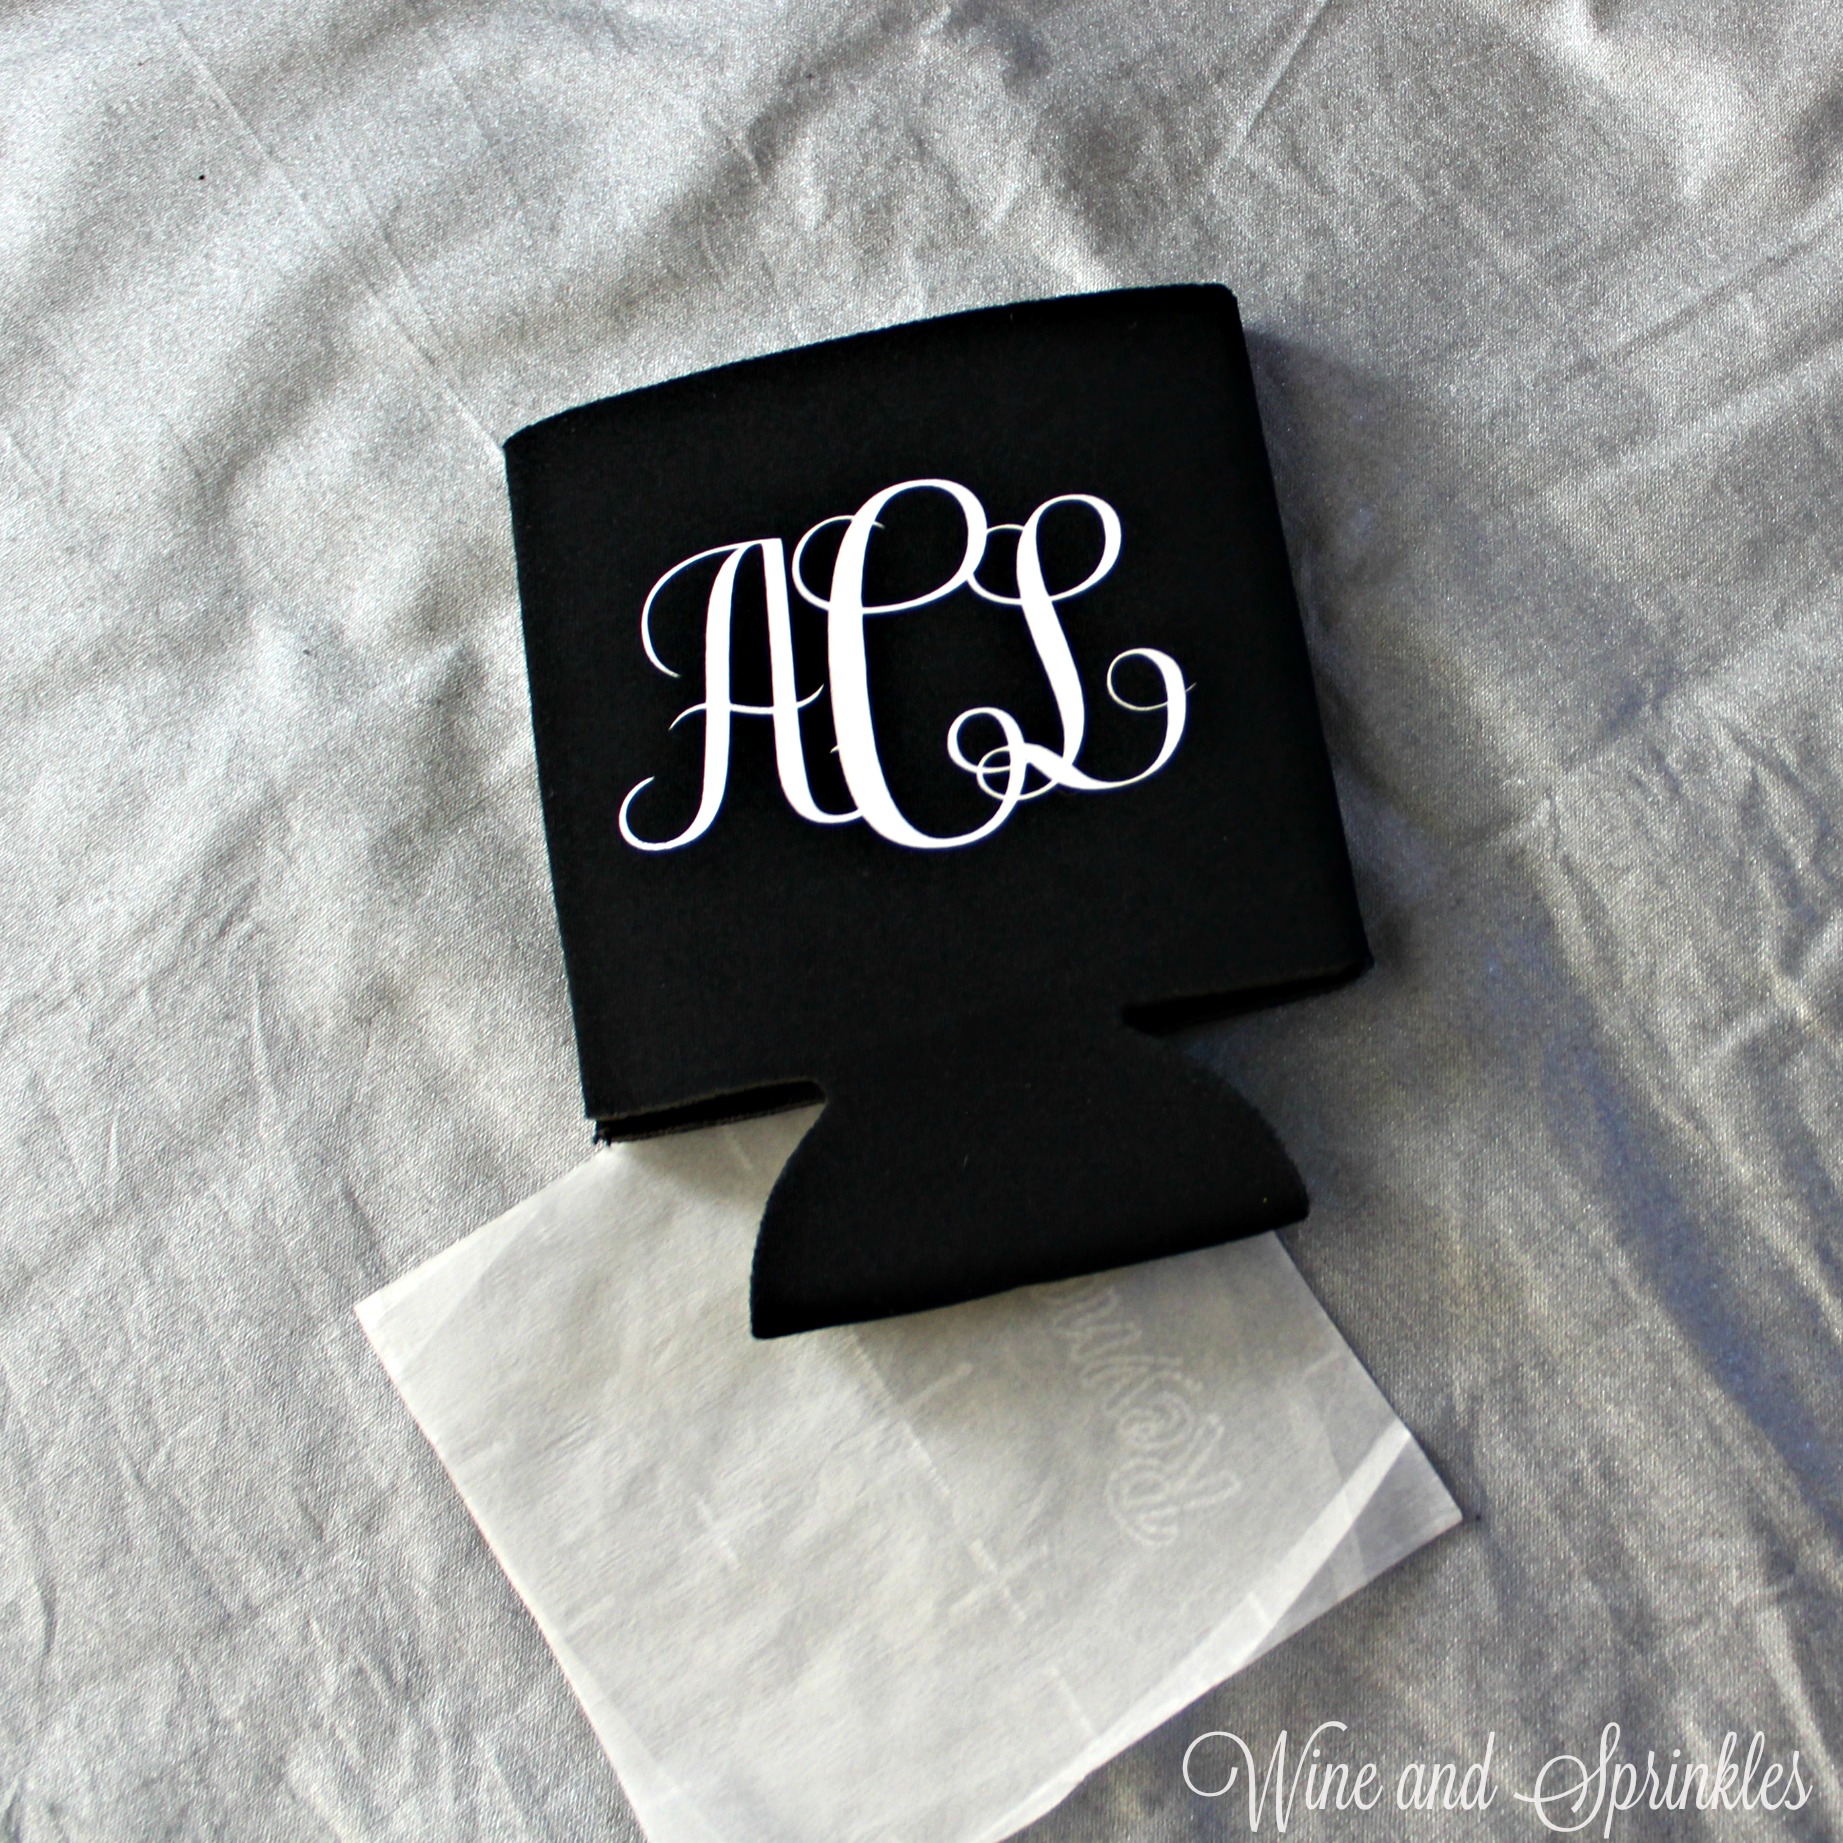
4. Once the designs are cut, weed away the extra vinyl and cut a piece of transfer taper to 4" x 4.5". Cut away any excess backing and smooth transfer tape over the design, aligning it so that “Table” is aligned to the transfer tape grid 2” from the top of the transfer tape (4 blocks down if you are using the Cricut 1/2” transfer tape), as shown below. Using the smoother tool, smooth the tape to the vinyl, removing any air bubbles. The transfer tape should overlap the backing of the design, so that you can stick the tape to an object with the backing still on the design.
DIY Wreath Wine Bottle Table Numbers #diywedding #cricutprojects #tablenumbers #winebottlecrafts

5. Now, transfer the design to your bottle. If you are comfortable centering the designs you can remove the tape from the backing and directly place the design on the wine bottle. If not, arrange the design to the bottle before removing the backing, sticking it with the overlapping transfer tape.  I aligned mine without the backing by lining up the bottom of the transfer tape with the bottom of the bottle without much trouble, as shown in the photos below. Smooth design onto the bottle, removing any air bubbles.

DIY Wreath Wine Bottle Table Numbers #diywedding #cricutprojects #tablenumbers #winebottlecrafts

6. Remove the transfer tape to leave the design on the wine bottle, then repeat the process for all your additional table numbers.

DIY Wreath Wine Bottle Table Numbers #diywedding #cricutprojects #tablenumbers #winebottlecrafts

This is a project that is super easy to do months in advance and the bottles can be easily stored together and set up the day of your wedding. :) Pick your favorite bottles to make into table numbers then simply gather other bottles and candles around them for a pretty and cheap centerpiece!
DIY Wreath Wine Bottle Table Numbers #diywedding #cricutprojects #tablenumbers #winebottlecrafts

Soon to be Drunk Bachelorette Flasks

This post contains affiliate links, meaning that if you click on a link I will recieve a small comission. This costs you nothing extra and I only promote products I use and love! You can read our full disclosure here

Free Cut Files! - DIY Soon to be Drunk Bachelorette Party Flasks #diybachelorette #bachelorette #cricutprojects

I love designing flasks for bachelorette parties, they are the perfect accessory for any group out on the town! Since I already had flasks from my previous projects, I decided to keep designing for them! :)

Free Cut Files! - DIY Soon to be Drunk Bachelorette Party Flasks #diybachelorette #bachelorette #cricutprojects

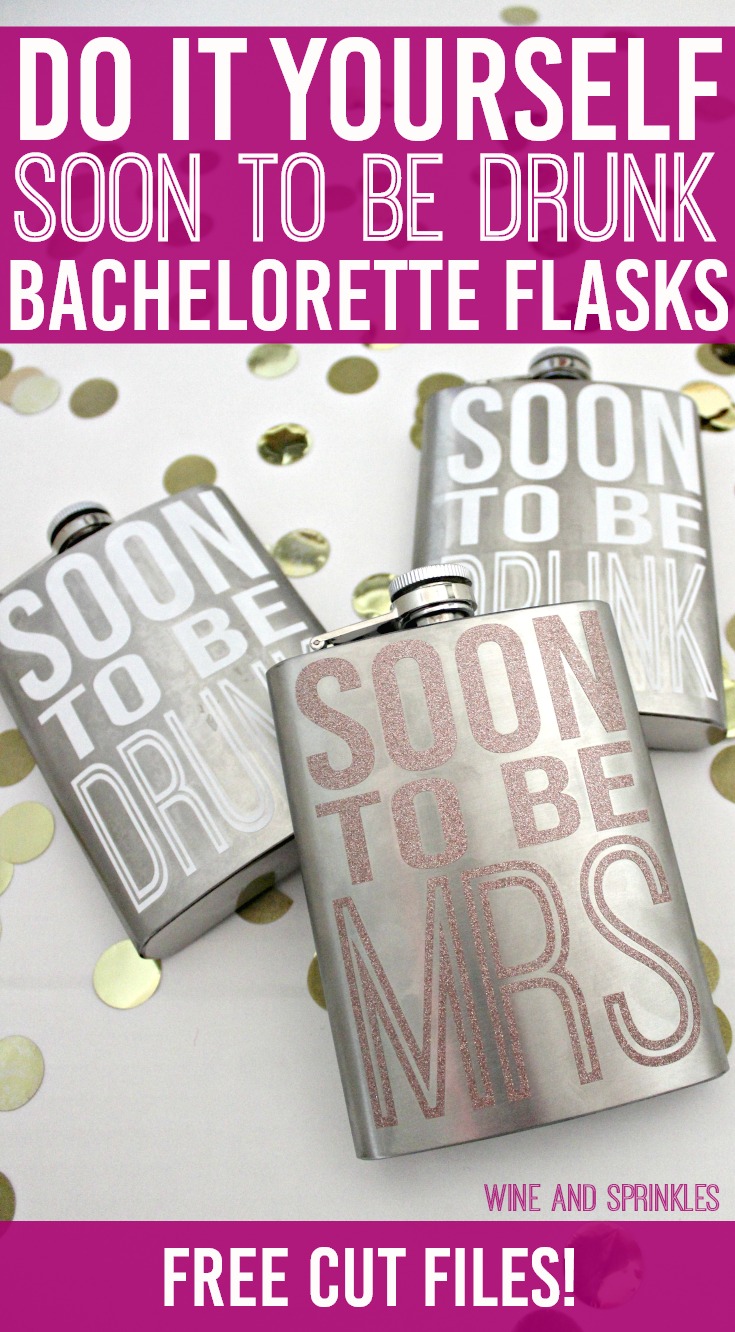
These flasks are a simple, cute design for any bar crawl or bachelorette party where booze is to be ingested (so pretty much all of them). Be careful when you are weeding the “Drunk” and “Mrs” middle bits, sometime they are a bit tricky.

Free Cut Files! - DIY Soon to be Drunk Bachelorette Party Flasks #diybachelorette #bachelorette #cricutprojects

1. After downloading the cut files, import them into the Cricut Software. After creating a new project, select Upload Image. Select the file you wish to upload and it will automatically take you to the final upload screen, where you can name the file the select Save. 

2. Cut the design(s) in your choice of permanent adhesive vinyl with the Vinyl Setting on your Cricut. The SVG Files are sized so that they will automatically cut to the size you see in the photos, but if you want to change the size you can do so.

Free Cut Files! - DIY Soon to be Drunk Bachelorette Party Flasks #diybachelorette #bachelorette #cricutprojects

3. Once the designs are cut, weed away the extra vinyl and cut a piece of transfer taper to 4" x 5". Cut away any excess backing from the vinyl design and smooth transfer tape over the design, aligning it to the “Soon” on each decal as shown below. Using the smoother tool, smooth the tape to the vinyl, removing any air bubbles.

Free Cut Files! - DIY Soon to be Drunk Bachelorette Party Flasks #diybachelorette #bachelorette #cricutprojects

4. Now, transfer the design to your flask. I arranged mine by the bottom of the transfer tape following the bottom of the flask with the design centered by placing the opening of the flask between the two “O’s” of the “Soon.”

Free Cut Files! - DIY Soon to be Drunk Bachelorette Party Flasks #diybachelorette #bachelorette #cricutprojects

5. Once your design is placed to your satisfaction, smooth the design onto the flask, once again using the smoother to remove any air bubbles.

Free Cut Files! - DIY Soon to be Drunk Bachelorette Party Flasks #diybachelorette #bachelorette #cricutprojects

6. Remove the transfer tape to leave the design on the flask, then repeat the process for all the additional flasks.

Free Cut Files! - DIY Soon to be Drunk Bachelorette Party Flasks #diybachelorette #bachelorette #cricutprojects

Just like the other flasks I’ve made, these were super simple and came out great! :) There will be plenty of future flasks, so check them out here!

Free Cut Files! - DIY Soon to be Drunk Bachelorette Party Flasks #diybachelorette #bachelorette #cricutprojects