There’s no better way to soak up the summer sun than with a tasty beverage, and for my friends and I that drink is all the delicious seltzers the world can offer! So when I was deciding on additions to some galentine’s gifts for my best girls, I broke into my new Cricut materials to create some pretty patterned koozies, and thus these Heart and Moon Patterned Skinny Koozies were born!
Read MoreKoozies
DIY HTV Getting Ready Bridal Party Koozies
This post contains affiliate links, meaning that if you click on a link I will recieve a small comission. This costs you nothing extra and I only promote products I use and love! You can read our full disclosure here
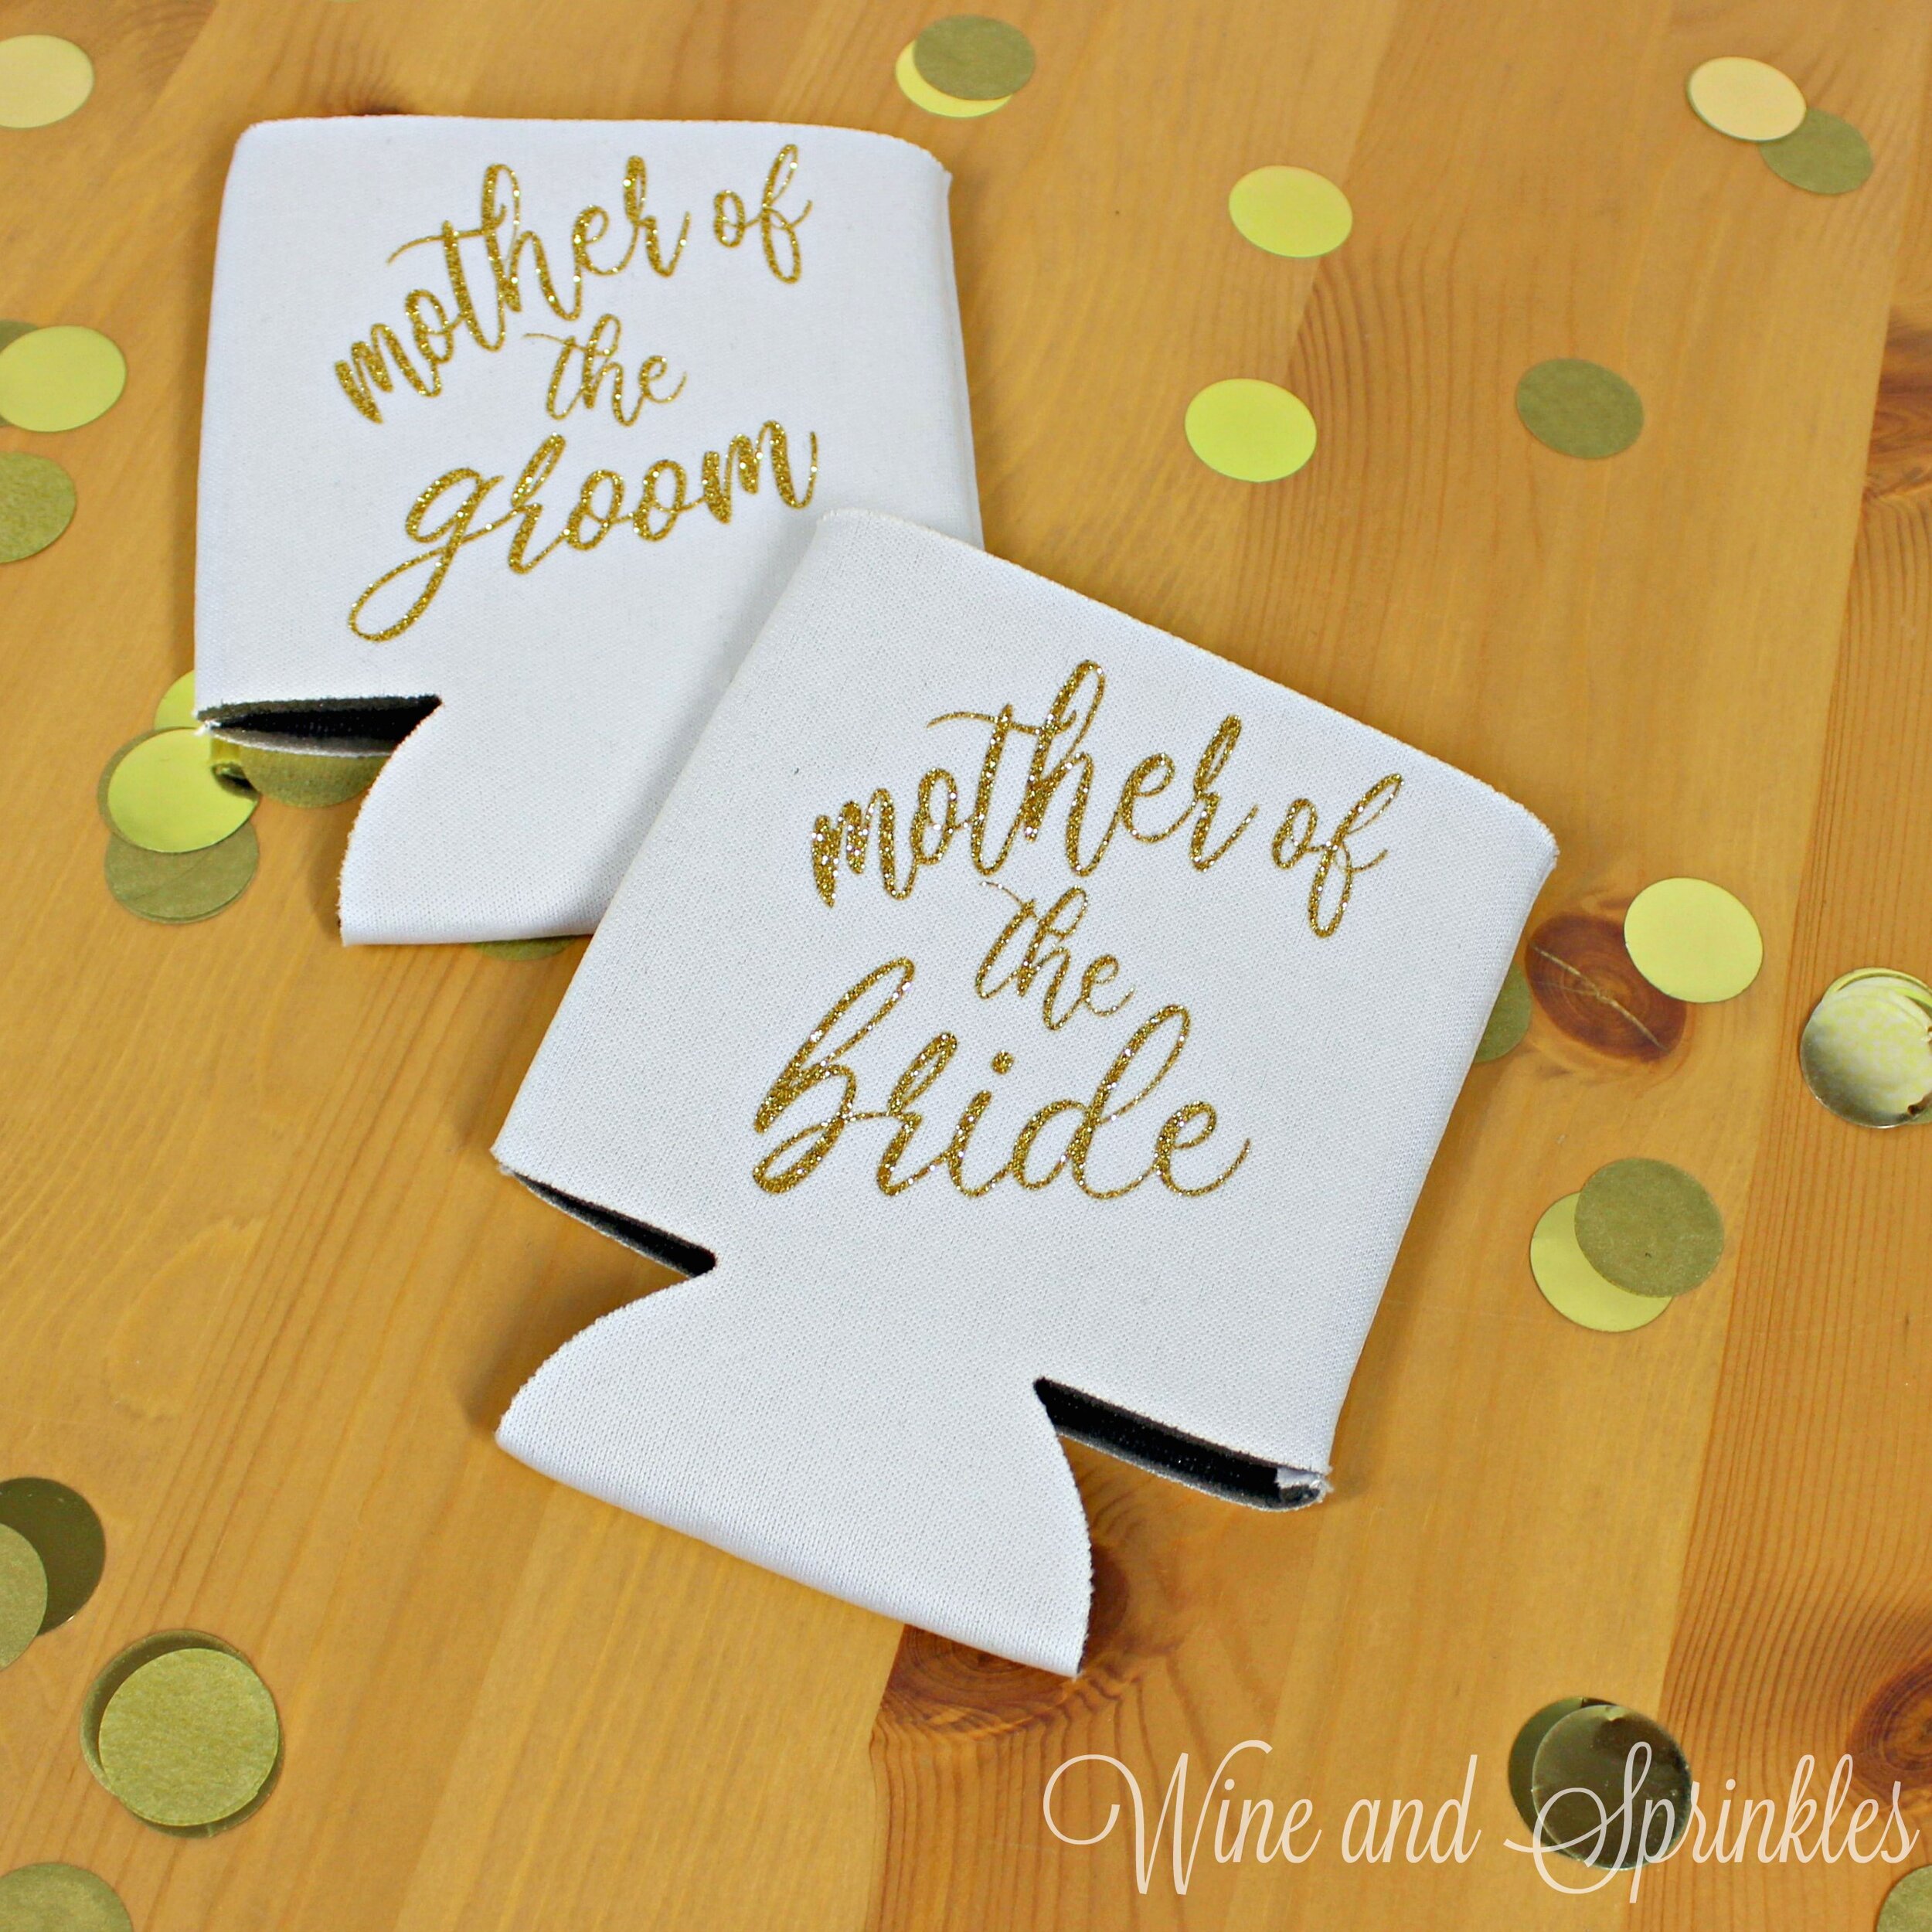
Koozies are always a fun, casual way to make everyone feel like a part of the party and these bridal party koozies are the perfect choice for keeping your getting ready beverages cool! I made decals for not only the bridesmaids, maid of honor, matron of honor (if you have one), and the bride; but also for the mothers of the bride and groom so that you can make sure all of your ladies feel extra special at your wedding!
I made these decals in Gold Glitter HTV on White Koozies and they turned out beautifully, but I also would love them on pink koozies so that only the bride is drinking with white! I used the font Clarissa while designing these decals, which you can download for free at dafont.com to use for personalizing these koozies or any of your other wedding projects!
Supplies:
Blank Koozies
Easyweed Heat Transfer Vinyl or Glitter Heat Transfer Vinyl
Craft Cutter and Tool Set
Adhesive Mat
Koozie Design Cut Files
After downloading the cut files, import them into the Cricut Software. After creating a new project, select Upload Image. Select the file you wish to upload and it will automatically take you to the final upload screen, where you can name the file the select Save. The SVG Files are sized so that they will automatically cut to the size you see in the photos, but if you want to change the size you can do so to fit the koozies the way you like.
After selecting “Make It” Make sure to select the Mirror Mode on the cutting screen. Cut the design(s) in your choice of heat transfer vinyl with the Iron On (for Easyweed Vinyl) or Iron On+ (for Glitter Vinyl) Setting on your Cricut, with the shiny side of the material down.
3. Weed the additional material off of the backing material so that, looking down with the shiny side up, you can see your design with the correct orientation.
4. Center the design in the middle of the koozie. Arrange the design shiny side up, then cover with parchment paper. Make sure to keep the parchment paper between the design and the iron.
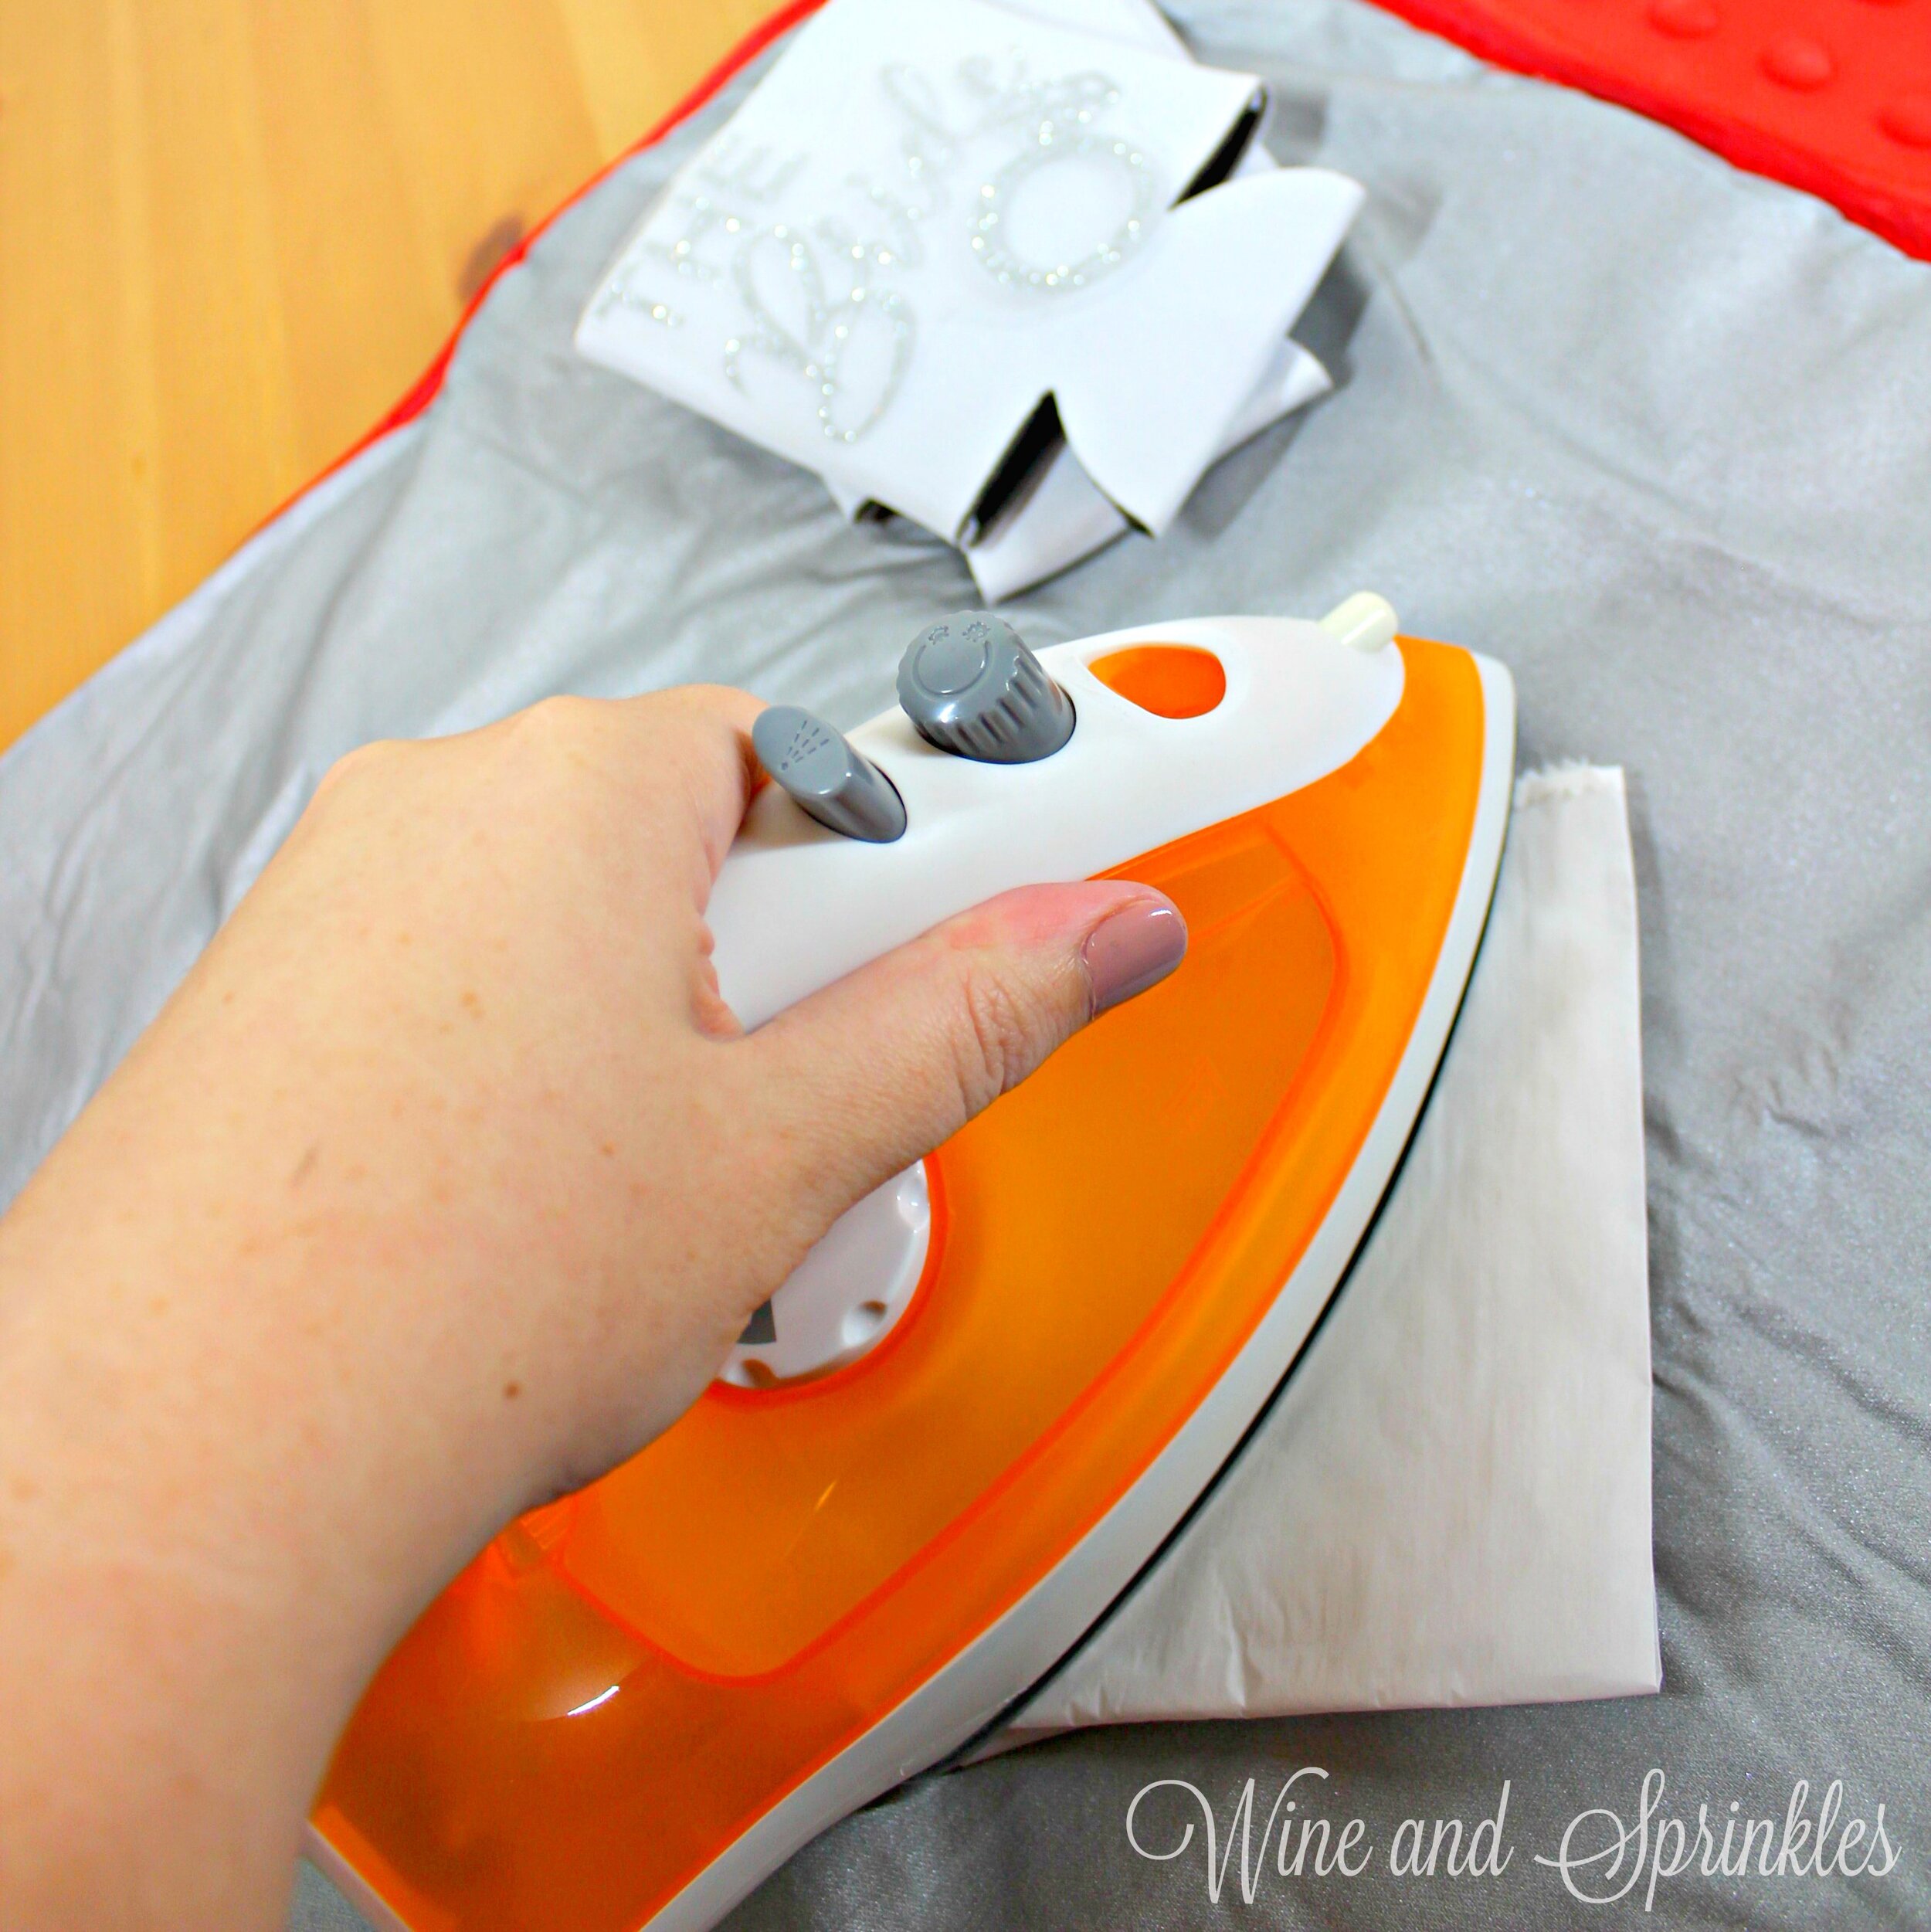
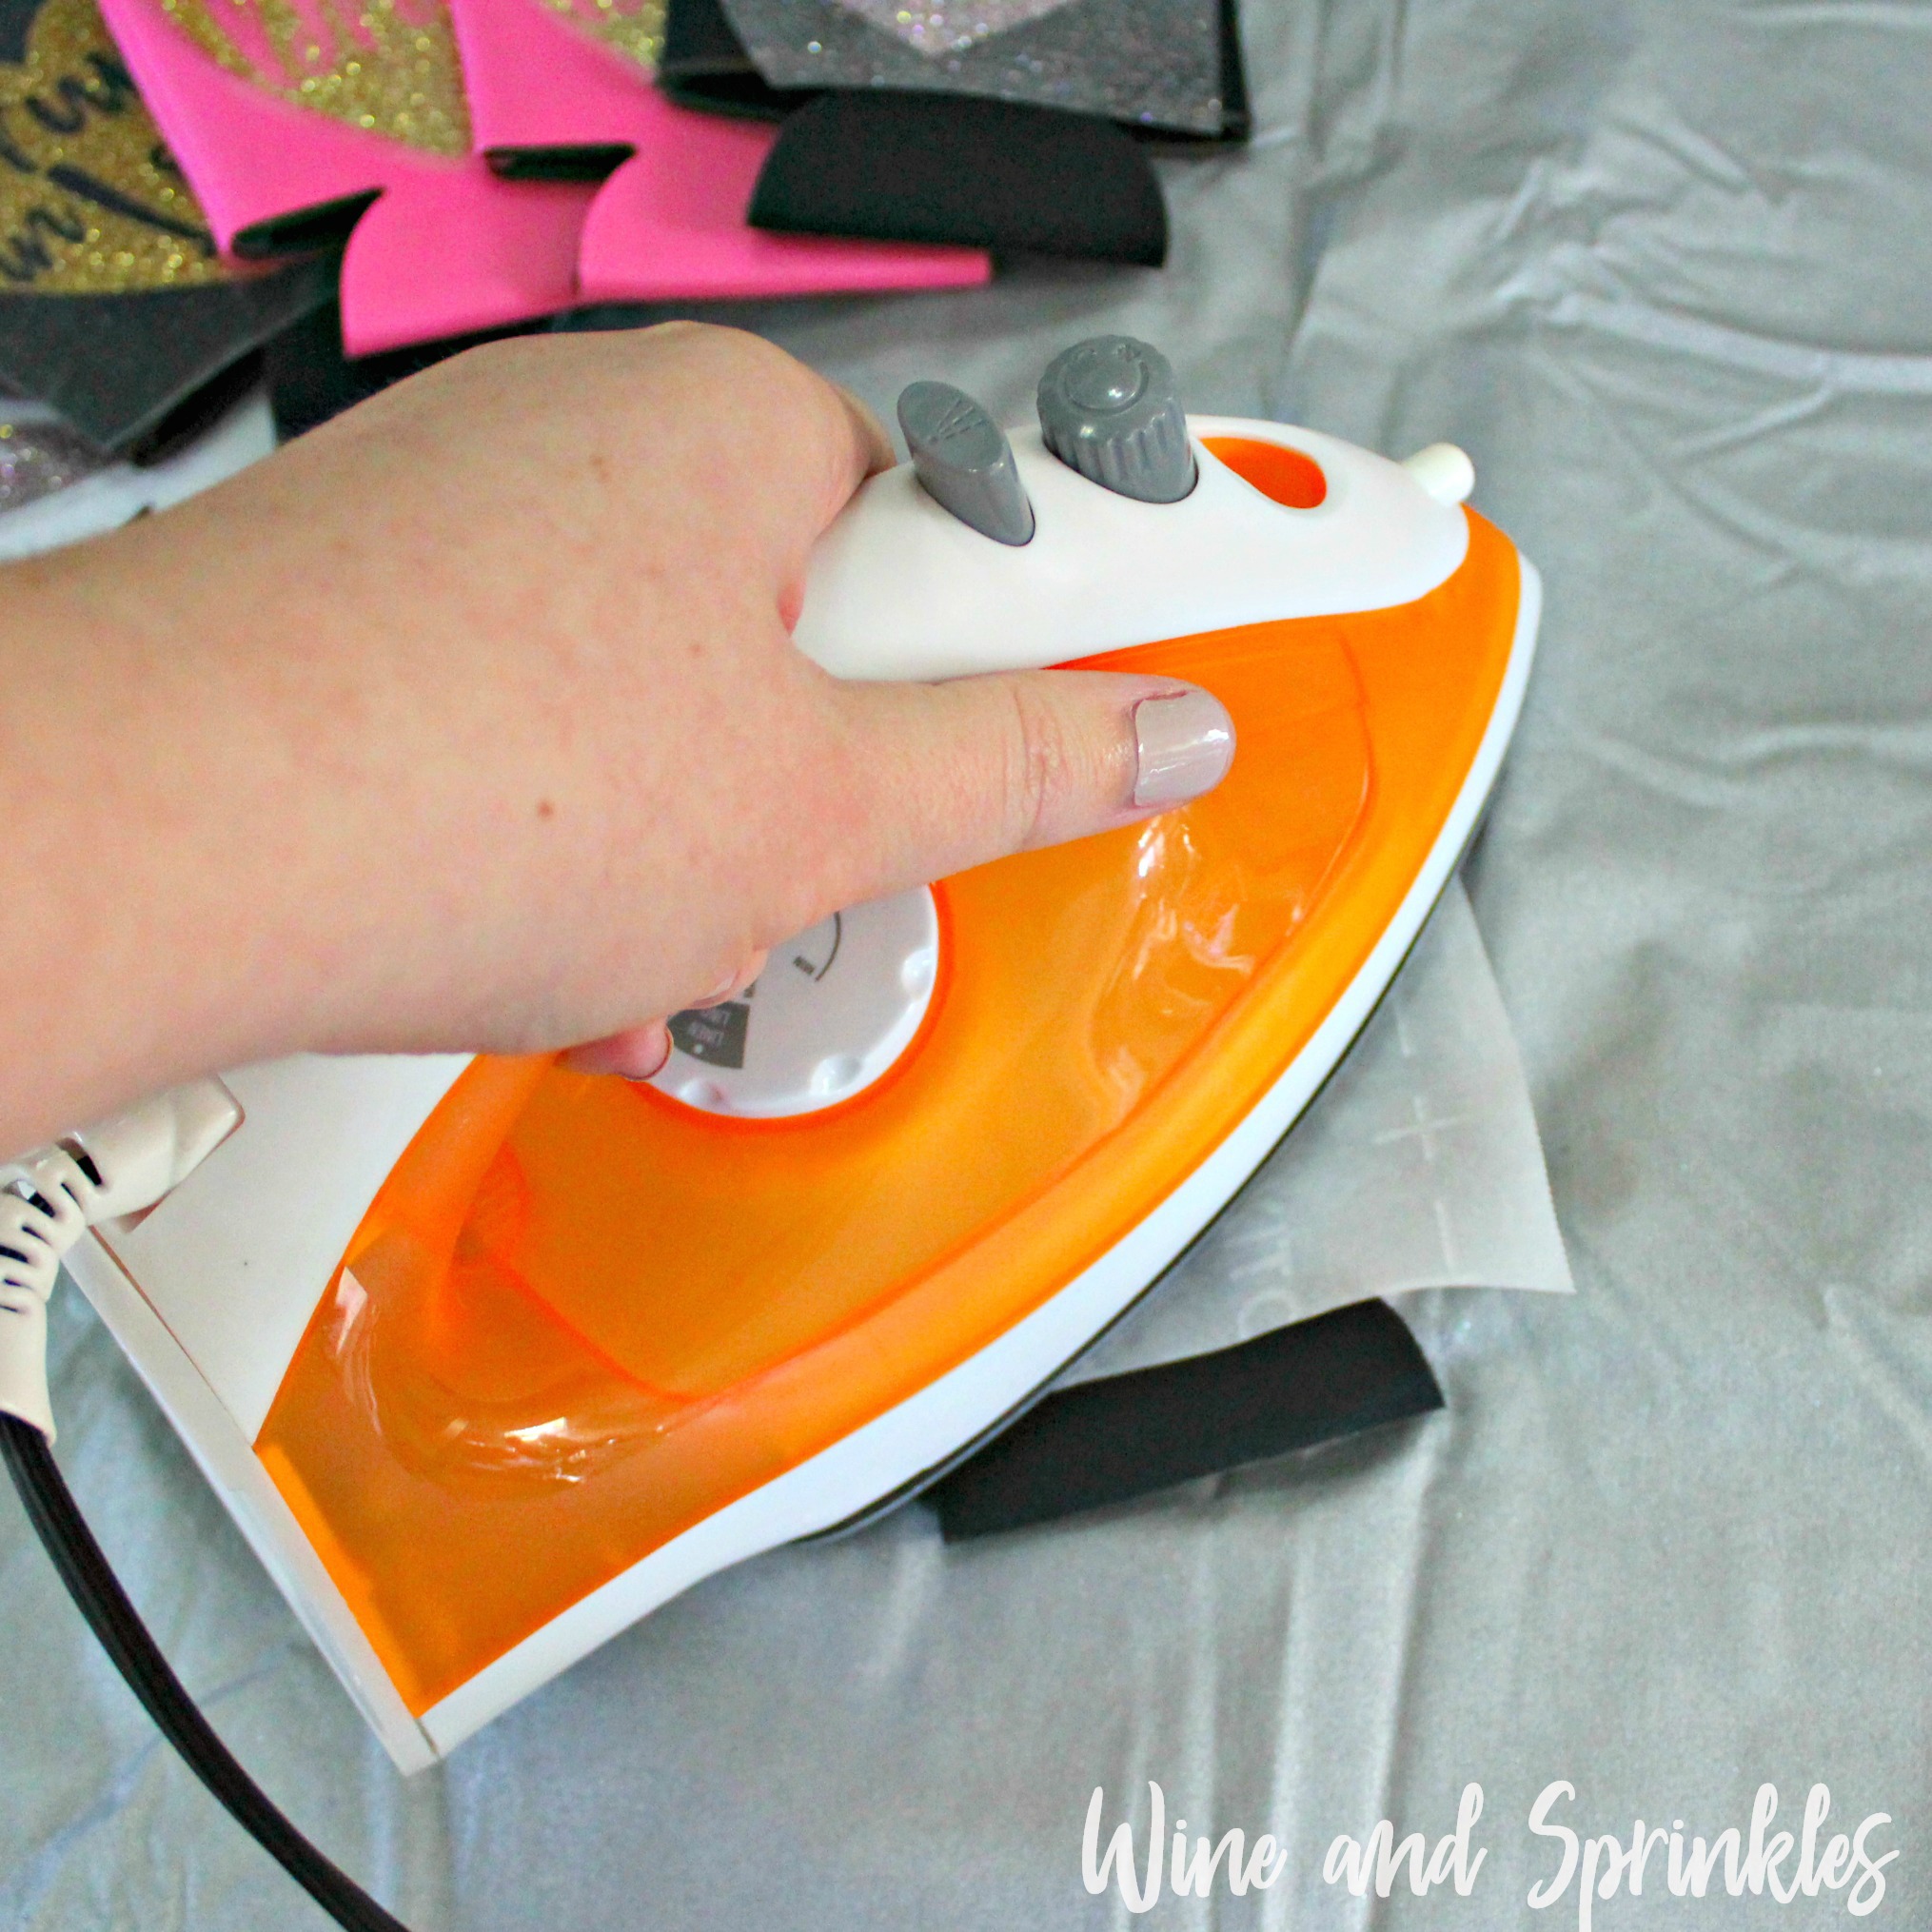
5. Set your Iron to the second Highest setting and press the iron down firmly on the design, not ironing but rather using it as a small heat press. The koozie design should be completely covered by the iron. Pressing the iron on the design for 15 - 30 seconds, mine took only 20 seconds. :) I’m always a little nervous about ironing koozies, so I check them every 5 seconds or so until the design has transferred. :)
6. Remove the backing from the design, leaving the design on the koozie. Repeat with all the remaining koozies.
Check out more of our Koozie Projects Here! :)
DIY HTV Groomsmen Getting Ready Koozies
This post contains affiliate links, meaning that if you click on a link I will recieve a small comission. This costs you nothing extra and I only promote products I use and love! You can read our full disclosure here
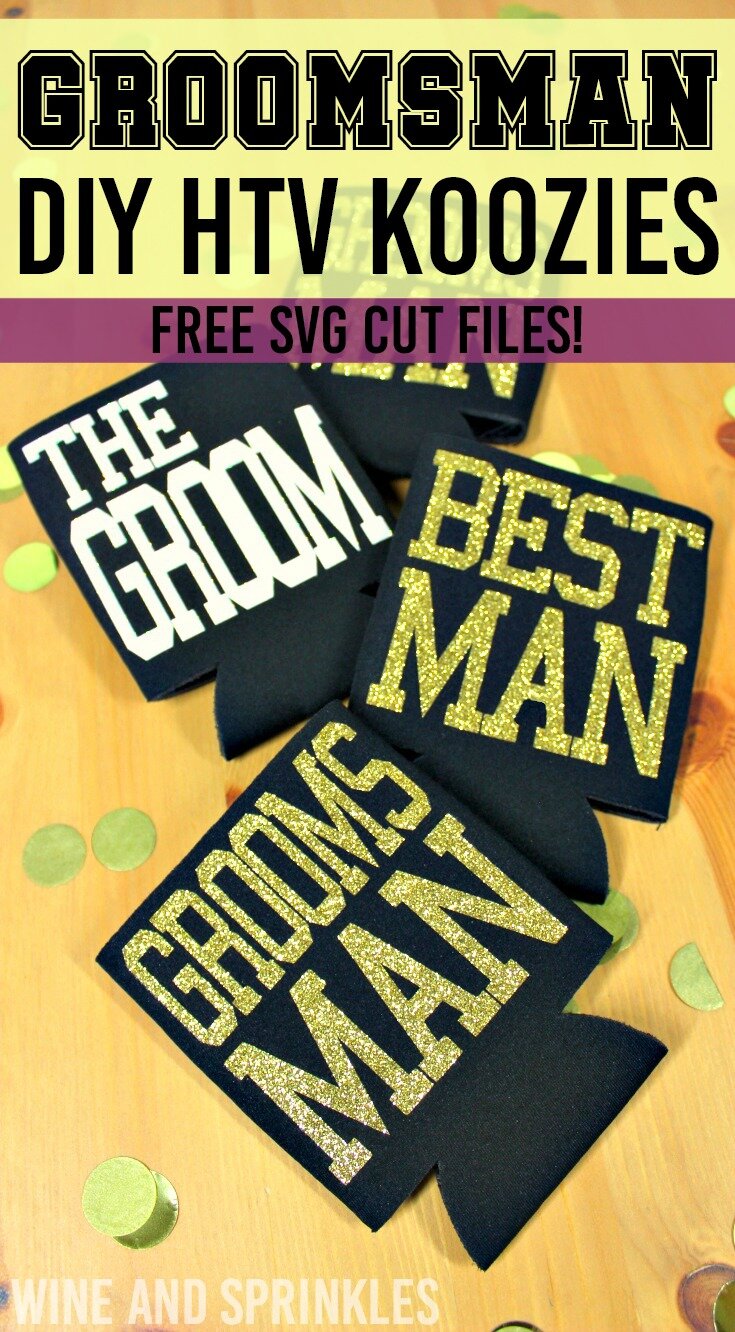
No better way to keep your drink cold and match as a group than koozies! These modern and classic groomsmen koozies are a great choice not only to mail as groomsmen proposals to any of your groom’s out of town bridal party members, but also for getting ready drinks for the boys on your wedding day.
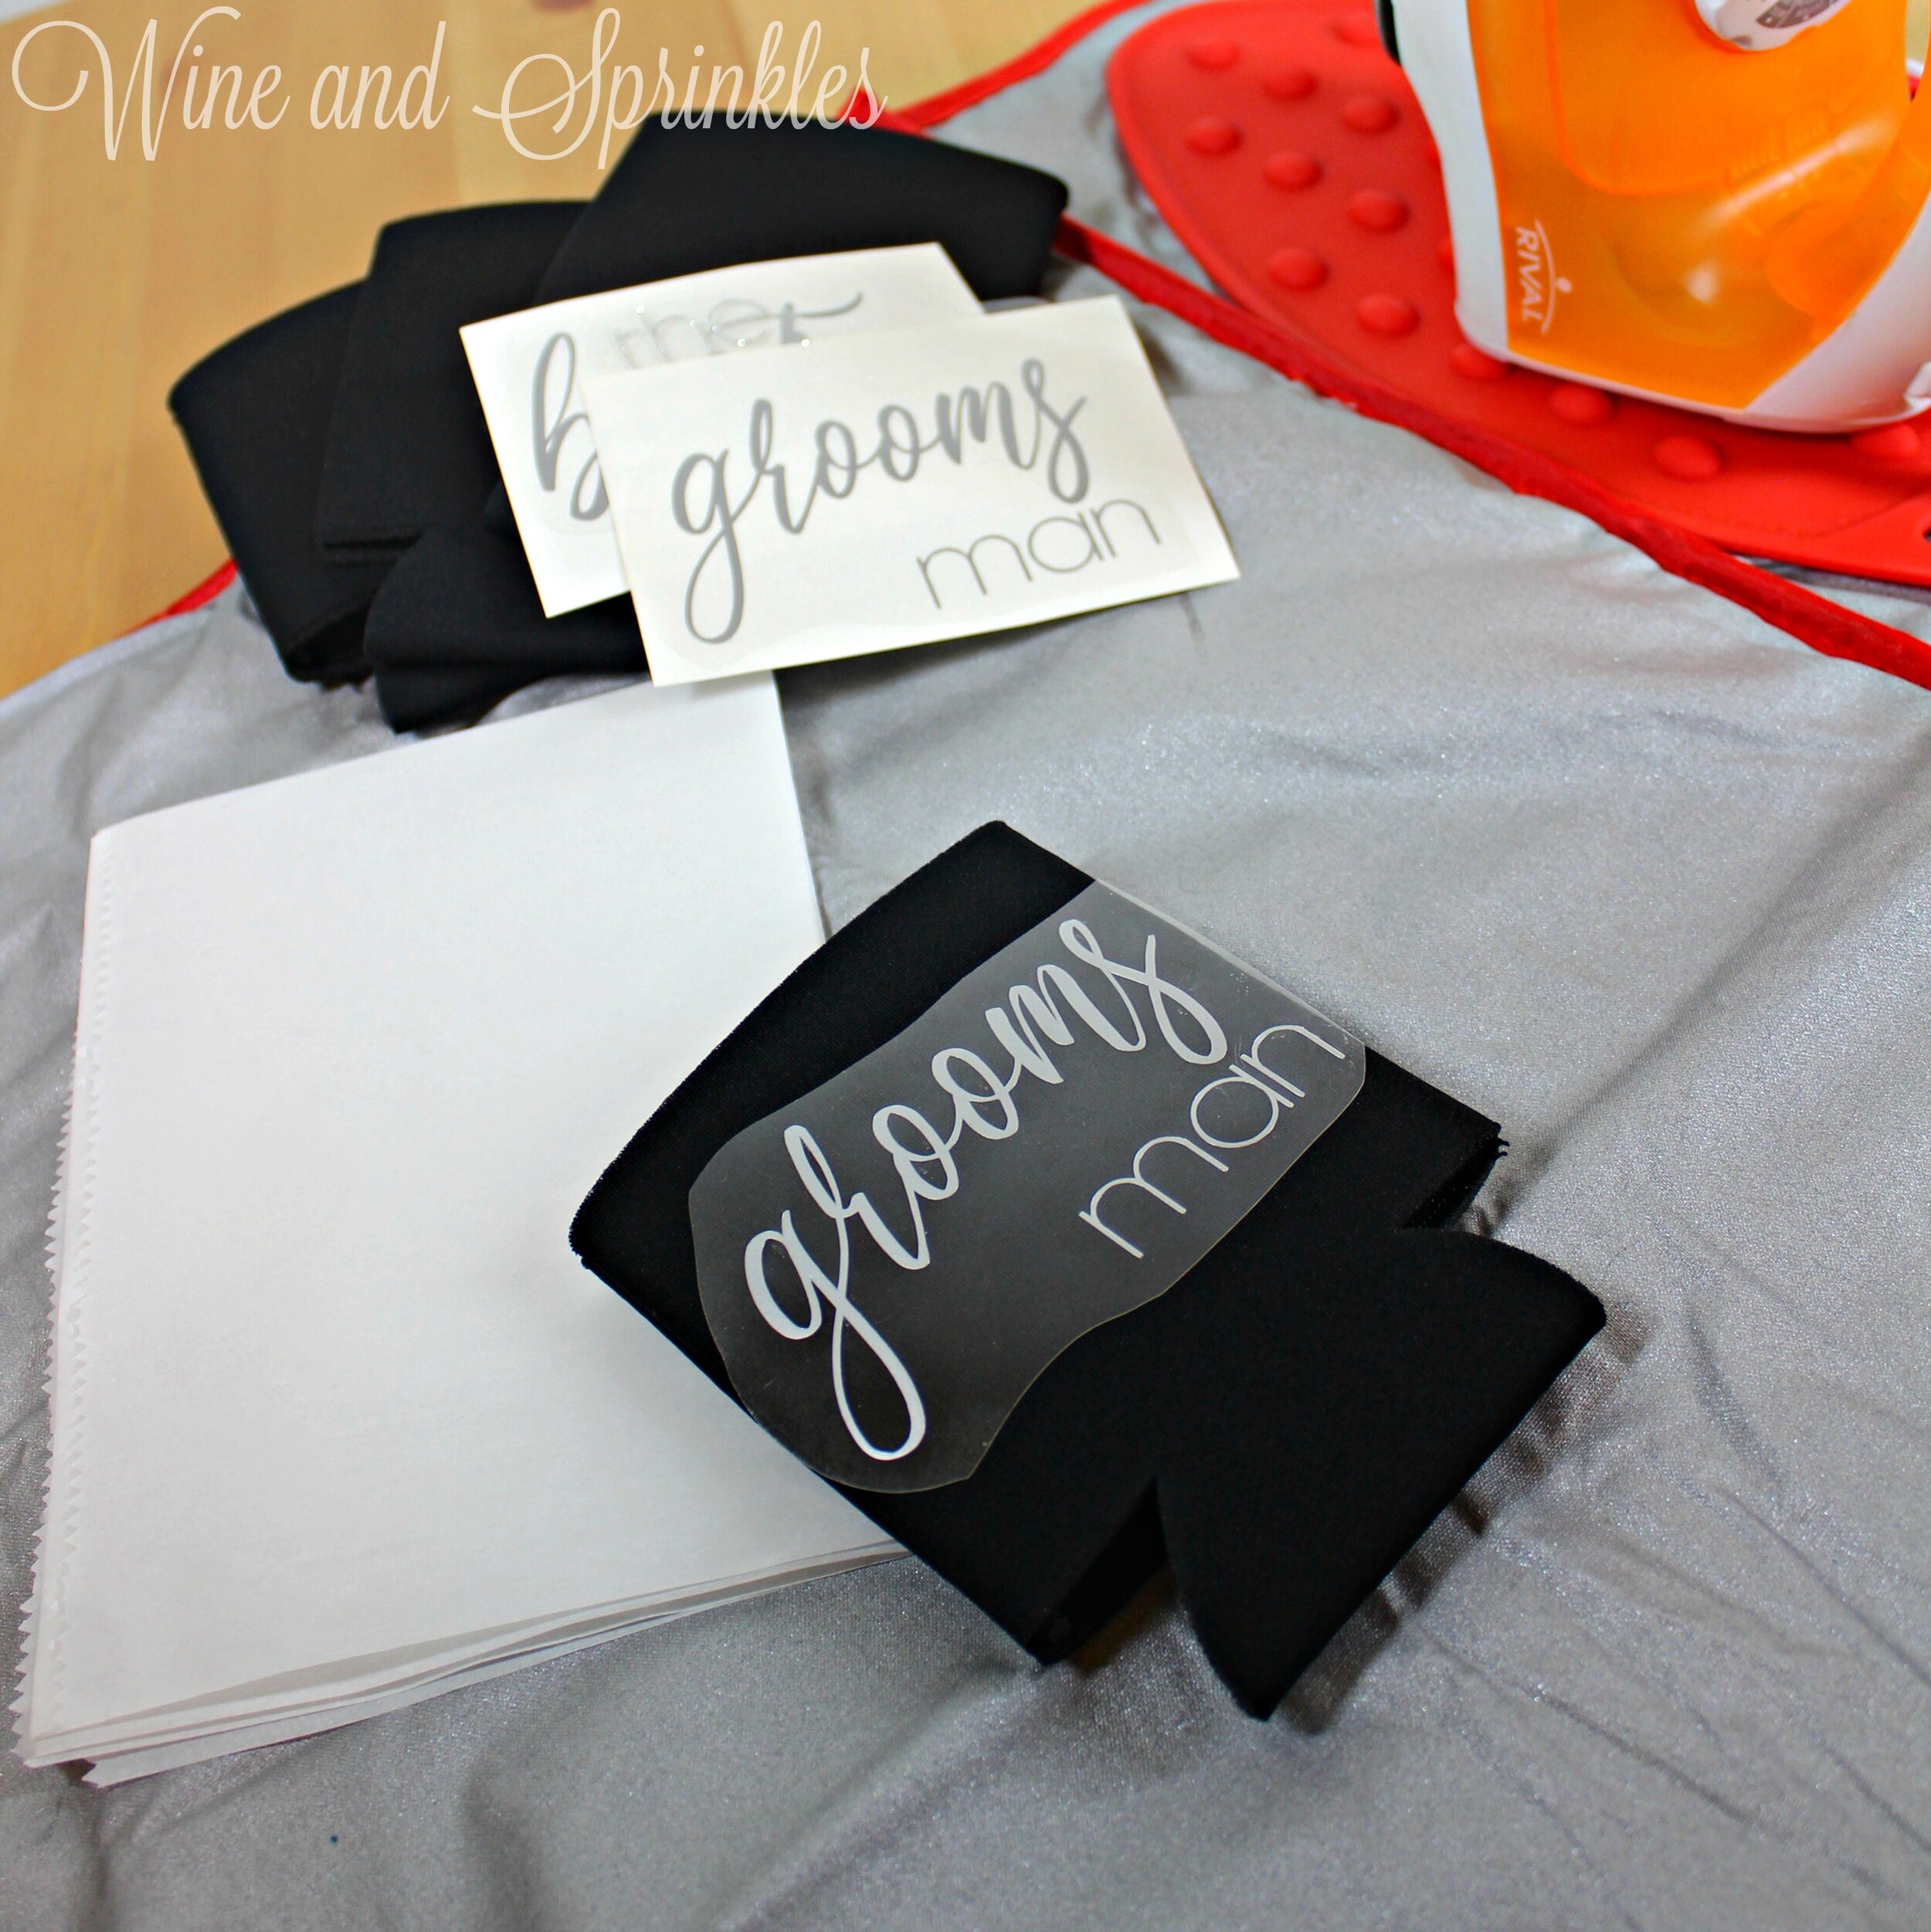
I used Silver HTV for the Groomsman and Best Man decals and Silver Glitter HTV for the Groom’s on Black Koozies, but it’s easy to completely personalize the color combination to your own wedding colors and metallics.
I used the fonts Clarissa and Generica designing these decals, which can be downloaded for free at dafont.com to further personalize the koozies with your groomsmen’s names, your wedding date, or anything you like!
Supplies:
Blank Koozies
Easyweed Heat Transfer Vinyl or Glitter Heat Transfer Vinyl
Craft Cutter and Tool Set
Adhesive Mat
Koozie Design Cut Files
After downloading the cut files, import them into the Cricut Software. After creating a new project, select Upload Image. Select the file you wish to upload and it will automatically take you to the final upload screen, where you can name the file the select Save. The SVG Files are sized so that they will automatically cut to the size you see in the photos, but if you want to change the size you can do so to fit the koozies the way you like.
After selecting “Make It” Make sure to select the Mirror Mode on the cutting screen. Cut the design(s) in your choice of heat transfer vinyl with the Iron On (for Easyweed Vinyl) or Iron On+ (for Glitter Vinyl) Setting on your Cricut, with the shiny side of the material down.
5. Set your Iron to the second Highest setting and press the iron down firmly on the design, not ironing but rather using it as a small heat press. The koozie design should be completely covered by the iron. Pressing the iron on the design for 15 - 30 seconds, mine took only 20 seconds. :) I’m always a little nervous about ironing koozies, so I check them every 5 seconds or so until the design has transferred. :)
6. Remove the backing from the design, leaving the design on the koozie. Repeat with all the remaining koozies.
3. Weed the additional material off of the backing material so that, looking down with the shiny side up, you can see your design with the correct orientation.
4. Center the design in the middle of the koozie. Arrange the design shiny side up, then cover with parchment paper. Make sure to keep the parchment paper between the design and the iron.
Check out more of our Koozie Projects here! :)
DIY HTV I Do Crew Koozies
This post contains affiliate links, meaning that if you click on a link I will recieve a small comission. This costs you nothing extra and I only promote products I use and love! You can read our full disclosure here
We don’t want to leave our ladies out of the koozie fun, so I had to make a set with my favorite bridal party saying of the year! These I Do Crew Koozies are an adorable choice for your maids and even better for including lots of ladies in your wedding group if you want a small group of Bridesmaids!
I made the I Do Crew Decals in Lilac Easyweed HTV and the Bride Decal in Silver Glitter HTV on White Neoprene Koozies and they turned out so cute! Check out our other Koozie Projects Here for other cute koozies you can make for Bridal Party Proposals, Bachelorette Parties, or even as Wedding Favors!
Supplies:
Blank Koozies
Easyweed Heat Transfer Vinyl or Glitter Heat Transfer Vinyl
Craft Cutter and Tool Set
Adhesive Mat
Koozie Design Cut Files
After downloading the cut files, import them into the Cricut Software. After creating a new project, select Upload Image. Select the file you wish to upload and it will automatically take you to the final upload screen, where you can name the file the select Save. The SVG Files are sized so that they will automatically cut to the size you see in the photos, but if you want to change the size you can do so to fit the koozies the way you like.
After selecting “Make It” Make sure to select the Mirror Mode on the cutting screen. Cut the design(s) in your choice of heat transfer vinyl with the Iron On (for Easyweed Vinyl) or Iron On+ (for Glitter Vinyl) Setting on your Cricut, with the shiny side of the material down.
3. Weed the additional material off of the backing material so that, looking down with the shiny side up, you can see your design with the correct orientation.
4. Center the design in the middle of the koozie. Arrange the design shiny side up, then cover with parchment paper. Make sure to keep the parchment paper between the design and the iron.
5. Set your Iron to the second Highest setting and press the the iron down firmly on the design, not ironing but rather using it as a small heat press. The koozie design should be completely covered by the iron. Pressing the iron on the design for 15 - 30 seconds, mine took only 20 seconds. :) I’m always a little nervous ironing koozies, so I check them every 5 second or so until the design has transferred. :)
6. Remove the backing from the design, leaving the design on the koozie. Repeat with all the remaining koozies.
DIY HTV Sporty Groomsman Wedding Koozies
This post contains affiliate links, meaning that if you click on a link I will recieve a small comission. This costs you nothing extra and I only promote products I use and love! You can read our full disclosure here
It’s almost Superbowl Time! While I’m not the sportiest of ladies myself, I can appreciate a good sporty themed koozie, and your Groomsmen are sure to enjoy one too! These Sporty Groomsmen Koozies are the perfect accessory for your best boys to sip beers for the game, have wedding day drinks with the groom, or to be invited to the bridal party!
I used Old Gold Glitter HTV for the Groomsman and Best Man decals and White Glitter HTV for the Groom’s on Black Koozies, but it would be awesome to make them in your boy’s favorite team colors!
Supplies:
Blank Koozies
Easyweed Heat Transfer Vinyl or Glitter Heat Transfer Vinyl
Craft Cutter and Tool Set
Adhesive Mat
Koozie Design Cut Files
After downloading the cut files, import them into the Cricut Software. After creating a new project, select Upload Image. Select the file you wish to upload and it will automatically take you to the final upload screen, where you can name the file the select Save. The SVG Files are sized so that they will automatically cut to the size you see in the photos, but if you want to change the size you can do so to fit the koozies the way you like.
2. After selecting “Make It” Make sure to select the Mirror Mode on the cutting screen. Cut the design(s) in your choice of heat transfer vinyl with the Iron On (for Easyweed Vinyl) or Iron On+ (for Glitter Vinyl) Setting on your Cricut, with the shiny side of the material down.
3. Weed the additional material off of the backing material so that, looking down with the shiny side up, you can see your design with the correct orientation.
4. Center the design in the middle of the koozie. Arrange the design shiny side up, then cover with parchment paper. Make sure to keep the parchment paper between the design and the iron.
5. Set your Iron to the second Highest setting and press the the iron down firmly on the design, not ironing but rather using it as a small heat press. The koozie design should be completely covered by the iron. Pressing the iron on the design for 15 - 30 seconds, mine took only 20 seconds. :) I’m always a little nervous ironing koozies, so I check them every 5 seconds or so until the design has transferred. :)
6. Remove the backing from the design, leaving the design on the koozie. Repeat with all the remaining koozies.
Check out more of our Koozie Projects here! :)
DIY Two Less Fish in the Sea HTV Iron On Koozies
This post contains affiliate links, meaning that if you click on a link I will recieve a small comission. This costs you nothing extra and I only promote products I use and love! You can read our full disclosure here
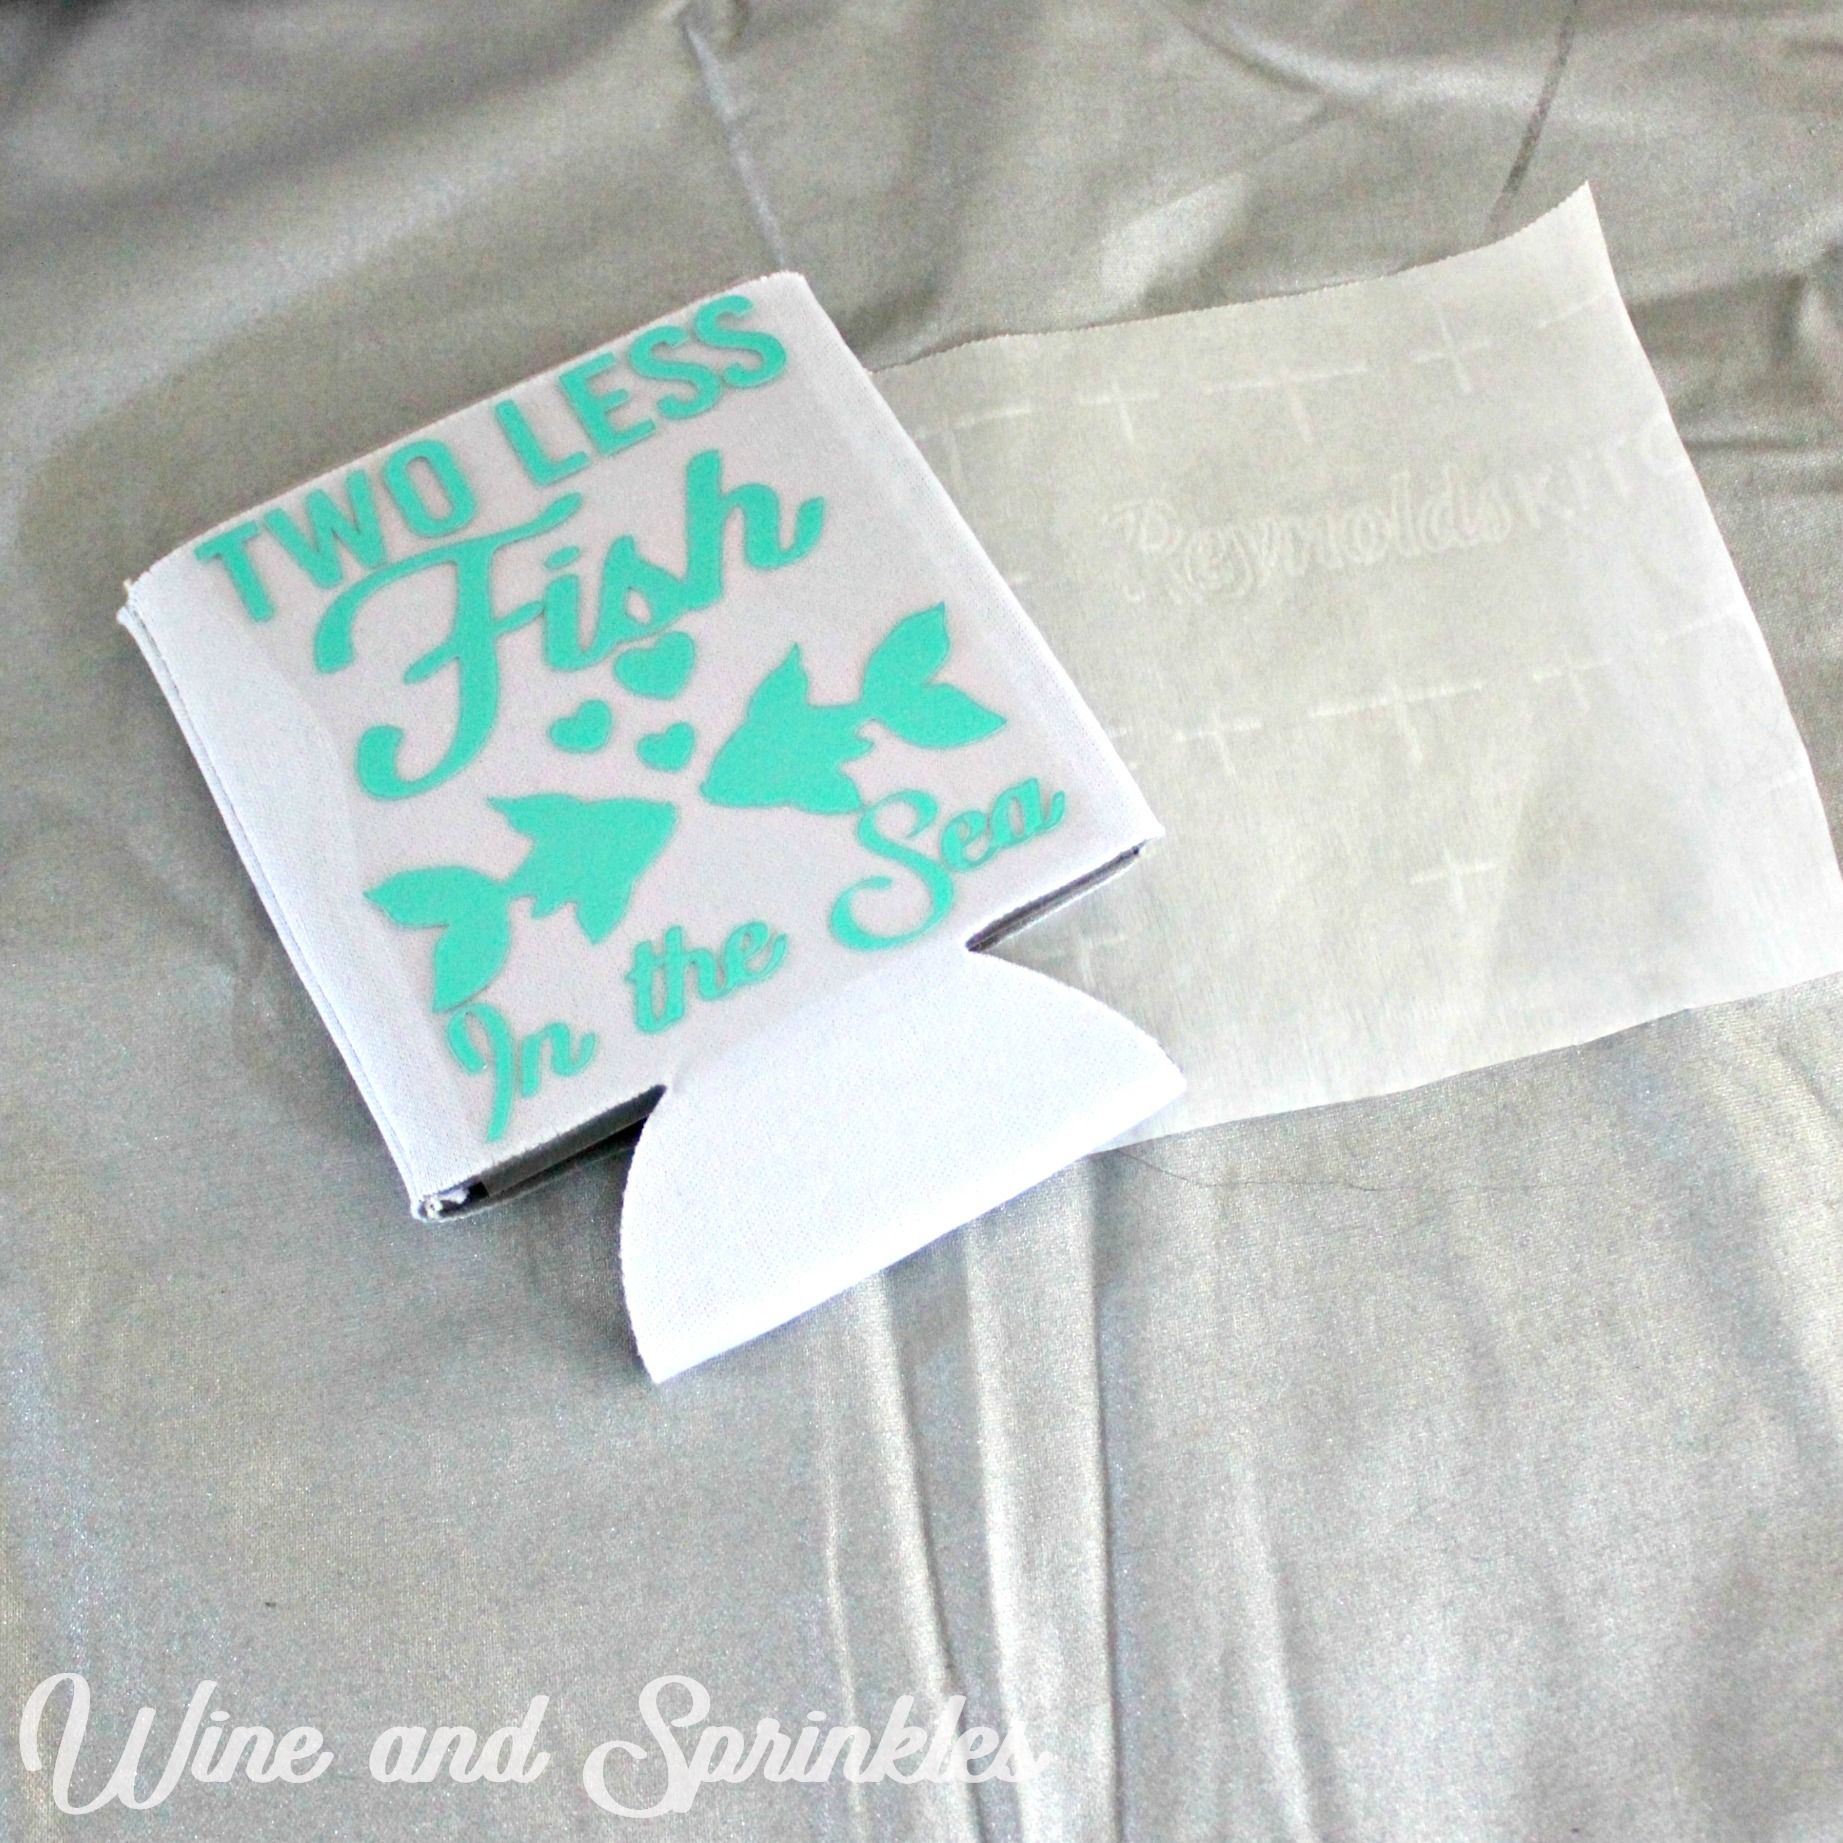
Koozies are wonderful wedding favors, especially for Beach or Destination Weddings! To Start off our Destination Wedding Koozie Designs, I went with my personal favorite beachy wedding saying, Two Less Fish in the Sea!
I made them in Mermaid Blue Glitter HTV and Jade Easeyweed HTV on white koozies; the Mermaid Blue Glitter ones are definetely my favorite! These designs are easy to weed and an easy project to make over a weekend; however, if you have to make a bunch its nice to have a group to help you weed them since that’s the most time intensive part of this project.
Supplies:
Blank Koozies
Easyweed Heat Transfer Vinyl or Glitter Heat Transfer Vinyl
Craft Cutter and Tool Set
Adhesive Mat
Koozie Design Cut Files
1. After downloading the cut files, import them into the Cricut Software. After creating a new project, select Upload Image. Select the file you wish to upload and it will automatically take you to the final upload screen, where you can name the file the select Save. The SVG Files are sized so that they will automatically cut to the size you see in the photos, but if you want to change the size you can do so to fit the koozies the way you like.
2. After selecting “Make It” Make sure to select the Mirror Mode on the cutting screen. Cut the design(s) in your choice of heat transfer vinyl with the Iron On (for Easyweed Vinyl) or Iron On+ (for Glitter Vinyl) Setting on your Cricut, with the shiny side of the material down.
3. Weed the additional material off of the backing material so that, looking down with the shiny side up, you can see your design with the correct orientation.
4. Center the design in the middle of the koozie. Arrange the design shiny side up, then cover with parchment paper. Make sure to keep the parchment paper between the design and the iron.
5. Set your Iron to the second Highest setting and press the the iron down firmly on the design, not ironing but rather using it as a small heat press. The koozie design should be completely covered by the iron. Pressing the iron on the design for 15 - 30 seconds, mine took only 20 seconds. :) I’m always a little nervous ironing koozies, so I check them every 5 second or so until the design has transferred. :)
6. Remove the backing from the design, leaving the design on the koozie. Repeat with all the remaining koozies.
I always love koozies for using up extra bits of HTV and they are the perfect favors for a beachy destination wedding! Check out more of our Koozie Projects here! :)
DIY Drunk in Love HTV Iron On Koozies
This post contains affiliate links, meaning that if you click on a link I will recieve a small comission. This costs you nothing extra and I only promote products I use and love! You can read our full disclosure here
Nothing like a set of matching koozies to get your bachelorette party started on the right foot (or in this case, with the right drink!). To go with our Drunk in Love Bachelorette T Shirts, I decided these cute little koozies were just the thing!
I made them in Old Gold Glitter HTV and Confetti Glitter HTV on black, white, and pink koozies but I think the black with Confetti Glitter HTV are my favorite! Despite the small lettering, I didn’t have any problems weeding the designs, but keep a lookout for the little pieces to make sure they don’t come off in the weeding process (such as the openings for the k’s and s’s).
Supplies:
Blank Koozies
Easyweed Heat Transfer Vinyl or Glitter Heat Transfer Vinyl
Craft Cutter and Tool Set
Adhesive Mat
Koozie Design Cut Files
1. After downloading the cut files, import them into the Cricut Software. After creating a new project, select Upload Image. Select the file you wish to upload and it will automatically take you to the final upload screen, where you can name the file the select Save. The SVG Files are sized so that they will automatically cut to the size you see in the photos, but if you want to change the size you can do so to fit the koozies the way you like.
2. After selecting “Make It” Make sure to select the Mirror Mode on the cutting screen. Cut the design(s) in your choice of heat transfer vinyl (I used Old Gold Glitter HTV and Confetti Glitter HTV) with the Iron On (for Easyweed Vinyl) or Iron On+ (for Glitter Vinyl) Setting on your Cricut, with the shiny side of the material down.
3. Weed the additional material off of the backing material so that, looking down with the shiny side up, you can see your design with the correct orientation.
4. Center the design in the middle of the koozie. Arrange the design shiny side up, then cover with parchment paper. Make sure to keep the parchment paper between the design and the iron.
5. Set your Iron to the second Highest setting and press the the iron down firmly on the design, not ironing but rather using it as a small heat press. The koozie design should be completely covered by the iron. Pressing the iron on the design for 15 - 30 seconds, mine took only 20 seconds. :) I’m always a little nervous ironing koozies, so I check them every 5 second or so until the design has transferred. :)
6. Remove the backing from the design, leaving the design on the koozie. Repeat with all the remaining koozies.
I always love koozies for using up extra bits of HTV and they are the perfect accessory to any bachelor or bachelorette party! Check out more of our Koozie Projects here!
DIY HTV Iron On You Can't Sip with Us Koozies
This post contains affiliate links, meaning that if you click on a link I will recieve a small comission. This costs you nothing extra and I only promote products I use and love! You can read our full disclosure here
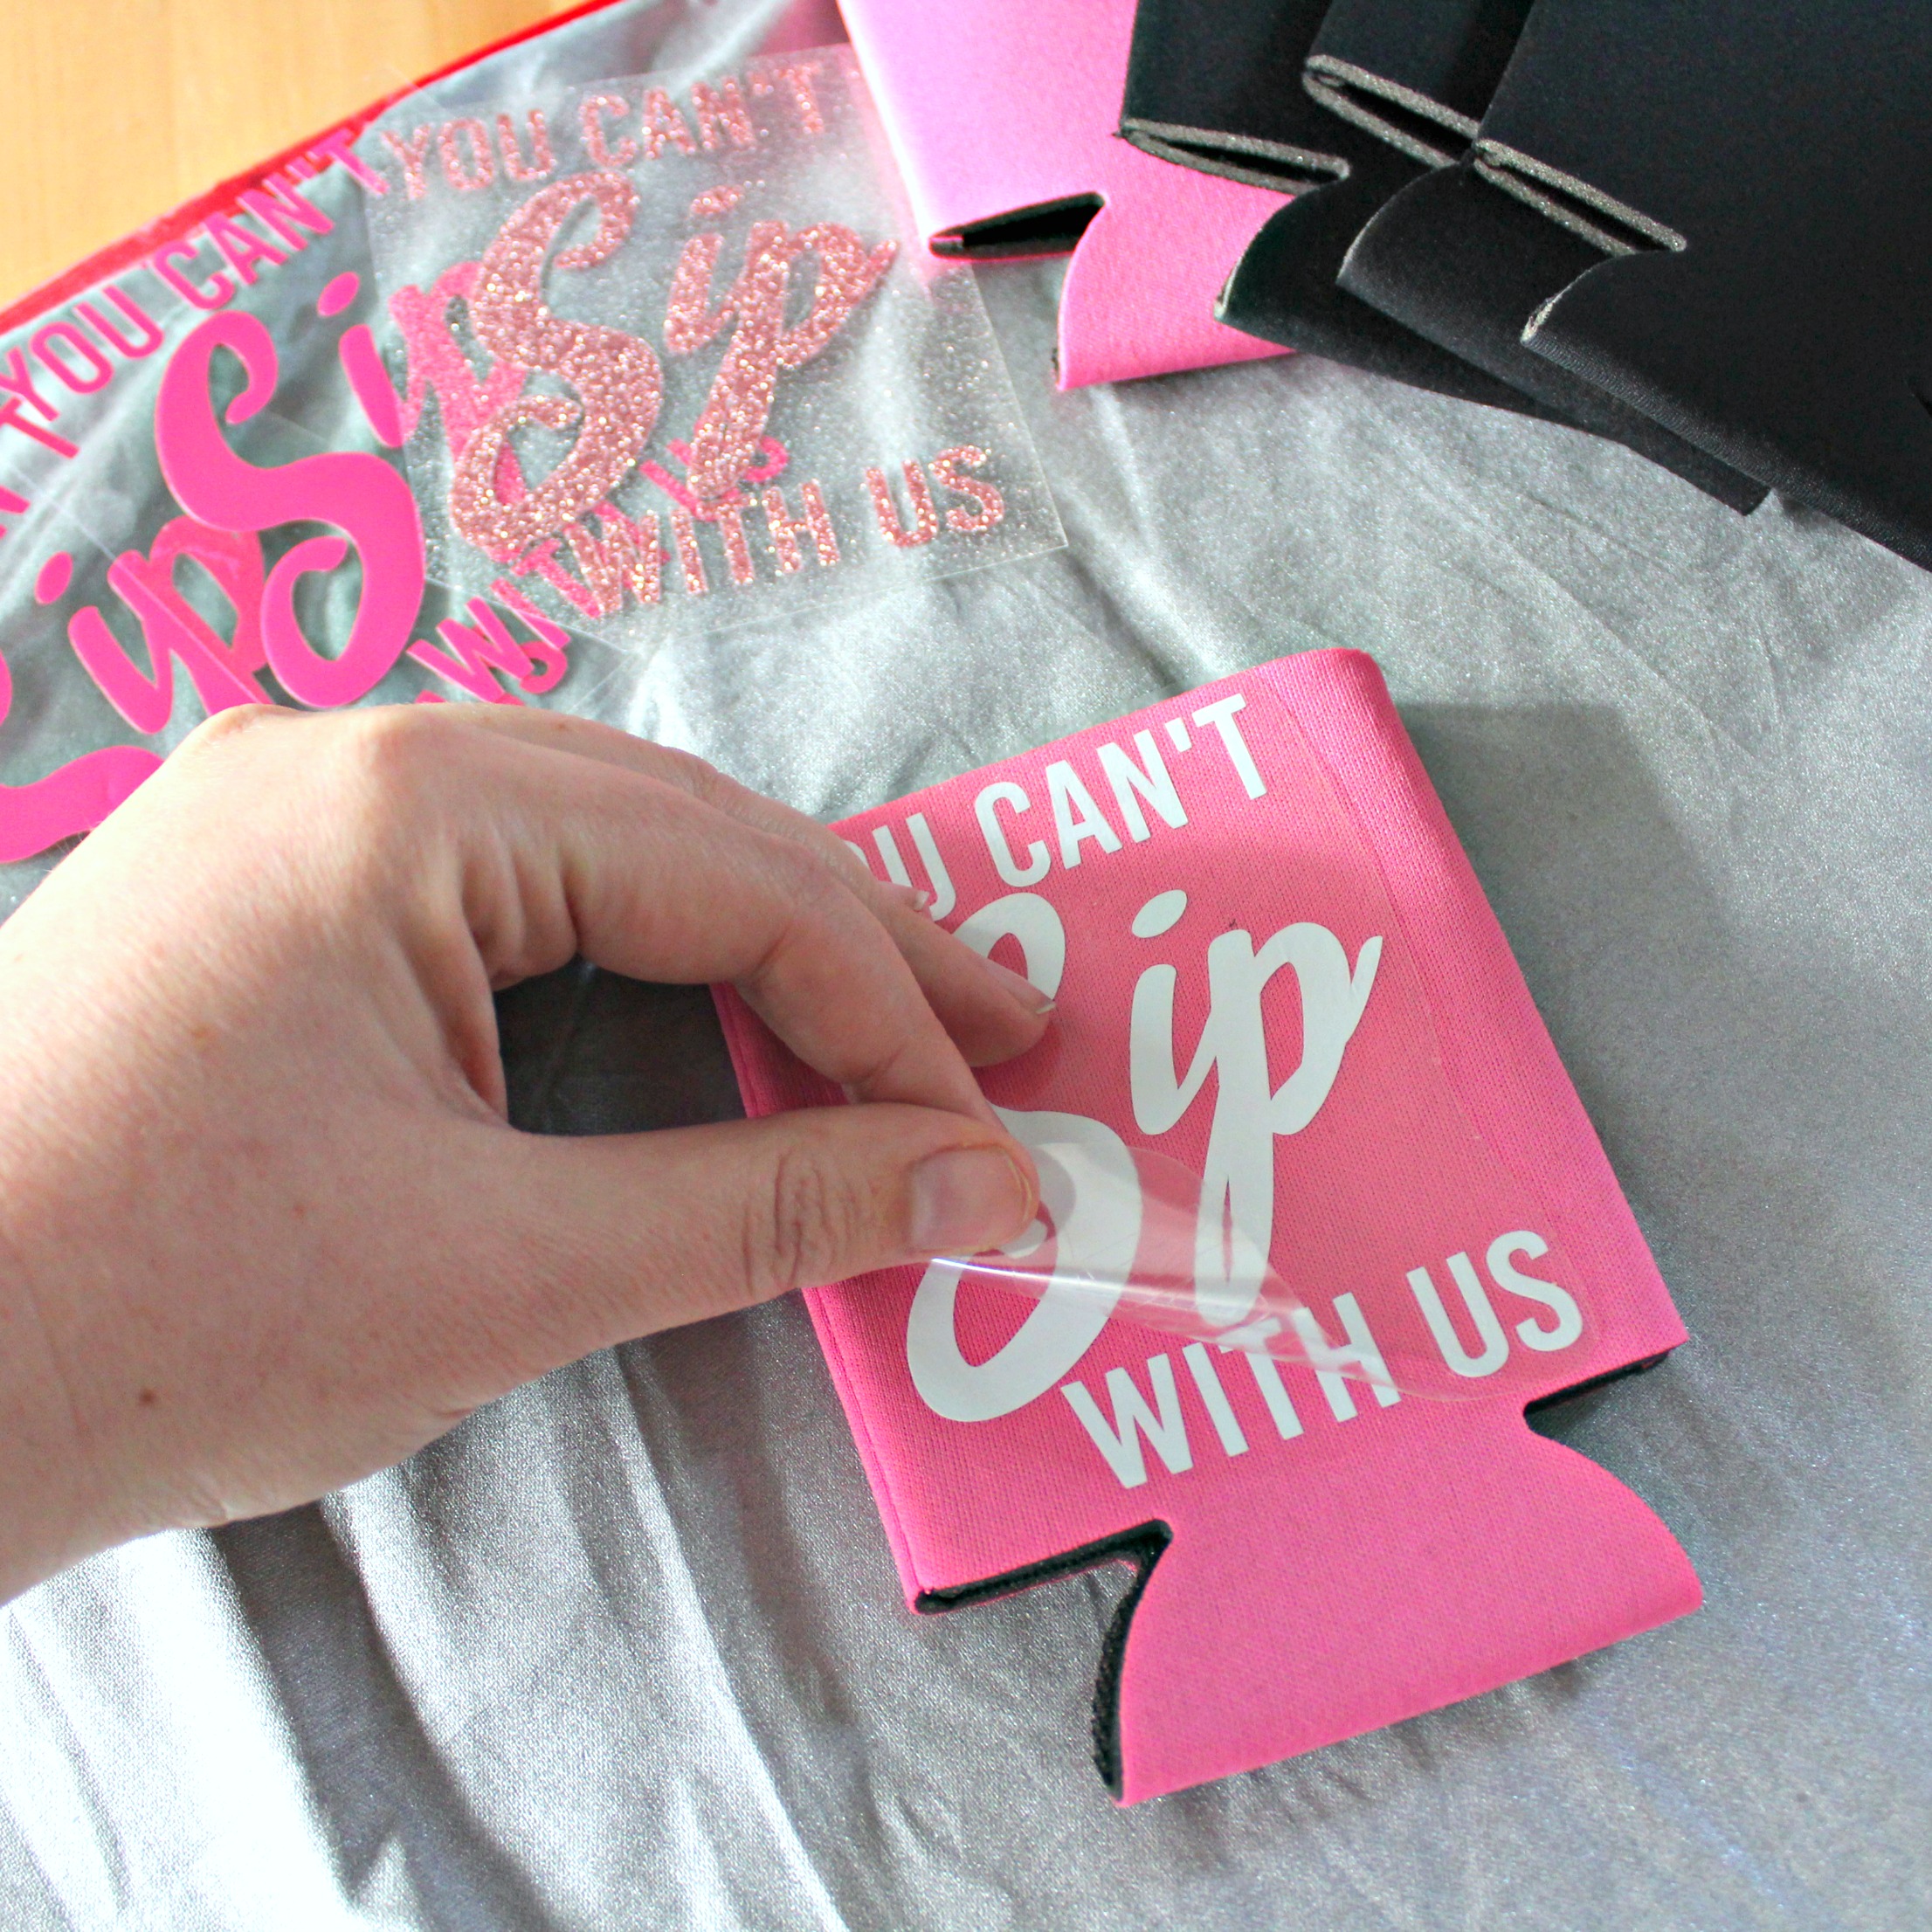
One of my favorite bachelorette party themes is a Mean Girls theme, and I actually got to plan one a couple years ago for one of my best friends bachelorette party in Las Vegas! I revisited the idea for these cute koozies, though you could easily use them for almost any bachelorette party theme you like. :) I made them in two different ways, one with only one color and the second in two colors, because I always like the bride to stand out.
I made these koozies in a variety of colors. For the single color koozies, I used pink HTV and rose gold glitter HTV on black koozies and white HTV on pink koozies. The two colored koozies I had fun with, making them a mix of pink words with a silver confetti “Sip.”
Supplies:
Blank Koozies
Easyweed Heat Transfer Vinyl or Glitter Heat Transfer Vinyl
Craft Cutter and Tool Set
Adhesive Mat
Koozie Design Cut Files
1. After downloading the cut files, import them into the Cricut Software. After creating a new project, select Upload Image. Select the file you wish to upload and it will automatically take you to the final upload screen, where you can name the file the select Save. The SVG Files are sized so that they will automatically cut to the size you see in the photos, but if you want to change the size you can do so to fit the koozies the way you like.
Single Colored Koozies
2. After selecting “Make It” Make sure to select the Mirror Mode on the cutting screen. Cut the design(s) in your choice of heat transfer vinyl (I used White Easyweed HTV, Pink Easyweed HTV, and Rose Gold Glitter HTV) with the Iron On (for Easyweed Vinyl) or Iron On+ (for Glitter Vinyl) Setting on your Cricut, with the shiny side of the material down.
3. Weed the additional material off of the backing material so that, looking down with the shiny side up, you can see your design with the correct orientation.
4. Center the design in the middle of the koozie. Arrange the design shiny side up, then cover with parchment paper. Make sure to keep the parchment paper between the design and the iron.
5. Set your Iron to the second Highest setting and press the the iron down firmly on the design, not ironing but rather using it as a small heat press. The koozie design should be completely covered by the iron. Pressing the iron on the design for 15 - 30 seconds, pressing in 5-10 second intervals and checking. Generally, my koozies took 15-20 seconds but you can always set your iron to a little lower temperature if you are nervous. :)
6. Remove the backing from the design, leaving the design on the koozie. Repeat with all the remaining koozies.
Dual Colored Koozies
2. After selecting “Make It” Make sure to select the Mirror Mode on the cutting screen. You will notice that the Cricut software divides the design colors into separate mats on its own. Cut the designs in your choice of heat transfer vinyl with the Iron On (for Easyweed Vinyl) or Iron On+ (for Glitter Vinyl) Setting on your Cricut, with the shiny side of the material down.
3. Weed the additional material off of the backing material so that, looking down with the shiny side up, you can see your design with the correct orientation. To keep your spacing correct, make sure not to separate your lines (“You can’t” and “with us”) from each other when you are weeding and cutting out your designs.
4. Start by aligning the top and bottom words (“You can’t” and “with us”) along the top of the koozie as shown below. It should be arranged such that the top line is following the top of the koozie and the bottom line is near the bottom of the koozie.
5. Set your Iron to the second Highest setting and press the the iron down firmly on the design, not ironing but rather using it as a small heat press. The koozie design should be completely covered by the iron. Pressing the iron on the design for 15 - 30 seconds, pressing in 5-10 second intervals and checking. Generally, my koozies took 15-20 seconds but you can always set your iron to a little lower temperature if you are nervous. :)
6. Remove the backing to leave your first color of HTV on the koozies.
7. Now, center the middle of the design (“Sip) in between the already ironed on HTV lines of the koozie as shown below. Arrange the design shiny side up, then cover with parchment paper. Make sure to keep the parchment paper between the design and the iron.
8. Set your Iron to the second Highest setting and press the the iron down firmly on the design, not ironing but rather using it as a small heat press. Repeat the same ironing process as above for the second design color.
9. Remove the backing from the design, leaving the completed design on the koozie. Repeat with all the remaining koozies.
Monogram HTV Iron On Koozies
This post contains affiliate links, meaning that if you click on a link I will recieve a small comission. This costs you nothing extra and I only promote products I use and love! You can read our full disclosure here
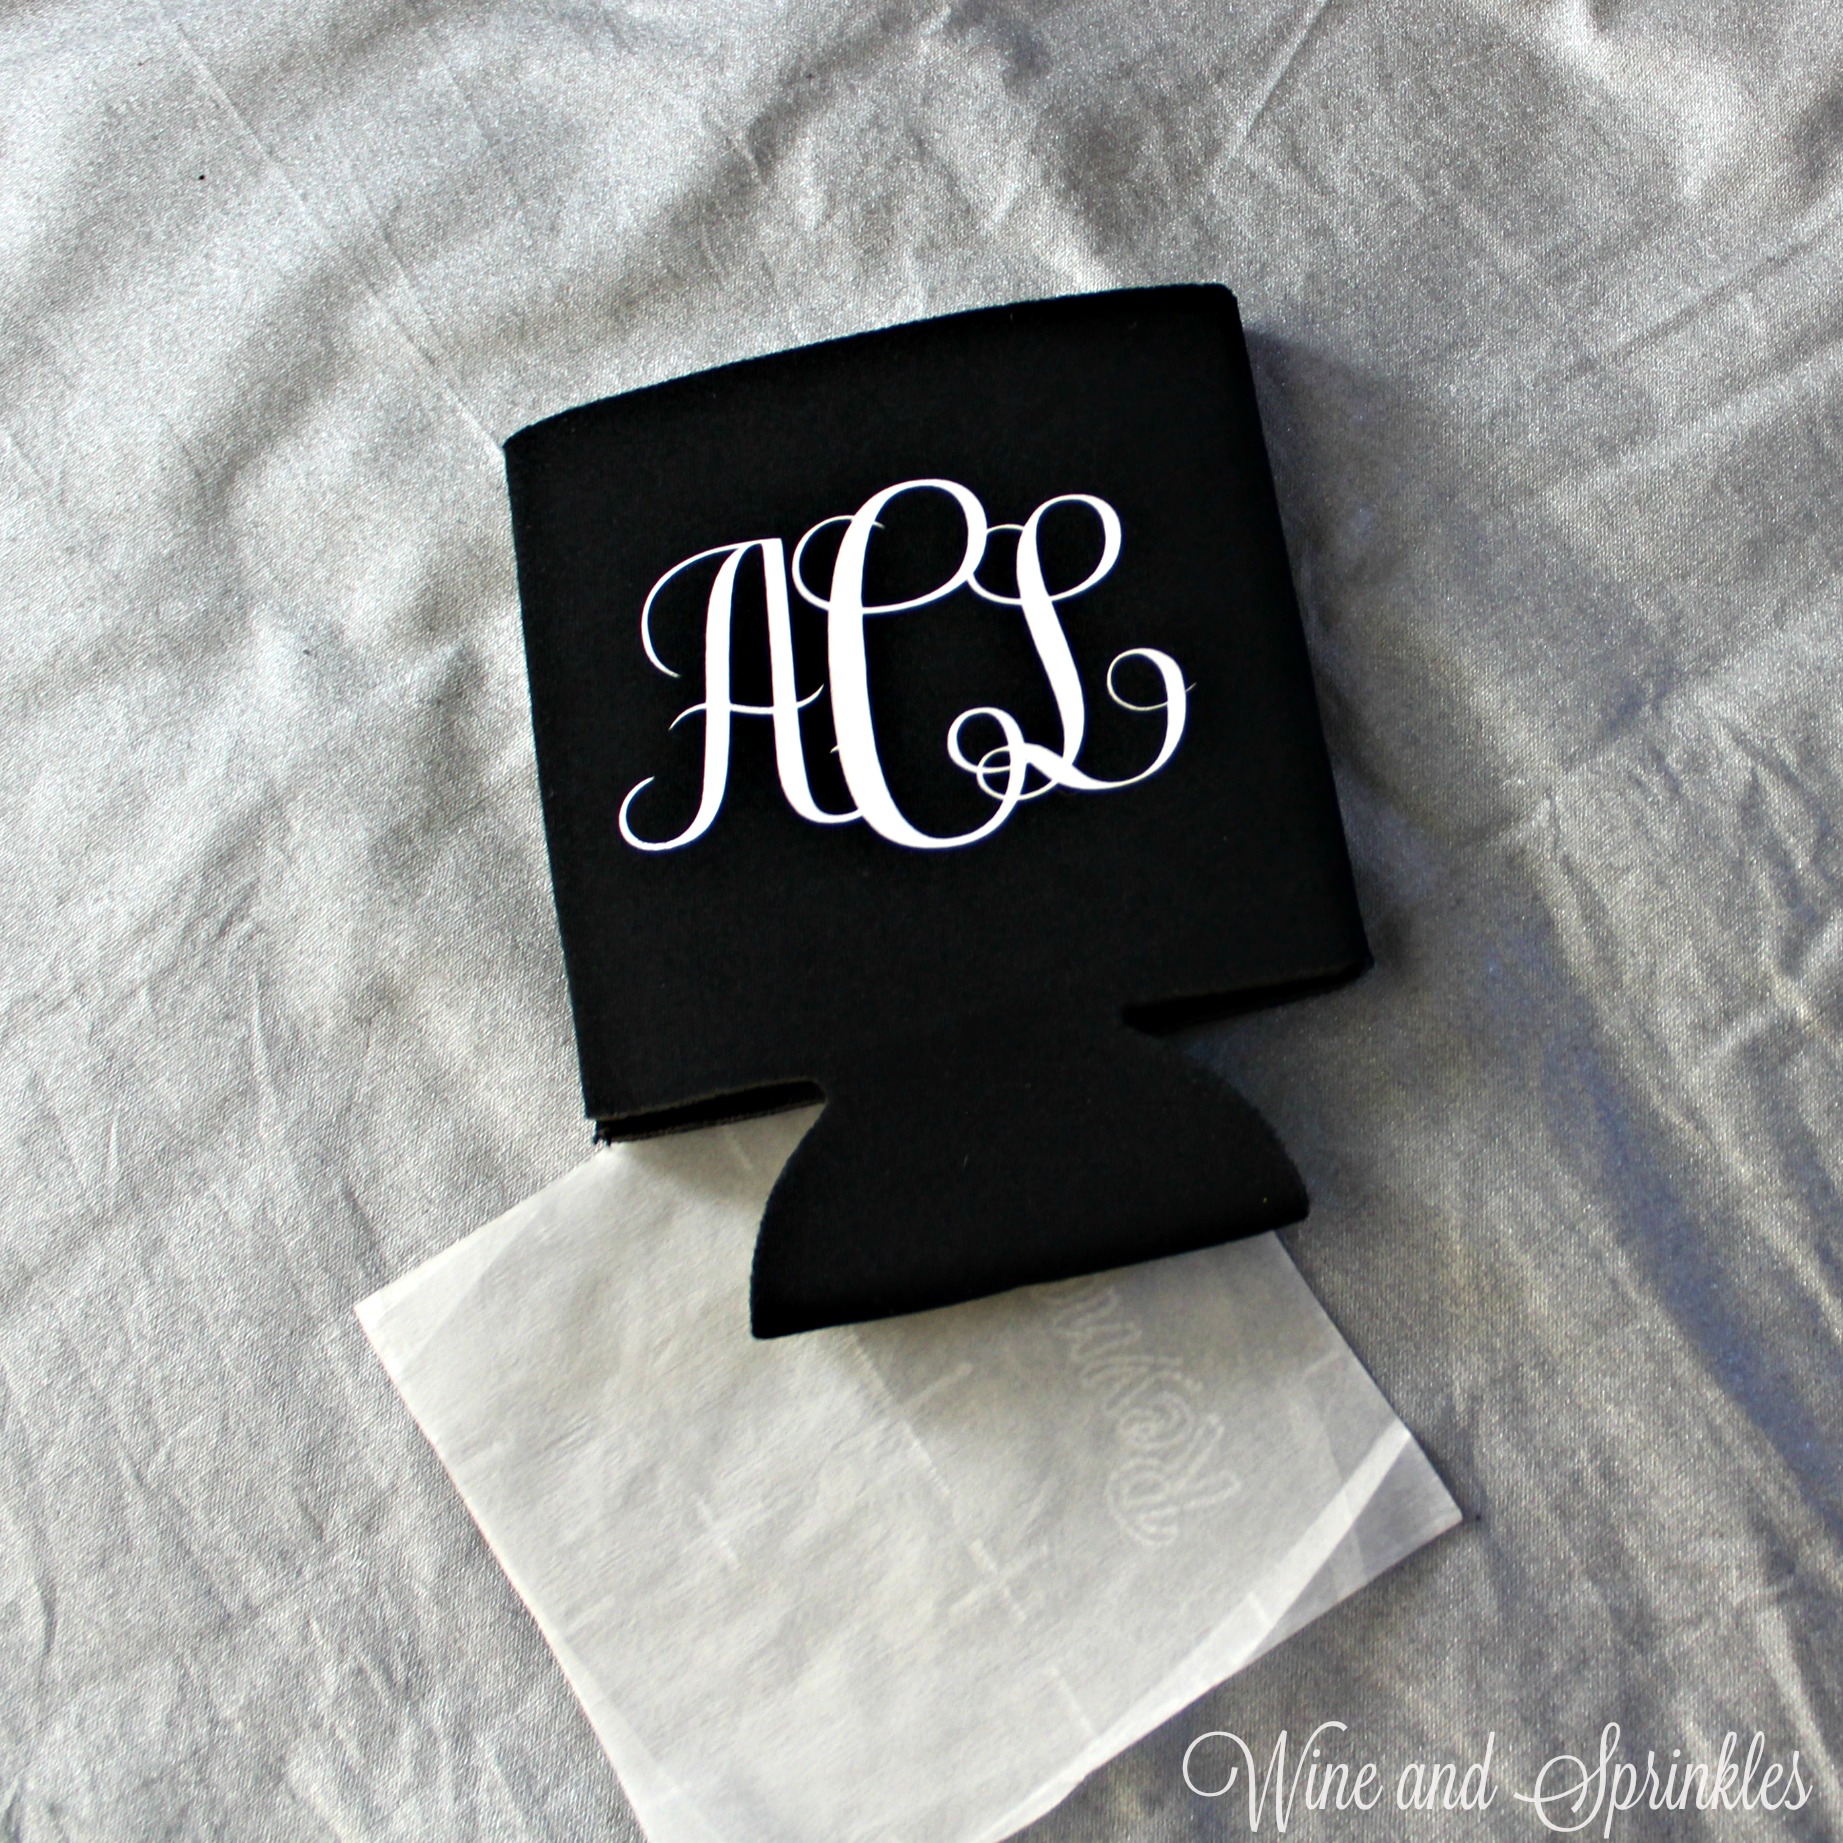
With all the fun I’ve had putting monograms on Tank Tops and Tote Bags, I decided to include koozies in the mix since its such an easy project if you have a little extra HTV lying around, and in my case I also had some extra koozies! Like the other monogram projects, you can easily design them in the Cricut Craft Cutter Software and size them however you like for your koozie. :)
Supplies:
Blank Koozies
Easyweed Heat Transfer Vinyl or Glitter Heat Transfer Vinyl
Craft Cutter and Tool Set
Adhesive Mat
Designing Your Monogram:
1. First, if you don't already own a Monogram style font, download one. The font I used is called Free Monogram Font from DaFont.com and it worked perfectly for what I wanted, and as the name implies its totally free!
2. Now, open a new project in your Cricut design software and create a text box. Select the Monogram font from your font choices and use it to type the initials for your monogram.
3. If you are using the font I mentioned, for smaller side letters you use lower case letters and for the center letter you use uppercase letters. For example, my initials on the monogram shown are typed in as "aCl" .
4. Next, overlap your letters by changing the letter spacing of your font. I chose -2 for the spacing of my letters but it is better to mess with it a little bit to find out what looks best to you.
5. Once all your letters are spaced to your satisfaction, select the "Weld" tool to combine your letters into a single set of cutting curves.
6. Now, you can size your monogram to whatever size you like best; I made them 3" wide.
7. Finally, cut the monograms on your choice of vinyl. I used the Iron On+ setting for Glitter HTV and the Standard Iron On Setting for regular Easyweed Vinyl. Make sure that you select the "Mirror" Function and load your Iron On material Shiny side down so that your design cuts correctly! :)
Transferring your Design
8. Once your design is cut, weed away the extra material, leaving only your monogram.
9. Arrange the Monogram such that it is in the center of the koozie. Arrange the design shiny side up, then cover with parchment paper. Make sure to keep the parchment paper between the design and the iron.
10. Set your Iron to the second Highest setting and press the the iron down firmly on the design, not ironing but rather using it as a small heat press. I worked from the upper left to lower right on the design, pressing the iron on each part of the design for about 20 seconds, covering the entire design and parchment paper.
11. Remove the backing from the design, leaving the Monogram on the Koozie. Repeat with all the remaining Koozies.
DIY Iron On Bride Tribe Wedding Koozies
This post contains affiliate links, meaning that if you click on a link I will recieve a small comission. This costs you nothing extra and I only promote products I use and love! You can read our full disclosure here
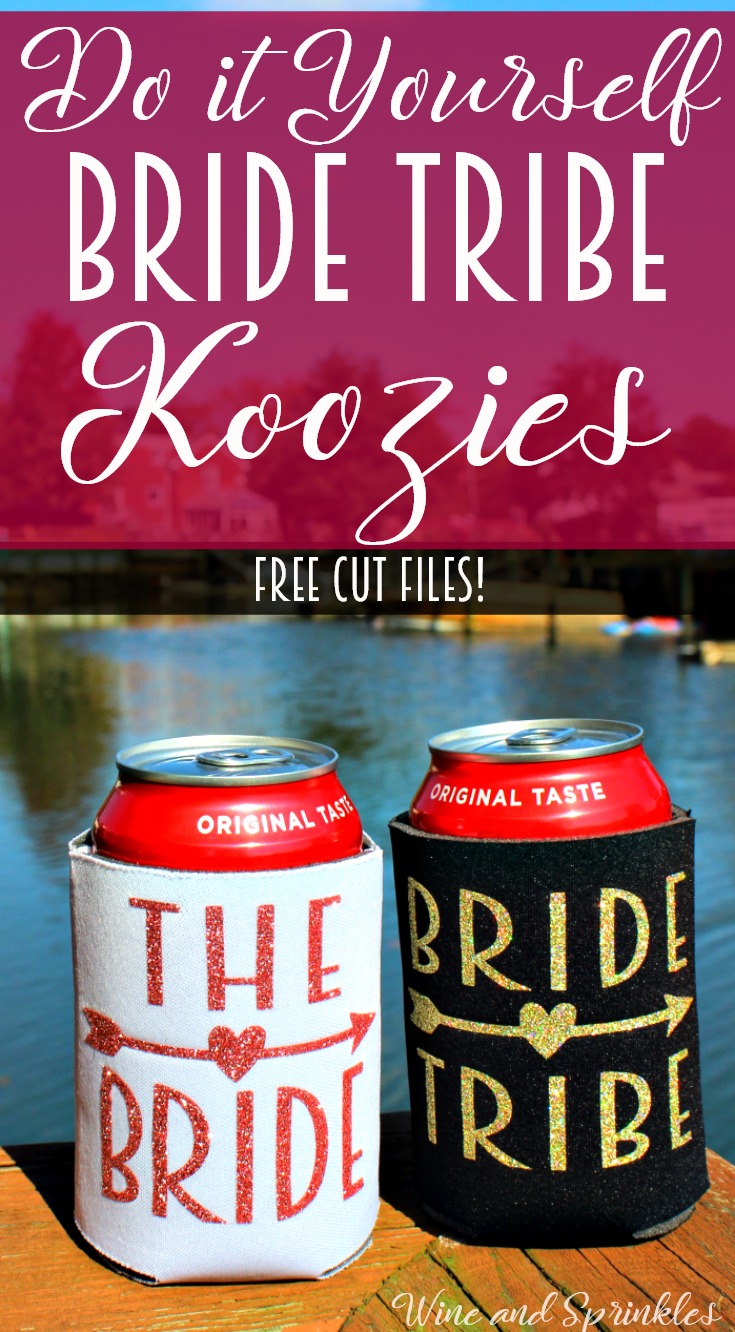
After making my Groomsman Brew Crew Koozies, I couldn’t leave the lovely ladies of the bridal party out of the koozie fun! So I started simple with some fun glittery Bride Tribe koozies. :)
I used a mix of Rose Gold Glitter HTV, Gold Confetti HTV, and Old Gold Easyweed HTV with a mix of white and black koozies and all of them turned out great! They are super easy to make and are perfect not only as bachelorette party favors but for bridesmaids proposals or any pre-wedding event. :)
Personally my favorite combination is below: with The Bride in Rose Gold Glitter on a white Koozie and the maids sporting Gold Confetti on black Bride Tribe Koozies; luckily there are dozens of color options so you can easily customize the colors to exactly what you want. :)
Supplies:
Blank Koozies
Easyweed Heat Transfer Vinyl or Glitter Heat Transfer Vinyl
Craft Cutter and Tool Set
Adhesive Mat
Koozie Design Cut Files
1. After downloading the cut files, import them into the Cricut Software. After creating a new project, select Upload Image. Select the file you wish to upload and it will automatically take you to the final upload screen, where you can name the file the select Save. The SVG Files are sized so that they will automatically cut to the size you see in the photos, but if you want to change the size you can do so to fit the tank tops the way you like.
2. After selecting “Make It” Make sure to select the Mirror Mode on the cutting screen. Cut the design(s) in your choice of heat transfer vinyl (I used Rose Gold Glitter, Gold Confetti Glitter and Old Gold Easyweed HTV) with the Iron On (for Easyweed Vinyl) or Iron On+ (for Glitter Vinyl) Setting on your Cricut, with the shiny side of the material down.
3. Weed the additional material off of the backing material so that, looking down with the shiny side up, you can see your design with the correct orientation.
4. Center the design in the middle of the koozie. Arrange the design shiny side up, then cover with parchment paper. Make sure to keep the parchment paper between the design and the iron.
5. Set your Iron to the second Highest setting and press the the iron down firmly on the design, not ironing but rather using it as a small heat press. The koozie design should be completely covered by the iron. Pressing the iron on the design for 15 - 30 seconds, mine took only 20 seconds. :)
6. Remove the backing from the design, leaving the design on the koozie. Repeat with all the remaining koozies.
DIY Brew Crew Groomsman Koozies
This post contains affiliate links, meaning that if you click on a link I will recieve a small comission. This costs you nothing extra and I only promote products I use and love! You can read our full disclosure here
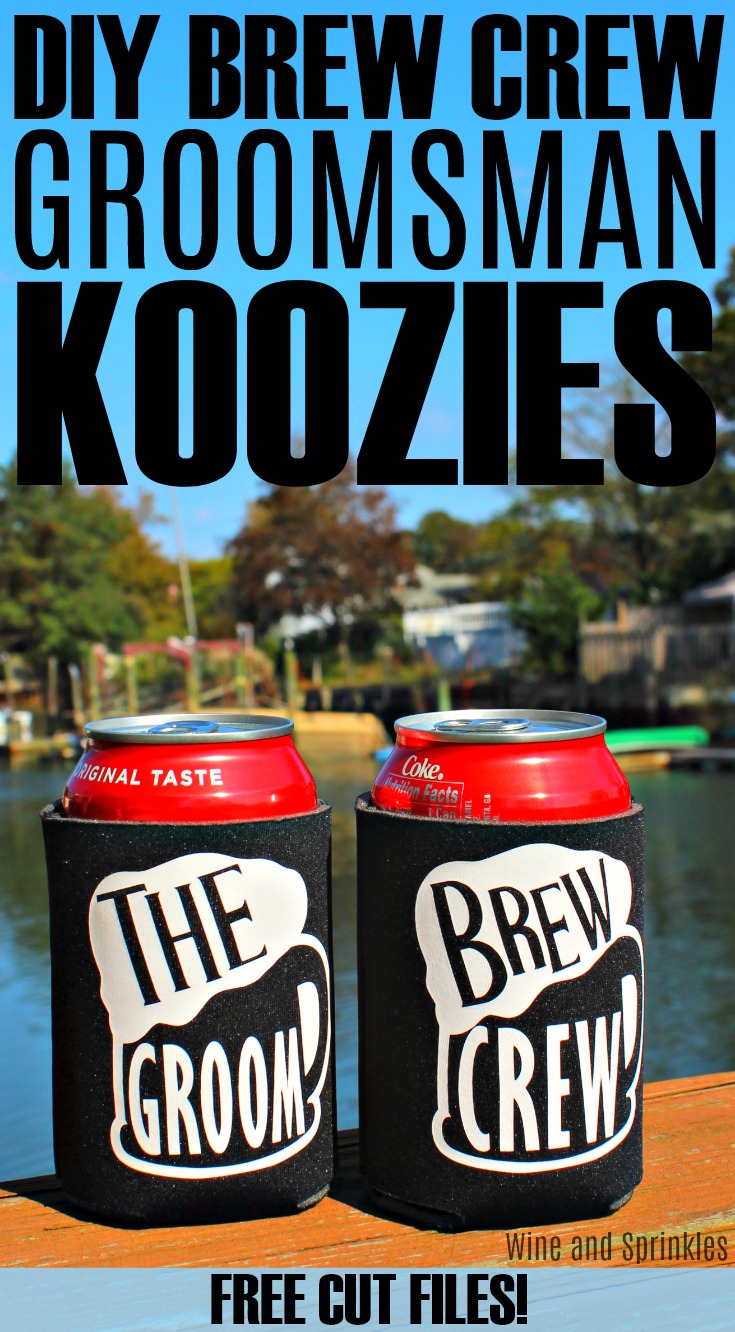
Koozies are a great favor for weddings, bachelor parties, or just as fun gifts for your wedding party. With my husband and his friends looking into cruises for a bachelor party next year, I got inspired to design a few koozies of my own!
I had tons of fun designing these beer stein “Brew Crew” koozies; they go perfectly with a bar crawl, lake day, or any bachelor party where beer is plentiful (which let’s be honest, is most of them!). :)
Supplies:
Blank Koozies
Easyweed Heat Transfer Vinyl or Glitter Heat Transfer Vinyl
Craft Cutter and Tool Set
Adhesive Mat
Koozie Design Cut Files
1. After downloading the cut files, import them into the Cricut Software. After creating a new project, select Upload Image. Select the file you wish to upload and it will automatically take you to the final upload screen, where you can name the file the select Save. The SVG Files are sized so that they will automatically cut to the size you see in the photos, but if you want to change the size you can do so to fit the koozies the way you like.
2. After selecting “Make It” Make sure to select the Mirror Mode on the cutting screen. Cut the design(s) in your choice of heat transfer vinyl (I used White Easyweed HTV) with the Iron On (for Easyweed Vinyl) or Iron On+ (for Glitter Vinyl) Setting on your Cricut, with the shiny side of the material down.
3. Weed the additional material off of the backing material so that, looking down with the shiny side up, you can see your design with the correct orientation.
4. Center the design in the middle of the koozie. Arrange the design shiny side up, then cover with parchment paper. Make sure to keep the parchment paper between the design and the iron.
5. Set your Iron to the second Highest setting and press the the iron down firmly on the design, not ironing but rather using it as a small heat press. The koozie design should be completely covered by the iron. Pressing the iron on the design for 15 - 30 seconds, mine took only 20 seconds. :)
6. Remove the backing from the design, leaving the design on the koozie. Repeat with all the remaining koozies.


