HTV Projects

Baby Bear DIY HTV Baby Onesie

This post contains affiliate links, meaning that if you click on a link I will recieve a small comission. This costs you nothing extra and I only promote products I use and love! You can read our full disclosure here

Baby Bear DIY HTV Baby Onesie #babybear #diybaby #diyonesie #craftsforbaby

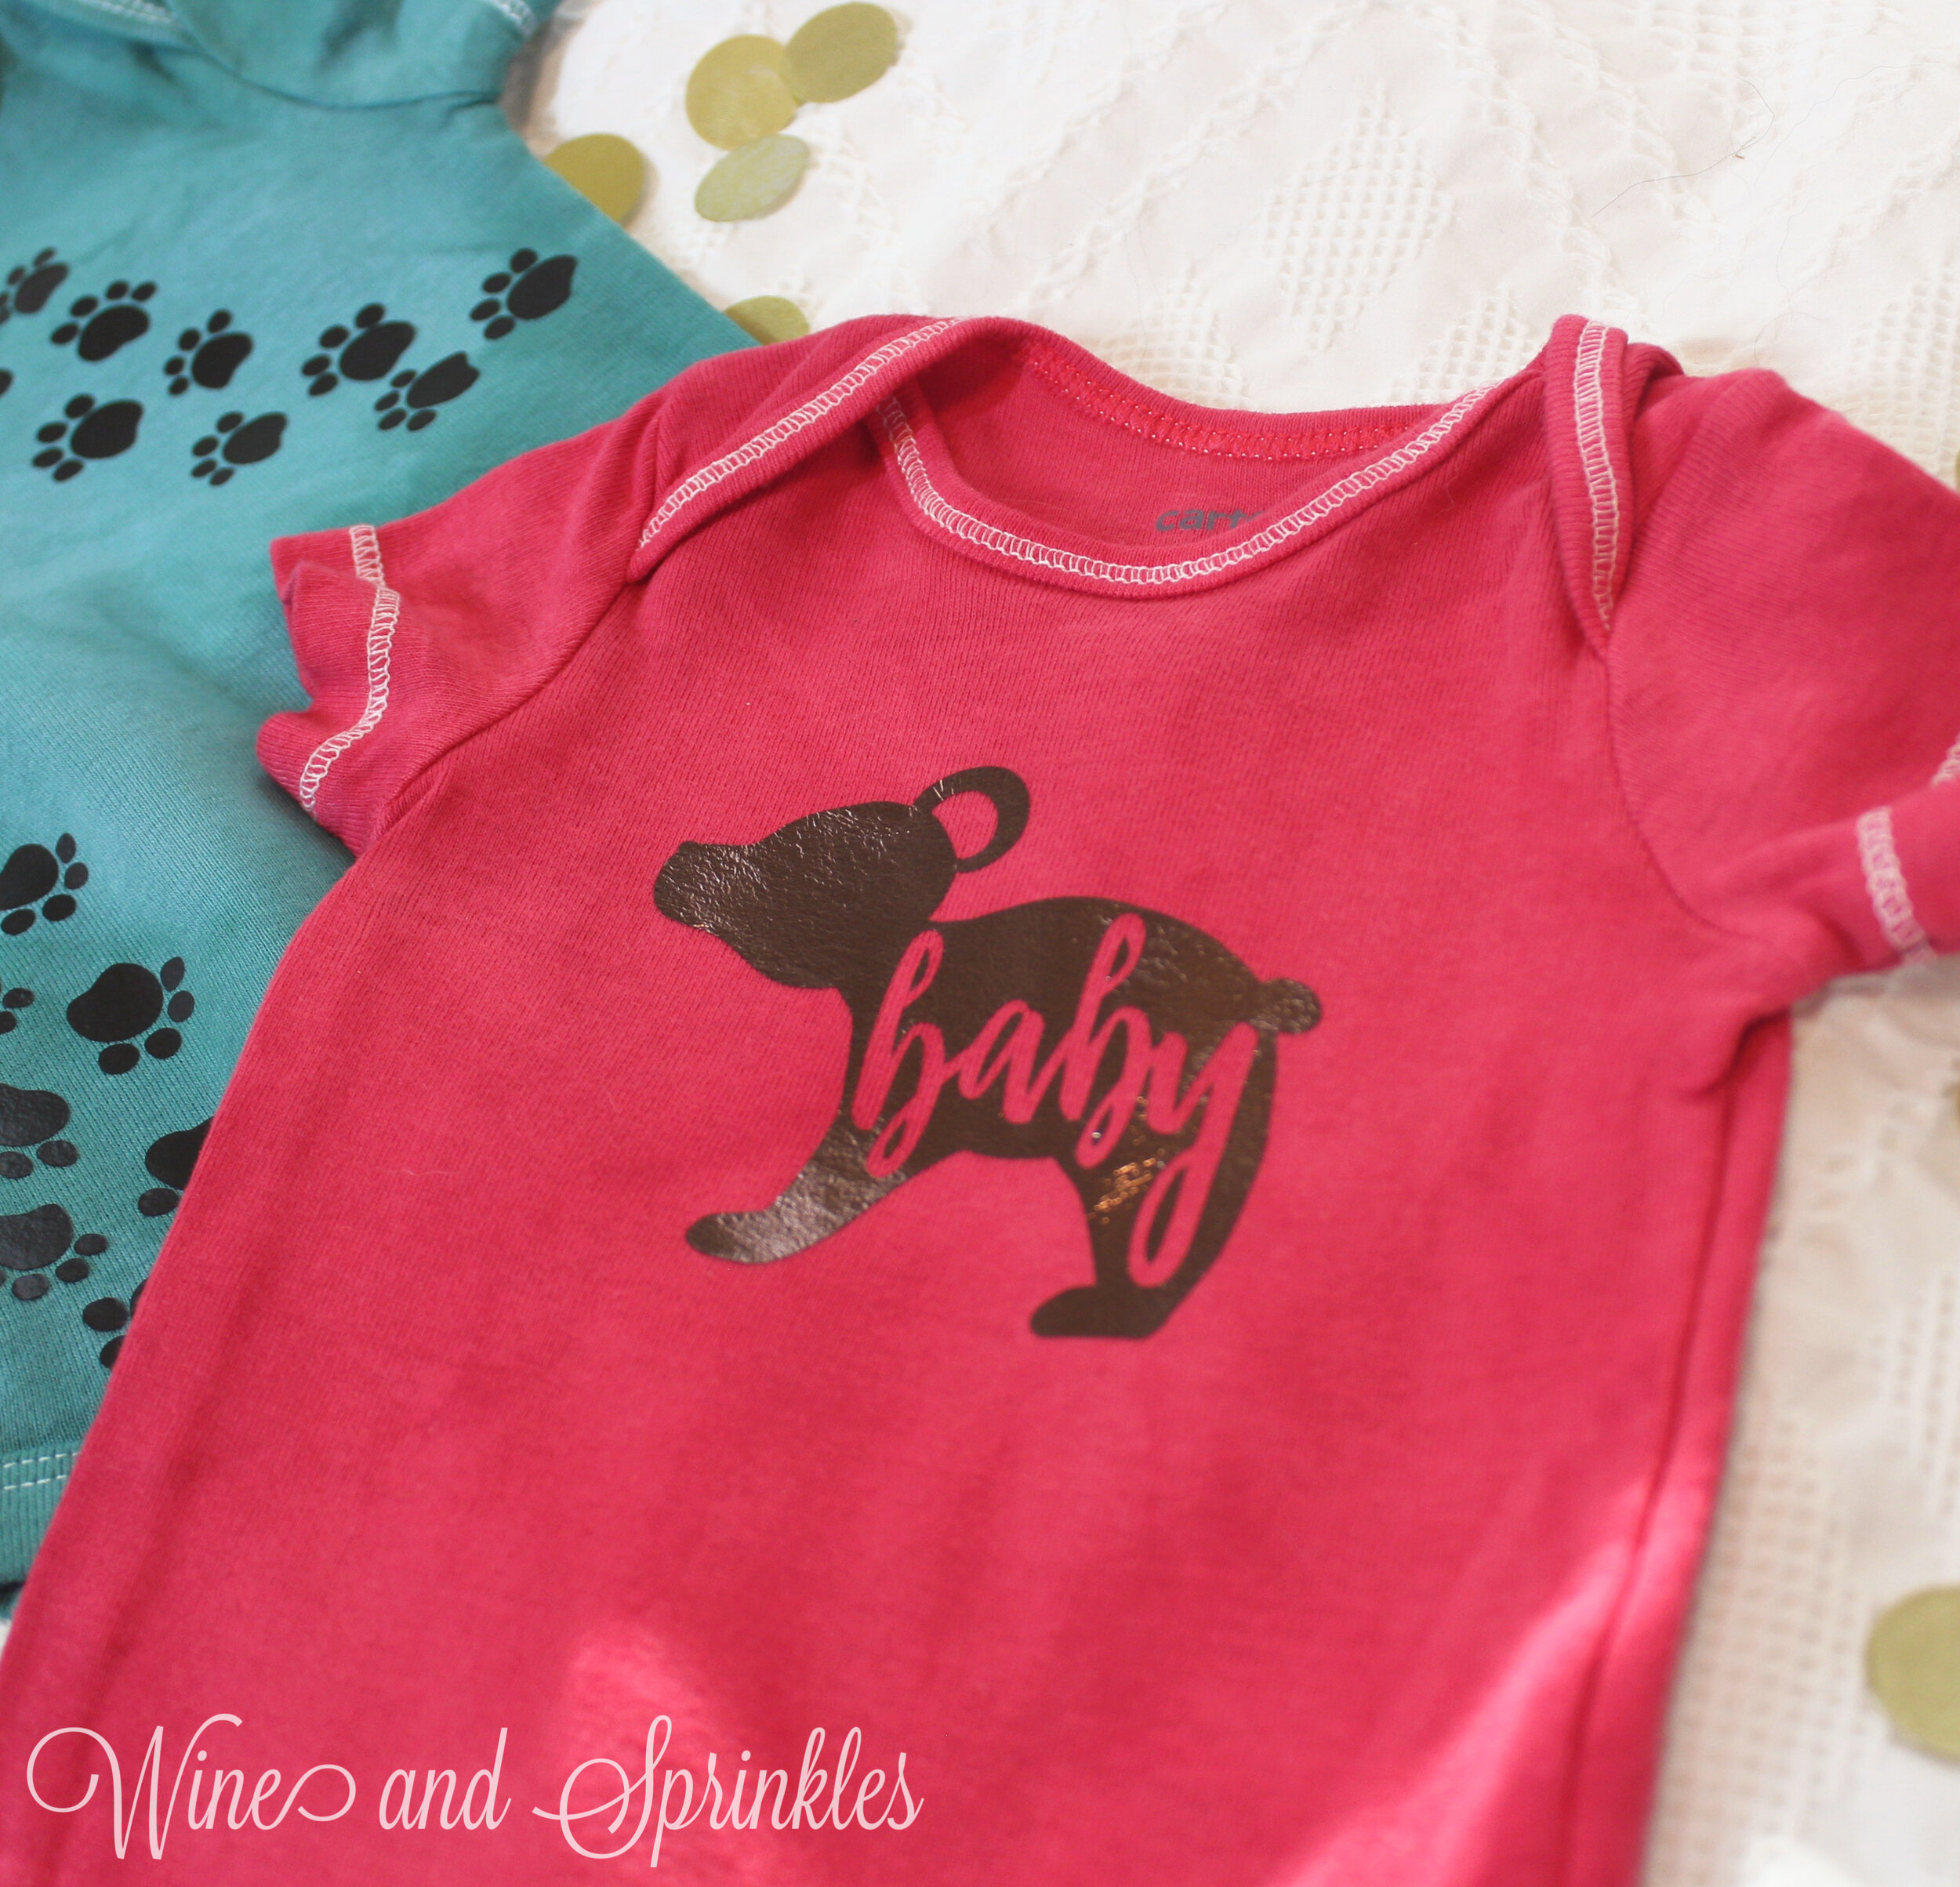
One of my best friends is expecting a baby soon and received an adorable Mama Bear themed sweater for the winter, and as soon as I saw it I knew there had to be a baby bear onesie to go with it for when her little one arrived! Thus, my baby bear onesie was born! Since her sweater has the silhouette of a bear with Mama cut out of it oh, it was only fitting that her little girls onesie was a little bear cub silhouette with baby cut out!  

The decal was made with Brown Easyweed HTV on a Hand Dyed Red Onesie and it turned out so adorable! Can't wait to see what it looks like in silver glitter and purple next!  This project is a great beginner HTV transfer project; the decal is easy to cut, weed, and small enough to fit entirely under your iron in one press.


Make sure to check out our other Baby Onesie Projects for more DIY Baby Shower Gift Inspiration!

Baby Bear DIY HTV Baby Onesie #babybear #diybaby #diyonesie #craftsforbaby


Baby Bear DIY HTV Baby Onesie #babybear #diybaby #diyonesie #craftsforbaby
  1. After downloading the cut files, import them into the Cricut Software. After creating a new project, select Upload Image. Select the file you wish to upload and it will automatically take you to the final upload screen, where you can name the file, then select Save. The SVG Files are sized so that they will automatically cut to the size you see in the photos, but if you want to change the size you can do so to fit your onesies the way you like.

  2. After selecting “Make It” Make sure to select the Mirror Mode on the cutting screen. Cut the design in your choice of heat transfer vinyl with the Iron On (for Easyweed HTV) or Iron On+ (for Glitter HTV) Setting on your Cricut, with the shiny side of the material down.

Baby Bear DIY HTV Baby Onesie #babybear #diybaby #diyonesie #craftsforbaby

4. Set your Iron to the second Highest setting. Cover the parchment paper and decal with your iron, pressing down firmly on the design. Using your iron like a small heat press, press the design for at least 20-30 seconds, repeating and overlapping the last position as you move across the design. Luckily, onesie decals are so small, you should be able to fit the whole decal under the iron in a single press!

3. Weed the additional material off of the backing material so that, looking down with the shiny side up, you can see your design with the correct orientation.Iron your onesie to remove any creases, then center the design over the top half of the onesie. Arrange the design shiny side up, then cover with parchment paper. Make sure to keep the parchment paper between the design and the iron.

Baby Bear DIY HTV Baby Onesie #babybear #diybaby #diyonesie #craftsforbaby

5. Remove the parchment paper and peel the clear backing from the decal, leaving the design on the onesie.

Baby Bear DIY HTV Baby Onesie #babybear #diybaby #diyonesie #craftsforbaby

Check out our other Baby Onesie Projects for more DIY Baby Shower Gift Inspiration!

Baby Bear DIY HTV Baby Onesie #babybear #diybaby #diyonesie #craftsforbaby

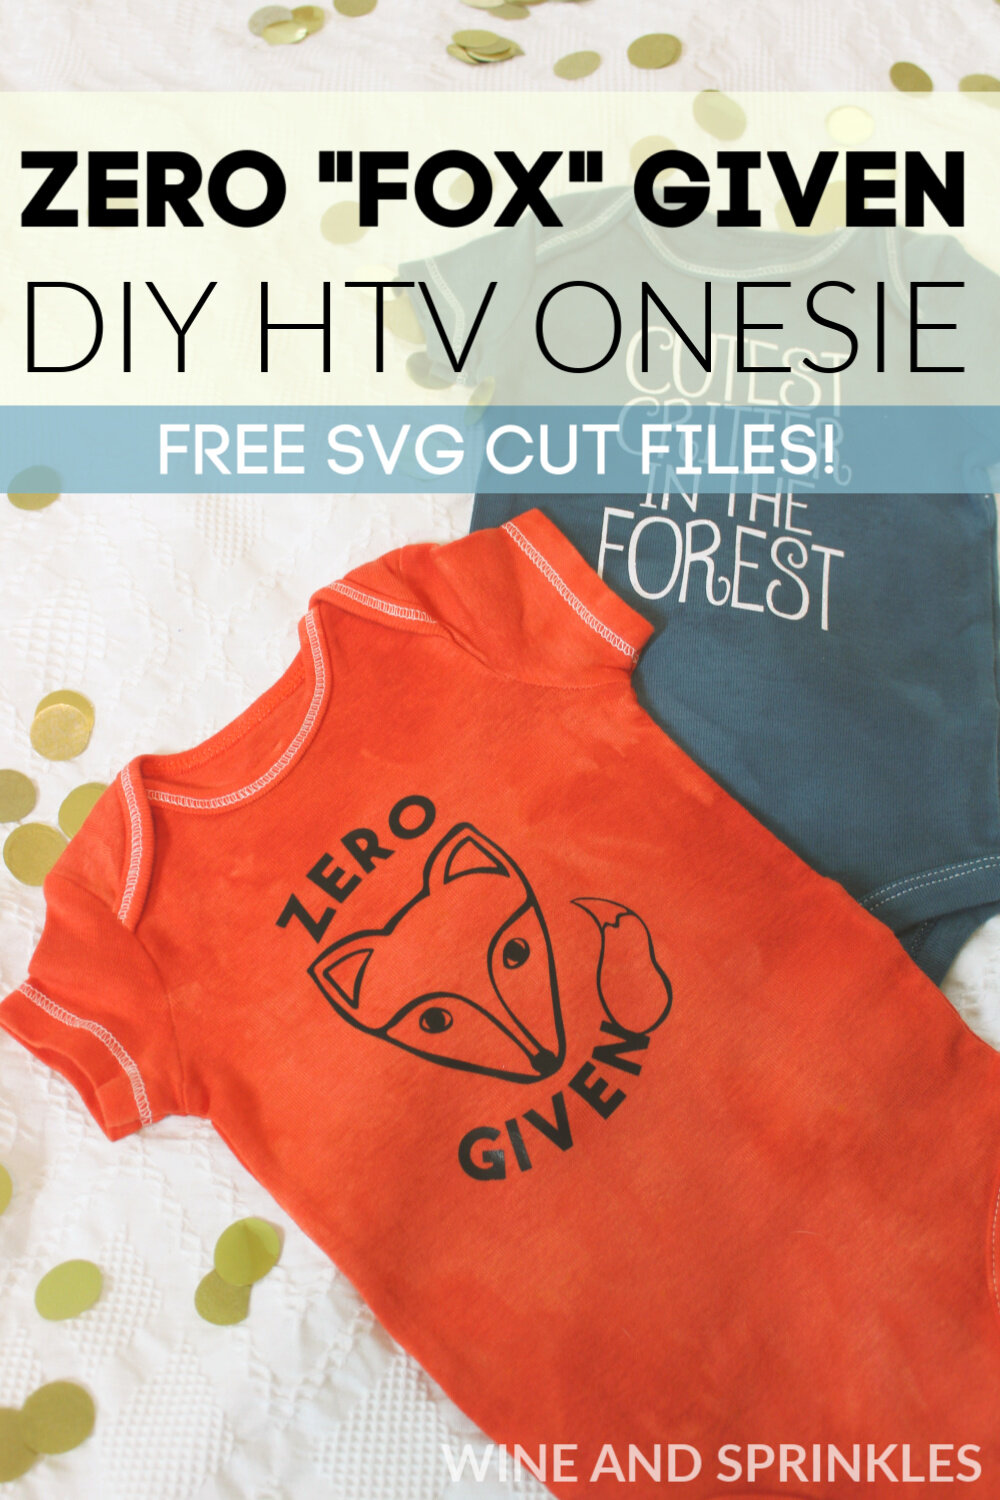
DIY HTV Zero Fox Given Baby Onesie

This post contains affiliate links, meaning that if you click on a link I will recieve a small comission. This costs you nothing extra and I only promote products I use and love! You can read our full disclosure here

DIY HTV Zero Fox Given Baby Onesie #zerofoxgiven #diybaby #diyonesie #craftsforbaby

As soon as I heard of this clever pun involving foxes, I had to use it in my critter themed onesie collection! Because if there's one thing newborns and little ones are good at, it's not giving any cares about things when they are hungry or need a nap.

For this onesie, I made the decal in Black Easyweed Heat Transfer Vinyl on a Hand Dyed Orange Onesie, and it turned out super perfect considering the foxy theme! This project is a great beginner HTV transfer project; the decal is easy to cut, weed, and small enough to fit entirely under your iron in one press.

Make sure to check out our other Baby Onesie Projects for more DIY Baby Shower Gift Inspiration!

DIY HTV Zero Fox Given Baby Onesie #zerofoxgiven #diybaby #diyonesie #craftsforbaby


DIY HTV Zero Fox Given Baby Onesie #zerofoxgiven #diybaby #diyonesie #craftsforbaby
  1. After downloading the cut files, import them into the Cricut Software. After creating a new project, select Upload Image. Select the file you wish to upload and it will automatically take you to the final upload screen, where you can name the file, then select Save. The SVG Files are sized so that they will automatically cut to the size you see in the photos, but if you want to change the size you can do so to fit your onesies the way you like.

  2. After selecting “Make It” Make sure to select the Mirror Mode on the cutting screen. Cut the design in your choice of heat transfer vinyl with the Iron On (for Easyweed HTV) or Iron On+ (for Glitter HTV) Setting on your Cricut, with the shiny side of the material down.

  3. Weed the additional material off of the backing material so that, looking down with the shiny side up, you can see your design with the correct orientation.Iron your onesie to remove any creases, then center the design over the top half of the onesie. Arrange the design shiny side up, then cover with parchment paper. Make sure to keep the parchment paper between the design and the iron.

DIY HTV Zero Fox Given Baby Onesie #zerofoxgiven #diybaby #diyonesie #craftsforbaby

4. Set your Iron to the second Highest setting. Cover the parchment paper and decal with your iron, pressing down firmly on the design. Using your iron like a small heat press, press the design for at least 20-30 seconds, repeating and overlapping the last position as you move across the design. Luckily, onesie decals are so small, you should be able to fit the whole decal under the iron in a single press!

5. Remove the parchment paper and peel the clear  backing from the decal, leaving the design on the onesie. I love pairing this design with yesterday’s onesie, the Cutest Critter in the Forest Onesie!

DIY HTV Zero Fox Given Baby Onesie #zerofoxgiven #diybaby #diyonesie #craftsforbaby

Check out our other Baby Onesie Projects for more DIY Baby Shower Gift Inspiration!

DIY HTV Zero Fox Given Baby Onesie #zerofoxgiven #diybaby #diyonesie #craftsforbaby

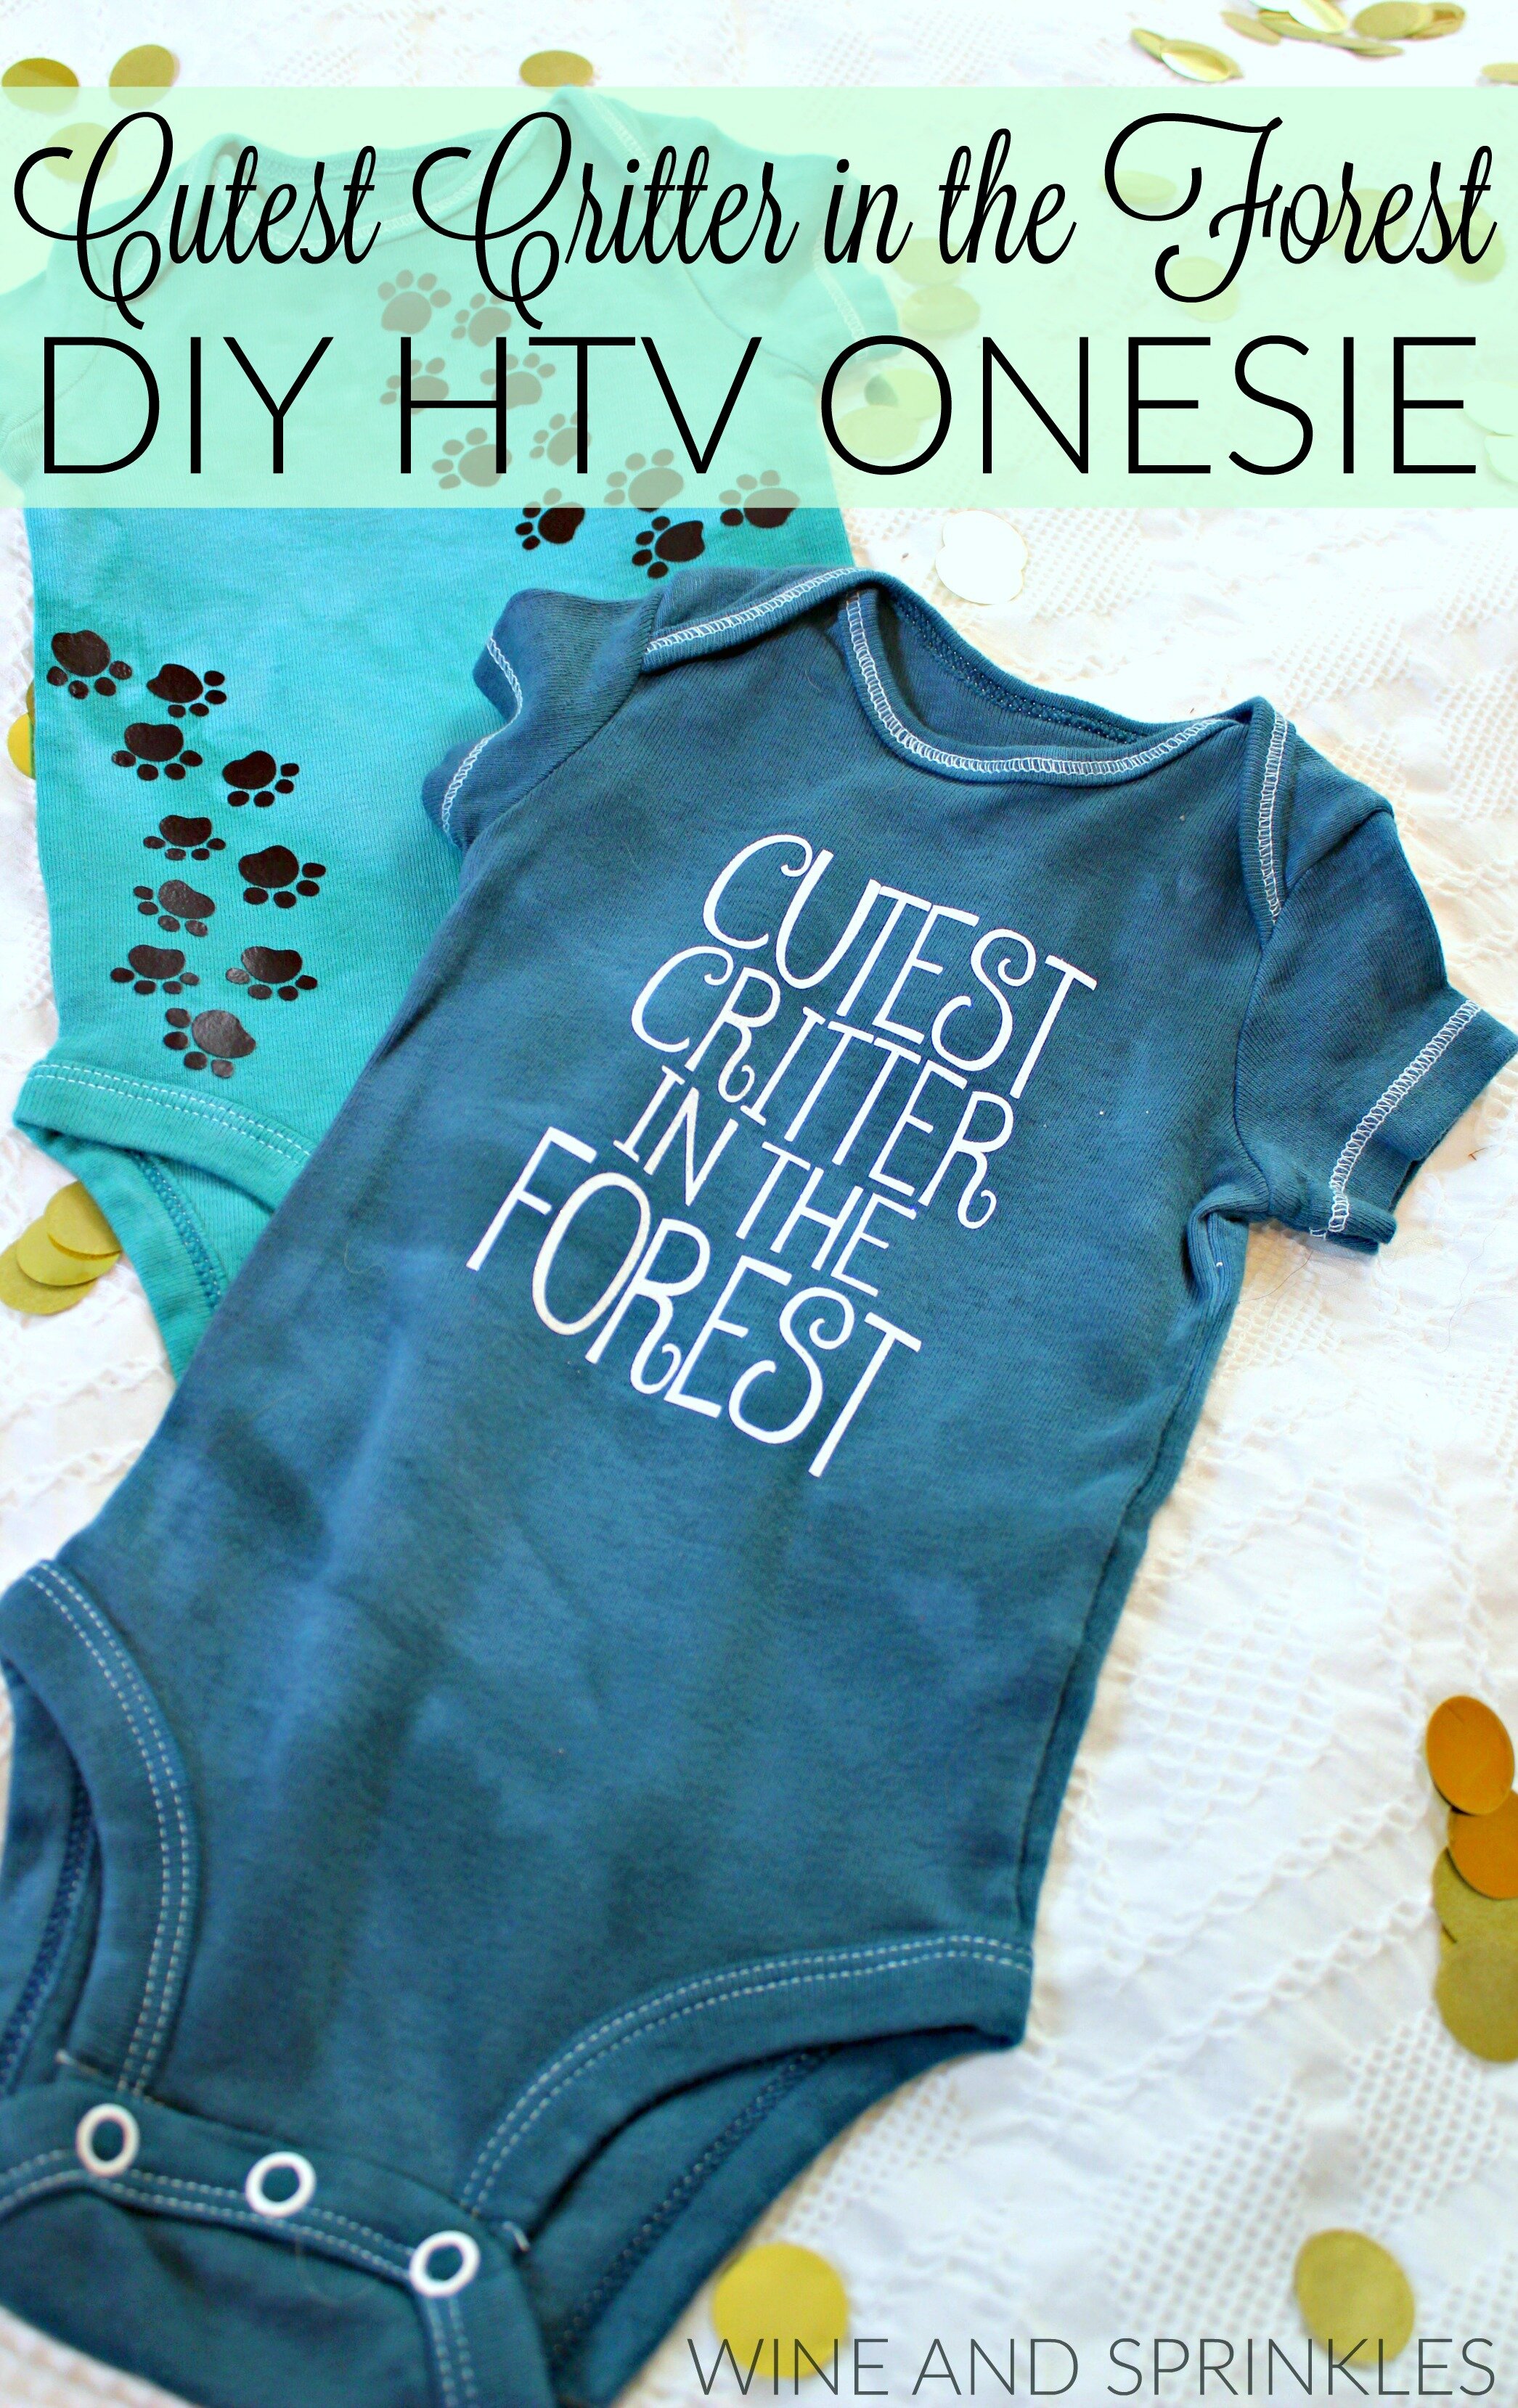
Cutest Critter in the Forest DIY HTV Onesie

This post contains affiliate links, meaning that if you click on a link I will recieve a small comission. This costs you nothing extra and I only promote products I use and love! You can read our full disclosure here

DIY HTV Cutest Critter in the Forest Baby Onesie #diybaby #diyonesie #craftsforbaby

Spring is in the air and all the babies are decked out in their adorable spring outfits! Springtime in a forest is my personal favorite, so in honor of spring I designed some woodland inspired onesies, starting with this Cutest Critter in the Forest Onesie!


I made the decal from White Glitter HTV on a Hand Dyed Blue Green Onesie and it turned out absolutely adorable! This project is a great beginner HTV transfer project; the decal is easy to cut, weed, and small enough to fit entirely under your iron in one press. I used the font Betty for the decal, which you can download for free from dafont.com

Make sure to check out our other Baby Onesie Projects for more DIY Baby Shower Gift Inspiration!

DIY HTV Cutest Critter in the Forest Baby Onesie #diybaby #diyonesie #craftsforbaby


DIY HTV Cutest Critter in the Forest Baby Onesie #diybaby #diyonesie #craftsforbaby
  1. After downloading the cut files, import them into the Cricut Software. After creating a new project, select Upload Image. Select the file you wish to upload and it will automatically take you to the final upload screen, where you can name the file, then select Save. The SVG Files are sized so that they will automatically cut to the size you see in the photos, but if you want to change the size you can do so to fit your onesies the way you like.

  2. After selecting “Make It” Make sure to select the Mirror Mode on the cutting screen. Cut the design in your choice of heat transfer vinyl with the Iron On (for Easyweed HTV) or Iron On+ (for Glitter HTV) Setting on your Cricut, with the shiny side of the material down.

  3. Weed the additional material off of the backing material so that, looking down with the shiny side up, you can see your design with the correct orientation.Iron your onesie to remove any creases, then center the design over the top half of the onesie. Arrange the design shiny side up, then cover with parchment paper. Make sure to keep the parchment paper between the design and the iron.

DIY HTV Cutest Critter in the Forest Baby Onesie #diybaby #diyonesie #craftsforbaby

4. Set your Iron to the second Highest setting. Cover the parchment paper and decal with your iron, pressing down firmly on the design. Using your iron like a small heat press, press the design for at least 20-30 seconds, repeating and overlapping the last position as you move across the design. Luckily, onesie decals are so small, you should be able to fit the whole decal under the iron in a single press!

5. Remove the parchment paper and peel the clear  backing from the decal, leaving the design on the onesie.

DIY HTV Cutest Critter in the Forest Baby Onesie #diybaby #diyonesie #craftsforbaby

Check out our other Baby Onesie Projects for more DIY Baby Shower Gift Inspiration!

DIY HTV Cutest Critter in the Forest Baby Onesie #diybaby #diyonesie #craftsforbaby

DIY HTV Groomsmen Getting Ready Koozies

This post contains affiliate links, meaning that if you click on a link I will recieve a small comission. This costs you nothing extra and I only promote products I use and love! You can read our full disclosure here

DIY HTV Groomsmen Getting Ready Koozies #willyoubemygroomsman #groomsman #svgfiles

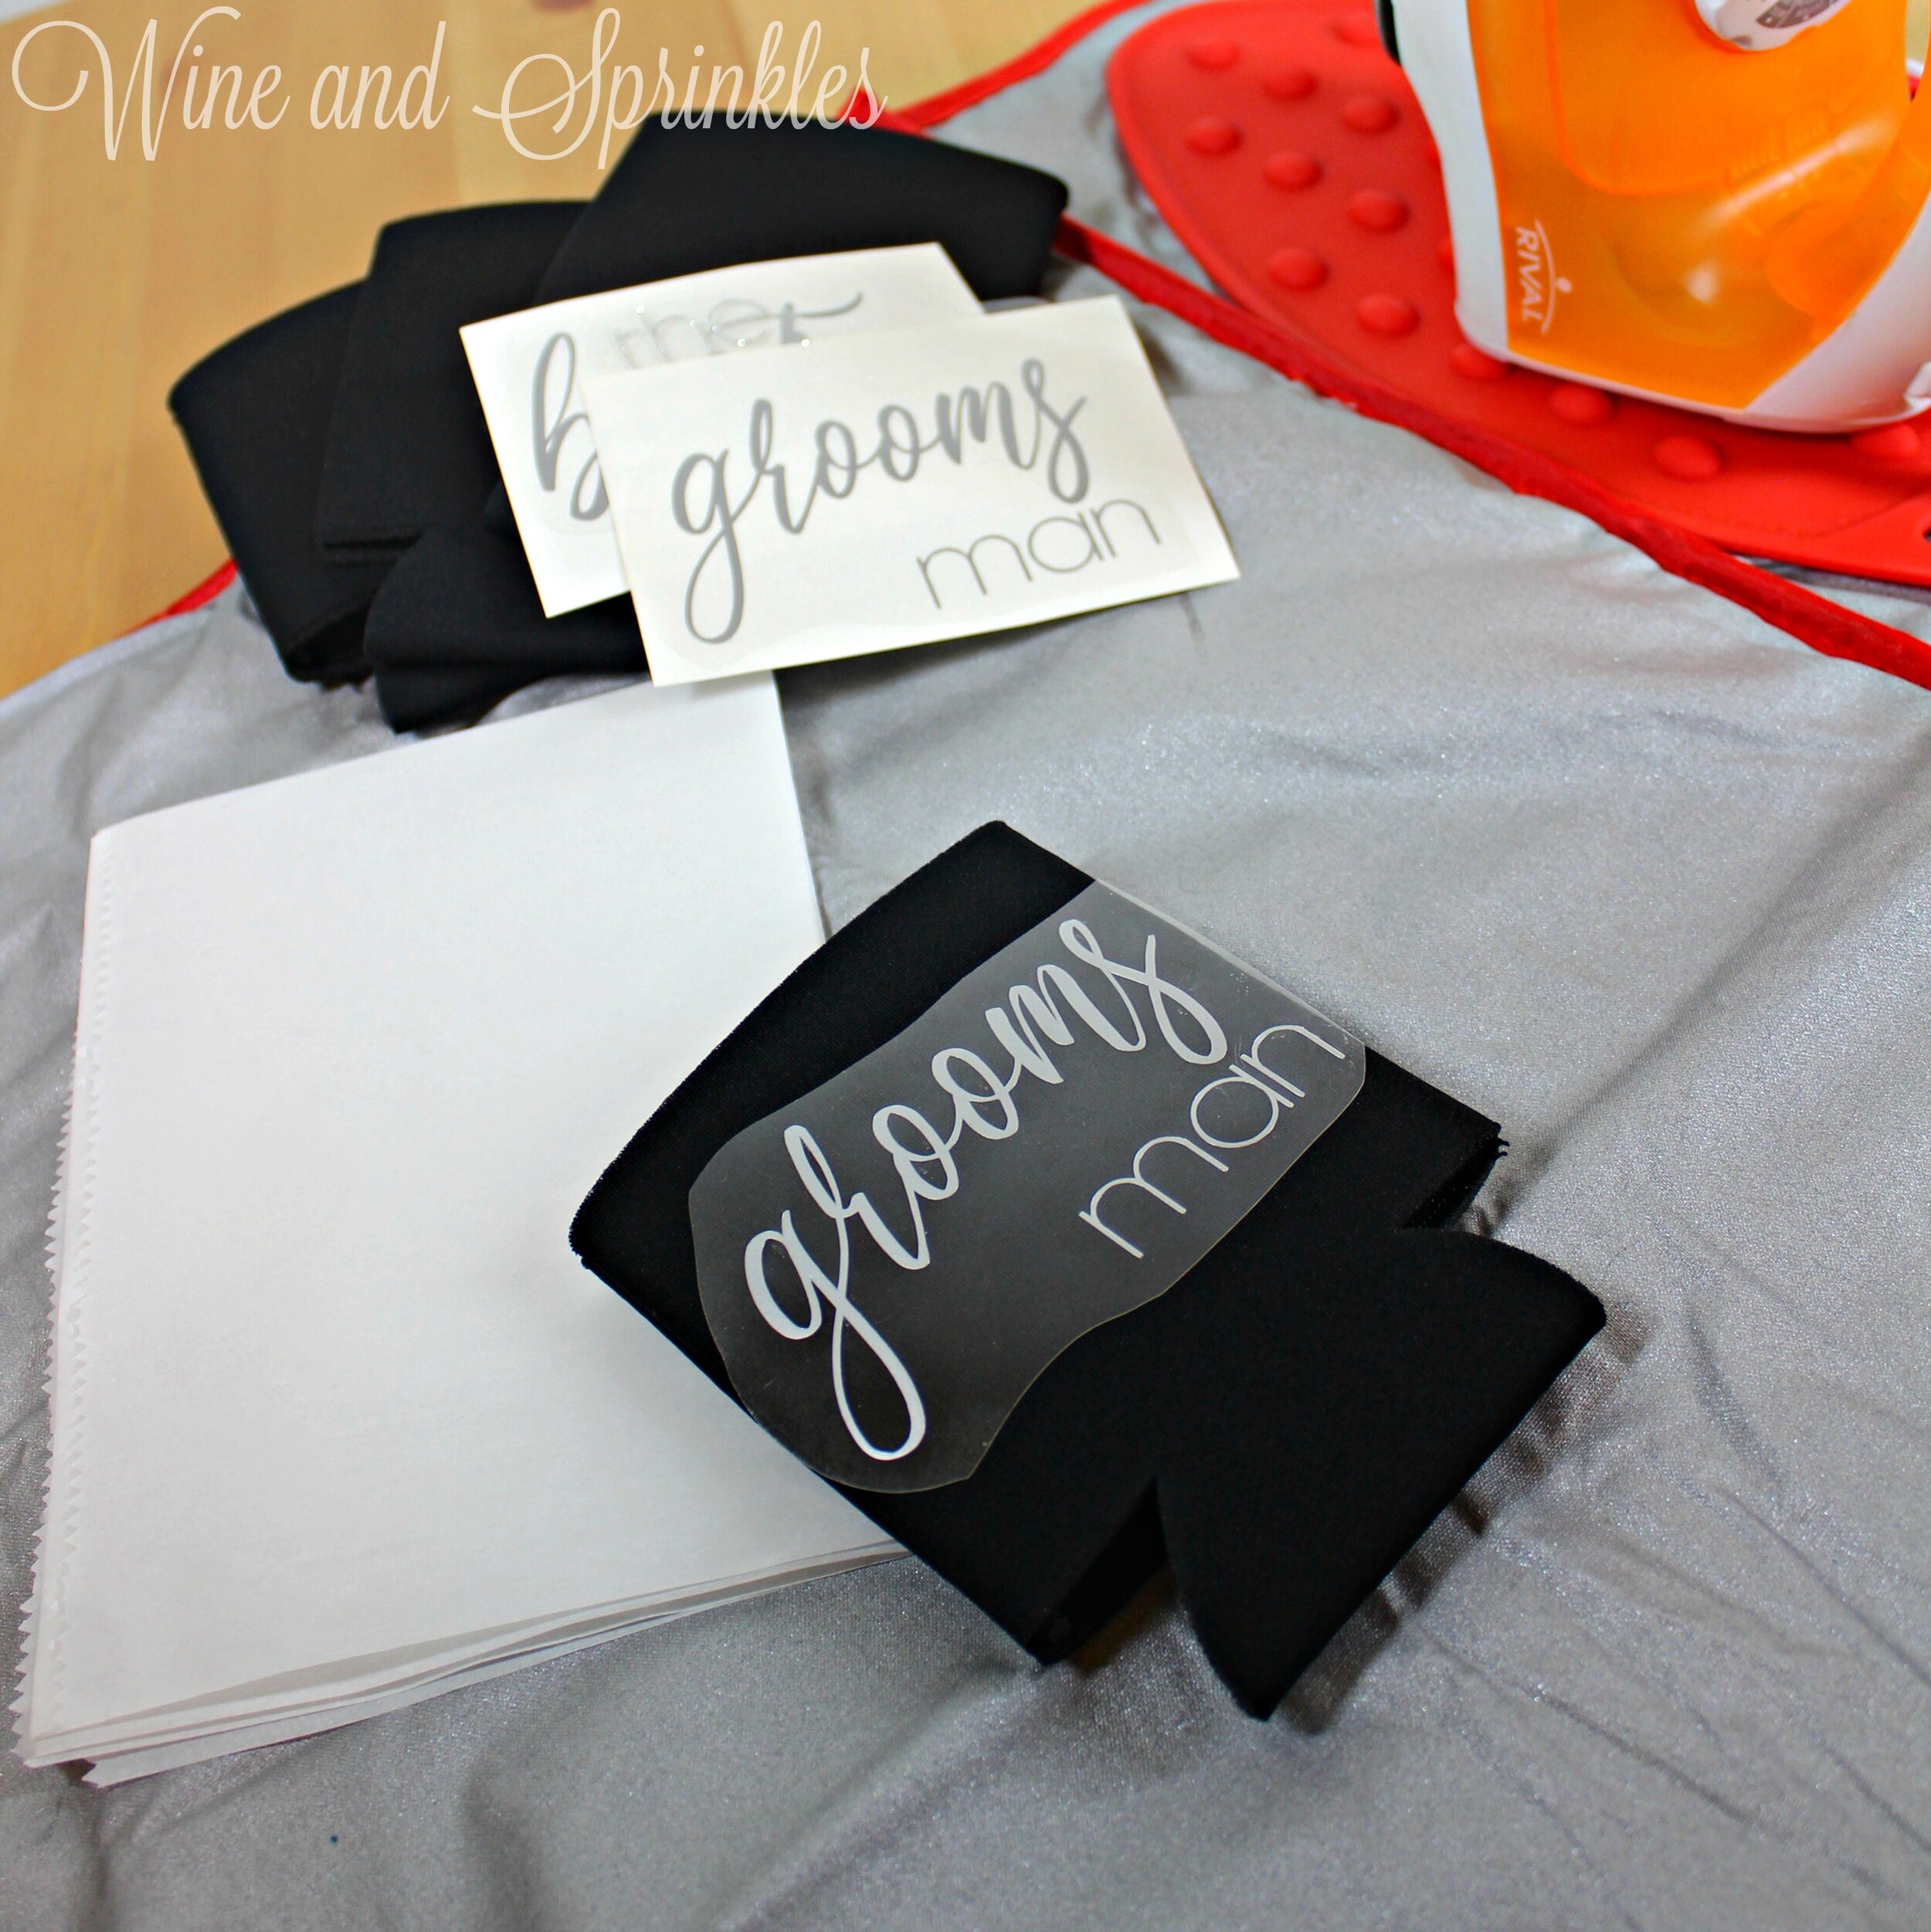
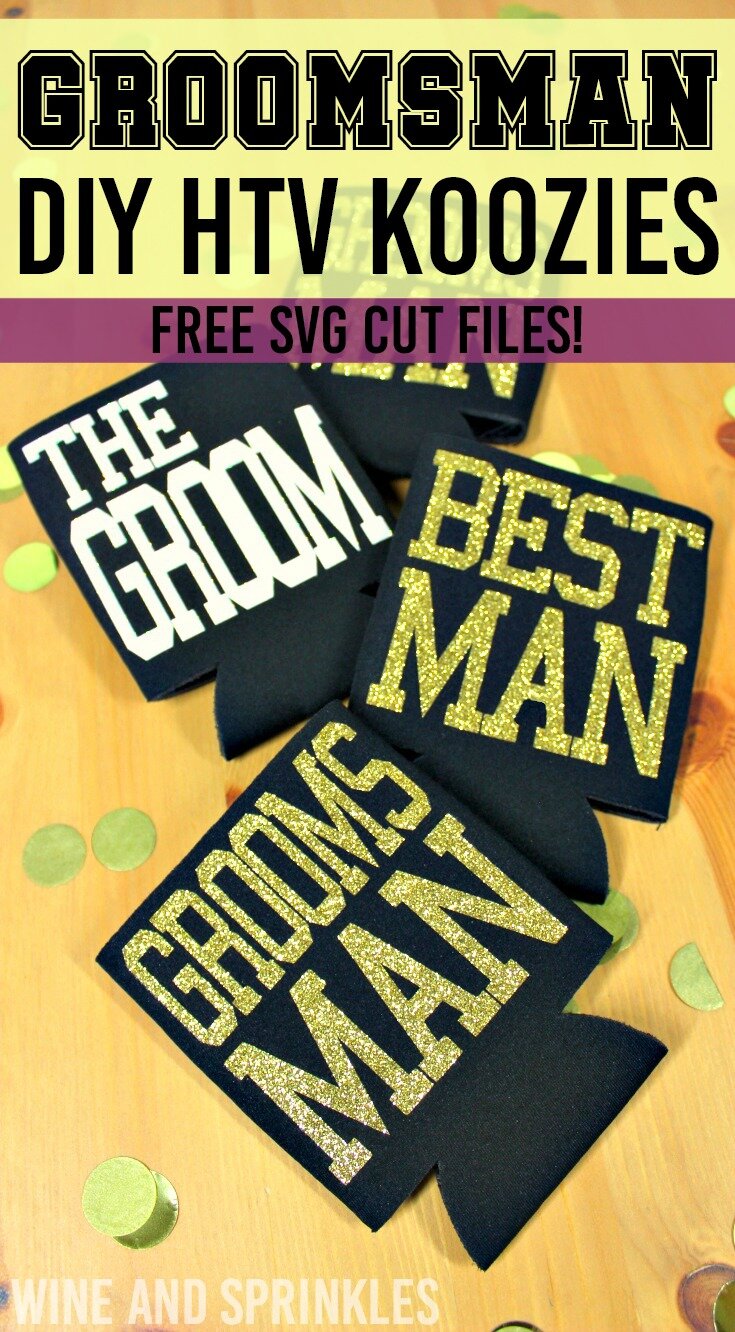
No better way to keep your drink cold and match as a group than koozies! These modern and classic groomsmen koozies are a great choice not only to mail as groomsmen proposals to any of your groom’s out of town bridal party members, but also for getting ready drinks for the boys on your wedding day.

I used Silver HTV  for the Groomsman and Best Man decals and Silver Glitter HTV for the Groom’s on Black Koozies, but it’s easy to completely personalize the color combination to your own wedding colors and metallics.


I used the fonts Clarissa and Generica designing these decals, which can be downloaded for free at dafont.com to further personalize the koozies with your groomsmen’s names, your wedding date, or anything you like!

DIY HTV Groomsmen Getting Ready Koozies #willyoubemygroomsman #groomsman #svgfiles


DIY HTV Groomsmen Getting Ready Koozies #willyoubemygroomsman #groomsman #svgfiles
  1. After downloading the cut files, import them into the Cricut Software. After creating a new project, select Upload Image. Select the file you wish to upload and it will automatically take you to the final upload screen, where you can name the file the select Save. The SVG Files are sized so that they will automatically cut to the size you see in the photos, but if you want to change the size you can do so to fit the koozies the way you like.

  2. After selecting “Make It” Make sure to select the Mirror Mode on the cutting screen. Cut the design(s) in your choice of heat transfer vinyl with the Iron On (for Easyweed Vinyl) or Iron On+ (for Glitter Vinyl) Setting on your Cricut, with the shiny side of the material down.

DIY HTV Groomsmen Getting Ready Koozies #willyoubemygroomsman #groomsman #svgfiles

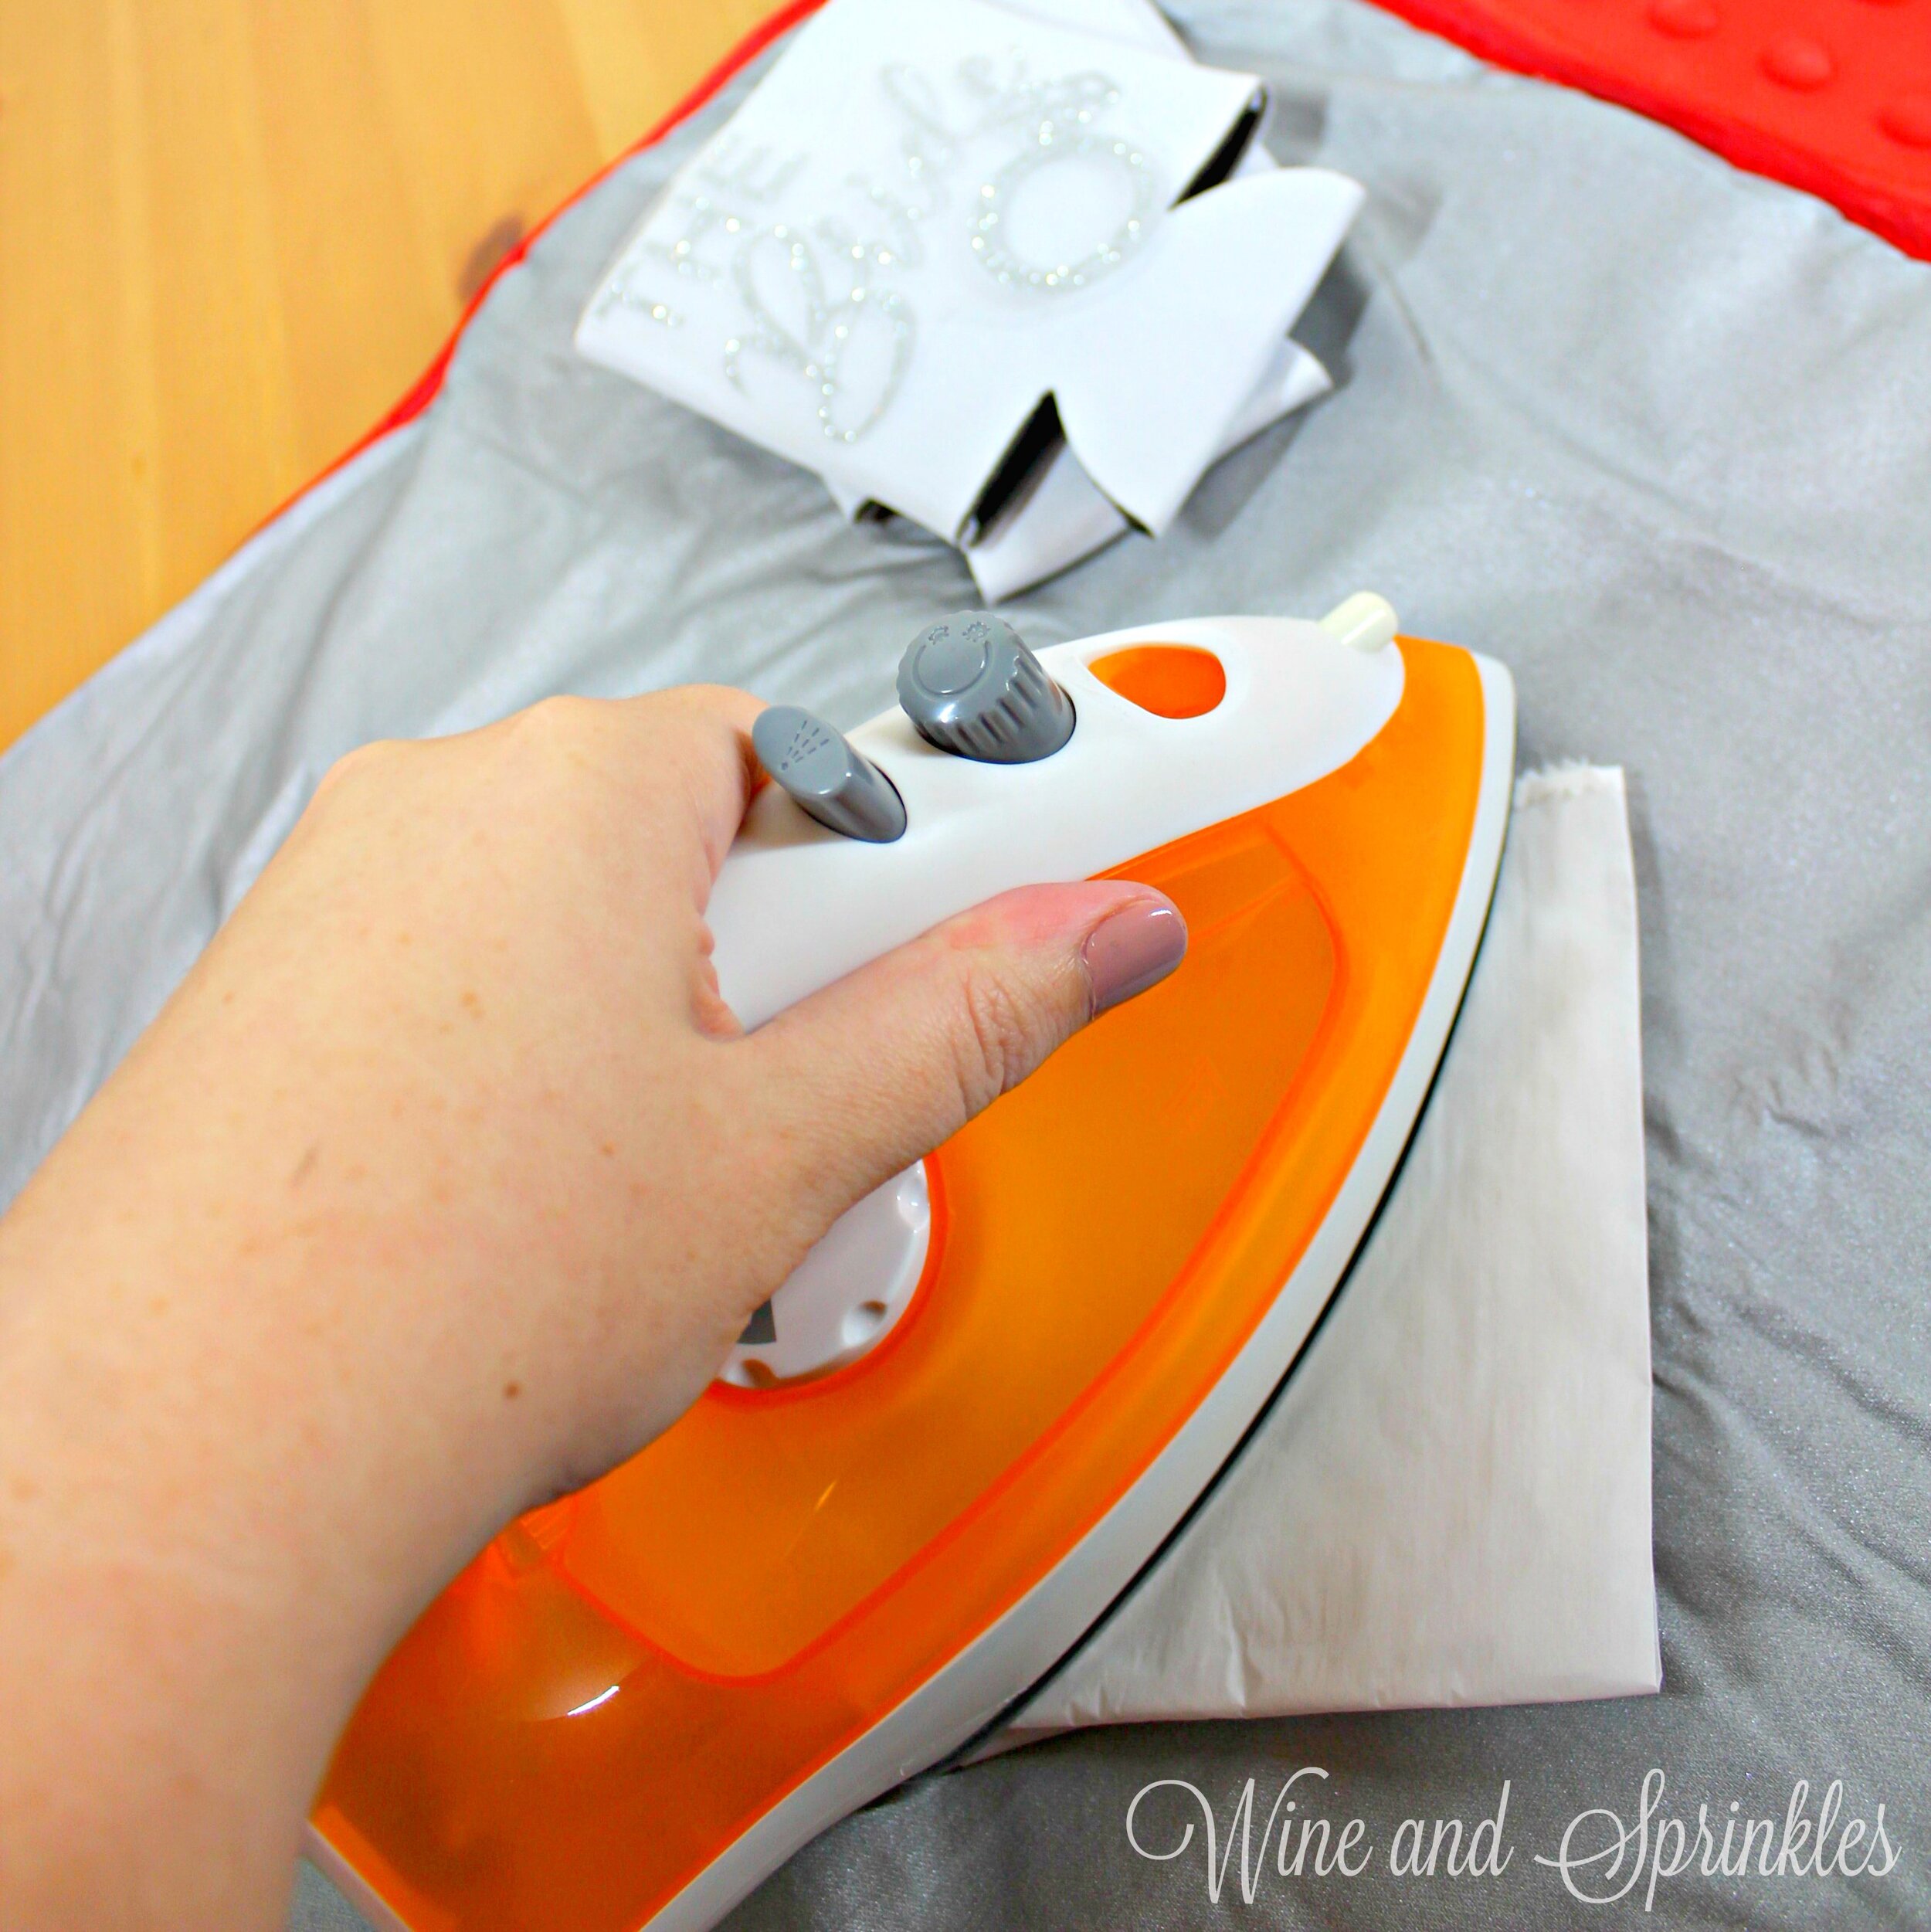
5. Set your Iron to the second Highest setting and press the iron down firmly on the design, not ironing but rather using it as a small heat press. The koozie design should be completely covered by the iron. Pressing the iron on the design for 15 - 30 seconds, mine took only 20 seconds. :) I’m always a little nervous about ironing koozies, so I check them every 5 seconds or so until the design has transferred. :)

6. Remove the backing from the design, leaving the design on the koozie. Repeat with all the remaining koozies.

3. Weed the additional material off of the backing material so that, looking down with the shiny side up, you can see your design with the correct orientation.

4. Center the design in the middle of the koozie. Arrange the design shiny side up, then cover with parchment paper. Make sure to keep the parchment paper between the design and the iron.

DIY HTV Groomsmen Getting Ready Koozies #willyoubemygroomsman #groomsman #svgfiles

Check out more of our Koozie Projects here! :)

DIY HTV Groomsmen Getting Ready Koozies #willyoubemygroomsman #groomsman #svgfiles

DIY HTV I Do Crew Koozies

This post contains affiliate links, meaning that if you click on a link I will recieve a small comission. This costs you nothing extra and I only promote products I use and love! You can read our full disclosure here

DIY HTV I Do Crew Bridesmaid Koozies #bridesmaid #bridesmaidproposal #weddingkoozie

We don’t want to leave our ladies out of the koozie fun, so I had to make a set with my favorite bridal party saying of the year! These I Do Crew Koozies are an adorable choice for your maids and even better for including lots of ladies in your wedding group if you want a small group of Bridesmaids! 

I made the I Do Crew Decals in Lilac Easyweed HTV and the Bride Decal in Silver Glitter HTV on White Neoprene Koozies and they turned out so cute! Check out our other Koozie Projects Here for other cute koozies you can make for Bridal Party Proposals, Bachelorette Parties, or even as Wedding Favors!

DIY HTV I Do Crew Bridesmaid Koozies #bridesmaid #bridesmaidproposal #weddingkoozie


DIY HTV I Do Crew Bridesmaid Koozies #bridesmaid #bridesmaidproposal #weddingkoozie
  1. After downloading the cut files, import them into the Cricut Software. After creating a new project, select Upload Image. Select the file you wish to upload and it will automatically take you to the final upload screen, where you can name the file the select Save. The SVG Files are sized so that they will automatically cut to the size you see in the photos, but if you want to change the size you can do so to fit the koozies the way you like.

  2. After selecting “Make It” Make sure to select the Mirror Mode on the cutting screen. Cut the design(s) in your choice of heat transfer vinyl with the Iron On (for Easyweed Vinyl) or Iron On+ (for Glitter Vinyl) Setting on your Cricut, with the shiny side of the material down.

DIY HTV I Do Crew Bridesmaid Koozies #bridesmaid #bridesmaidproposal #weddingkoozie

3. Weed the additional material off of the backing material so that, looking down with the shiny side up, you can see your design with the correct orientation.

4. Center the design in the middle of the koozie. Arrange the design shiny side up, then cover with parchment paper. Make sure to keep the parchment paper between the design and the iron.

DIY HTV I Do Crew Bridesmaid Koozies #bridesmaid #bridesmaidproposal #weddingkoozie

5. Set your Iron to the second Highest setting and press the the iron down firmly on the design, not ironing but rather using it as a small heat press. The koozie design should be completely covered by the iron. Pressing the iron on the design for 15 - 30 seconds, mine took only 20 seconds. :) I’m always a little nervous ironing koozies, so I check them every 5 second or so until the design has transferred. :)

6. Remove the backing from the design, leaving the design on the koozie. Repeat with all the remaining koozies.

DIY HTV I Do Crew Bridesmaid Koozies #bridesmaid #bridesmaidproposal #weddingkoozie
 
DIY HTV I Do Crew Bridesmaid Koozies #bridesmaid #bridesmaidproposal #weddingkoozie

DIY HTV Sporty Groomsman Wedding Koozies

This post contains affiliate links, meaning that if you click on a link I will recieve a small comission. This costs you nothing extra and I only promote products I use and love! You can read our full disclosure here

DIY HTV Sporty Groomsman Wedding Koozies #groomsman #willyoubemygroomsman #svgfiles

It’s almost Superbowl Time! While I’m not the sportiest of ladies myself, I can appreciate a good sporty themed koozie, and your Groomsmen are sure to enjoy one too! These Sporty Groomsmen Koozies are the perfect accessory for your best boys to sip beers for the game, have wedding day drinks with the groom, or to be invited to the bridal party!


I used Old Gold Glitter HTV  for the Groomsman and Best Man decals and White Glitter HTV for the Groom’s on Black Koozies, but it would be awesome to make them in your boy’s favorite team colors!

DIY HTV Sporty Groomsman Wedding Koozies #groomsman #willyoubemygroomsman #svgfiles


Download Cut Files Here!
DIY HTV Sporty Groomsman Wedding Koozies #groomsman #willyoubemygroomsman #svgfiles
  1. After downloading the cut files, import them into the Cricut Software. After creating a new project, select Upload Image. Select the file you wish to upload and it will automatically take you to the final upload screen, where you can name the file the select Save. The SVG Files are sized so that they will automatically cut to the size you see in the photos, but if you want to change the size you can do so to fit the koozies the way you like.

DIY HTV Sporty Groomsman Wedding Koozies #groomsman #willyoubemygroomsman #svgfiles

2. After selecting “Make It” Make sure to select the Mirror Mode on the cutting screen. Cut the design(s) in your choice of heat transfer vinyl with the Iron On (for Easyweed Vinyl) or Iron On+ (for Glitter Vinyl) Setting on your Cricut, with the shiny side of the material down. 

3. Weed the additional material off of the backing material so that, looking down with the shiny side up, you can see your design with the correct orientation.

4. Center the design in the middle of the koozie. Arrange the design shiny side up, then cover with parchment paper. Make sure to keep the parchment paper between the design and the iron.

5. Set your Iron to the second Highest setting and press the the iron down firmly on the design, not ironing but rather using it as a small heat press. The koozie design should be completely covered by the iron. Pressing the iron on the design for 15 - 30 seconds, mine took only 20 seconds. :) I’m always a little nervous ironing koozies, so I check them every 5 seconds or so until the design has transferred. :)

DIY HTV Sporty Groomsman Wedding Koozies #groomsman #willyoubemygroomsman #svgfiles

6. Remove the backing from the design, leaving the design on the koozie. Repeat with all the remaining koozies.

Check out more of our Koozie Projects here! :)

DIY HTV Sporty Groomsman Wedding Koozies #groomsman #willyoubemygroomsman #svgfiles

DIY HTV You are my Sunshine Newborn Baby Onesie

This post contains affiliate links, meaning that if you click on a link I will recieve a small comission. This costs you nothing extra and I only promote products I use and love! You can read our full disclosure here

DIY HTV You are my Sunshine Newborn Baby Onesie for Baby Shower Gifts #onesies #babygift #babyshower

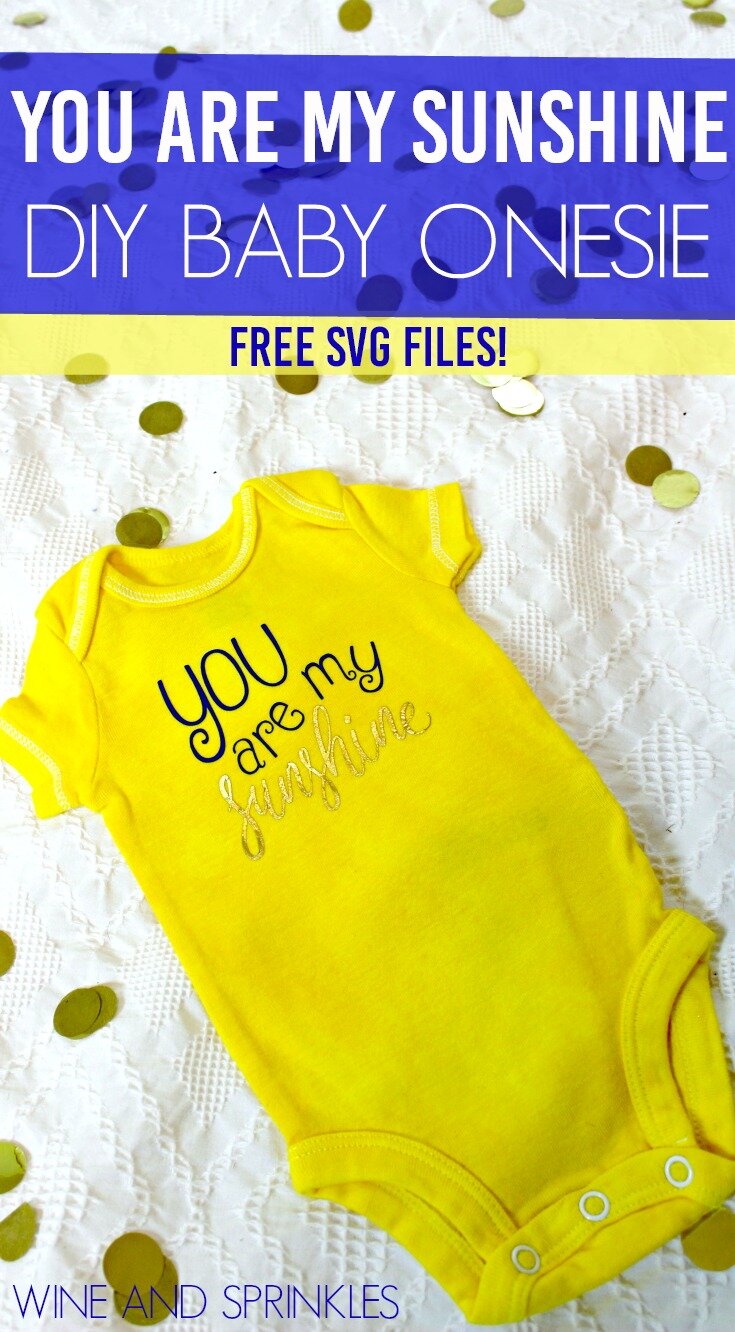
Growing up, one of our favorite childhood songs was “You are my Sunshine” and I think it is such a fitting saying for a new baby coming into your life. Despite the sleepiness and tough times, your baby is still a little ray of sunshine! So for the last (newborn) onesie I designed, I made this beautiful “You are my Sunshine” two toned onesie!


The decal was made in Turquoise Easyweed HTV for the top lettering and Gold Metal Foil HTV for the bottom lettering on a Hand Dyed Yellow Onesie. I absolutely love the onesie and decal color combination, bright and cheerful just like your little ray of sunshine! If you wish to use them for other projects, this decal was made with the fonts Betty and Clarissa, both of which are available at dafont.com!

DIY HTV You are my Sunshine Newborn Baby Onesie for Baby Shower Gifts #onesies #babygift #babyshower

Make sure to check out our other Baby Onesie Projects for more DIY Baby Shower Gift Inspiration!


DIY HTV You are my Sunshine Newborn Baby Onesie for Baby Shower Gifts #onesies #babygift #babyshower
  1. After downloading the cut files, import them into the Cricut Software. After creating a new project, select Upload Image. Select the file you wish to upload and it will automatically take you to the final upload screen, where you can name the file, then select Save. The SVG Files are sized so that they will automatically cut to the size you see in the photos, but if you want to change the size you can do so to fit your onesies the way you like.

  2. After selecting “Make It” Make sure to select the Mirror Mode on the cutting screen. Cut the design in your choice of heat transfer vinyl with the Iron On (for Easyweed and Metal Look HTV) or Iron On+ (for Glitter HTV) Setting on your Cricut, with the shiny side of the material down. Repeat for the remaining color of your decal.

DIY HTV You are my Sunshine Newborn Baby Onesie for Baby Shower Gifts #onesies #babygift #babyshower

3. Weed the additional material off of the backing material so that, looking down with the shiny side up, you can see your design with the correct orientation.Iron your onesie to remove any creases, then center the design over the top half of the onesie, shiny side up. Start by arranging the whole design (both colors) so that you can see how they will fit together, with the “Sunshine” Decal under the other text decal. Once the design is placed to your satisfaction, remove the “You are my” lettering, leaving only the “Sunshine” Decal to transfer first.  Cover with parchment paper, making sure to keep the parchment paper between the design and the iron.

DIY HTV You are my Sunshine Newborn Baby Onesie for Baby Shower Gifts #onesies #babygift #babyshower

4. Set your Iron to the second Highest setting. Cover the parchment paper and decal with your iron, pressing down firmly on the design. Using your iron like a small heat press, press the design for at least 20-30 seconds for Easyweed or Glitter HTV or 10-15 seconds for Metal Look HTV, repeating and overlapping the last position as you move across the design. Luckily, onesie decals are so small, you should be able to fit the whole decal under the iron in a single press!

5. Remove the parchment paper and peel the clear  backing from the decal, leaving the design on the onesie. Now, arrange the second decal back on the onesie, fitting the text to run along the top of the “Sunshine” lettering. Cover with parchment paper and again press the design for 20-30 seconds, checking every 10 seconds until the second design is adhered. I was worried about Foil HTV I had already transferred, but it didn’t seem to hurt it by repressing it with the iron.

DIY HTV You are my Sunshine Newborn Baby Onesie for Baby Shower Gifts #onesies #babygift #babyshower

6. Remove the parchment paper and peel the clear backing from the decal, leaving the end of the design on the onesie.

DIY HTV You are my Sunshine Newborn Baby Onesie for Baby Shower Gifts #onesies #babygift #babyshower

Check out our other Baby Onesie Projects for more DIY Baby Shower Gift Inspiration!

DIY HTV You are my Sunshine Newborn Baby Onesie for Baby Shower Gifts #onesies #babygift #babyshower

DIY HTV Brand Spankin New Newborn Baby Onesie

This post contains affiliate links, meaning that if you click on a link I will recieve a small comission. This costs you nothing extra and I only promote products I use and love! You can read our full disclosure here

DIY HTV Brand Spankin New Newborn Baby Onesie for Baby Shower Gifts #onesies #babygift #babyshower

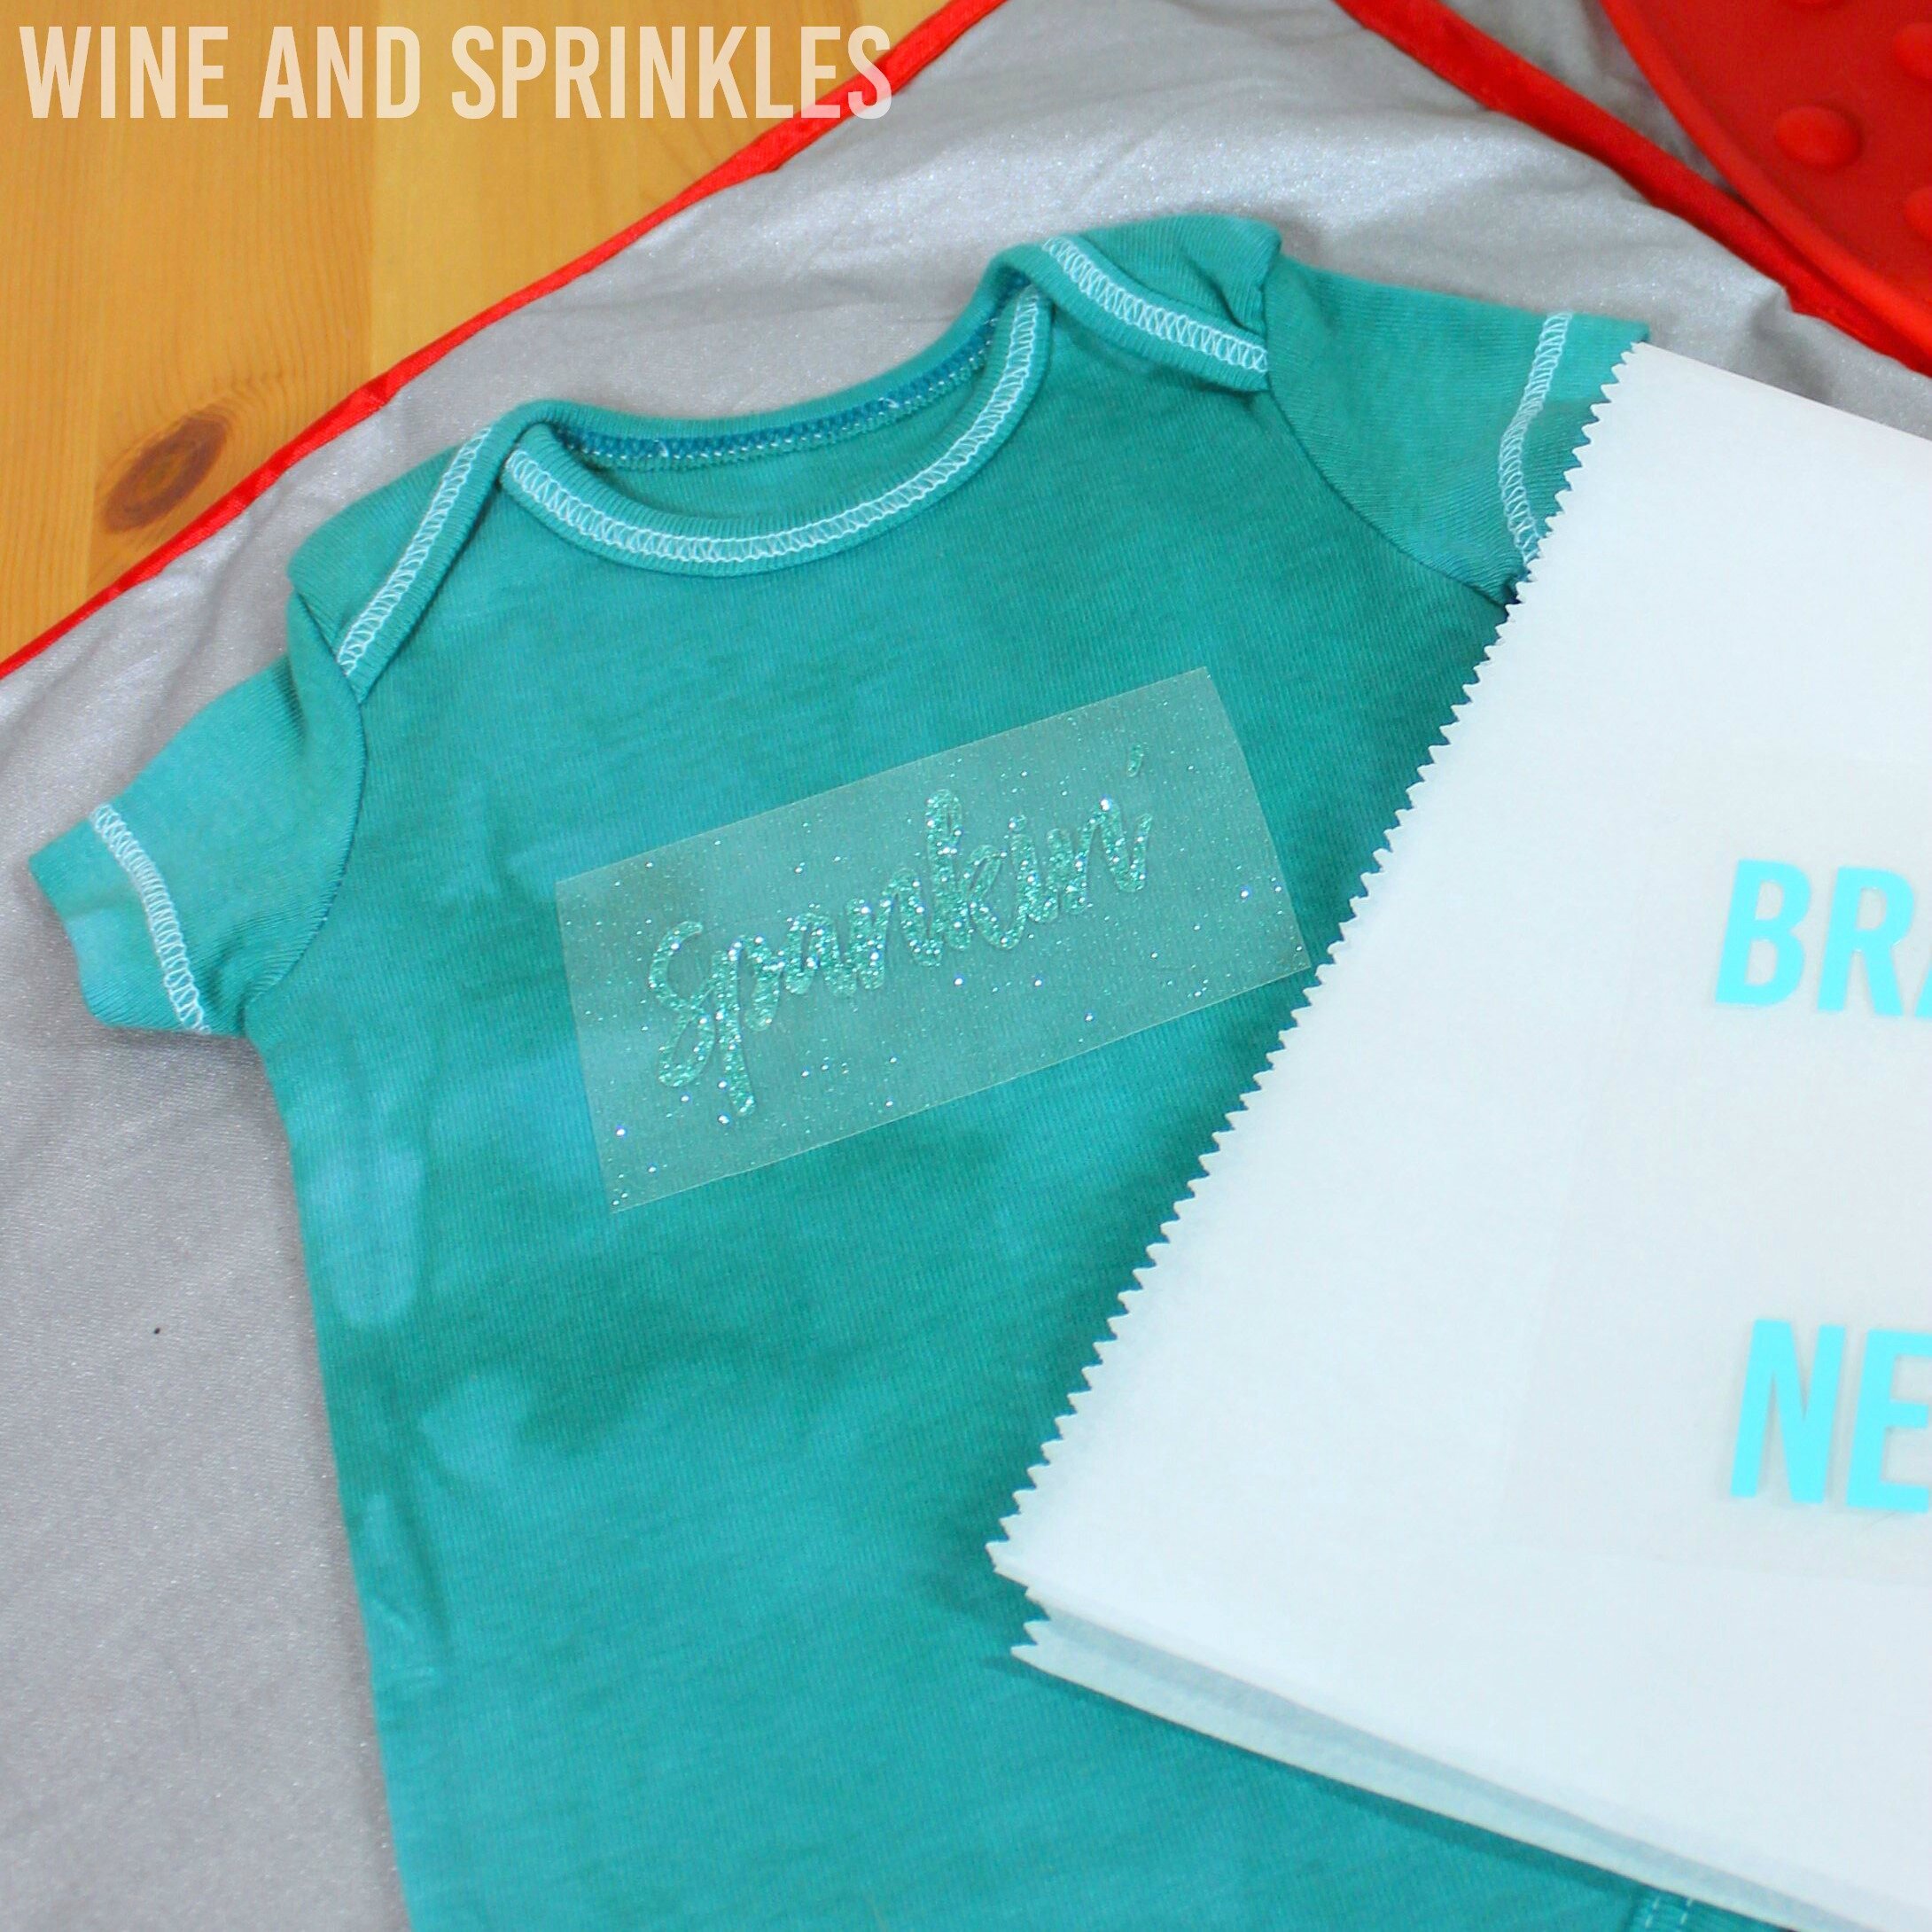
There are so many cute designs and sayings to make for onesies, I had to include this adorable Brand Spankin’ New onesie in my decal collection! This two toned onesie is a super fun and easy choice to gift to any “Brand Spankin” New Born you know!

I made the decal in Tiffany Blue Easyweed HTV and Silver Glitter HTV on a Hand Dyed Emerald Onesie and it came out adorable! The fonts used were Bebas Kai and Passenger Script, in case you want to use them to design your own projects!


Make sure to check out our other Baby Onesie Projects for more DIY Baby Shower Gift Inspiration!

DIY HTV Brand Spankin New Newborn Baby Onesie for Baby Shower Gifts #onesies #babygift #babyshower


DIY HTV Brand Spankin New Newborn Baby Onesie for Baby Shower Gifts #onesies #babygift #babyshower
  1. After downloading the cut files, import them into the Cricut Software. After creating a new project, select Upload Image. Select the file you wish to upload and it will automatically take you to the final upload screen, where you can name the file, then select Save. The SVG Files are sized so that they will automatically cut to the size you see in the photos, but if you want to change the size you can do so to fit your onesies the way you like.

  2. After selecting “Make It” Make sure to select the Mirror Mode on the cutting screen. Cut the design in your choice of heat transfer vinyl with the Iron On (for Easyweed HTV) or Iron On+ (for Glitter HTV) Setting on your Cricut, with the shiny side of the material down.

DIY HTV Brand Spankin New Newborn Baby Onesie for Baby Shower Gifts #onesies #babygift #babyshower

3. Weed the additional material off of the backing material so that, looking down with the shiny side up, you can see your design with the correct orientation.Iron your onesie to remove any creases, then center the design over the top half of the onesie, shiny side up.. Start by arranging the whole design (both colors) so that you can see how they will fit together, with the “Spankin” Decal under the other text decal. Once the design is placed to your satisfaction, remove the “Brand - New” lettering, leaving only the “Spankin” Decal to transfer first.  Cover with parchment paper, making sure to keep the parchment paper between the design and the iron.

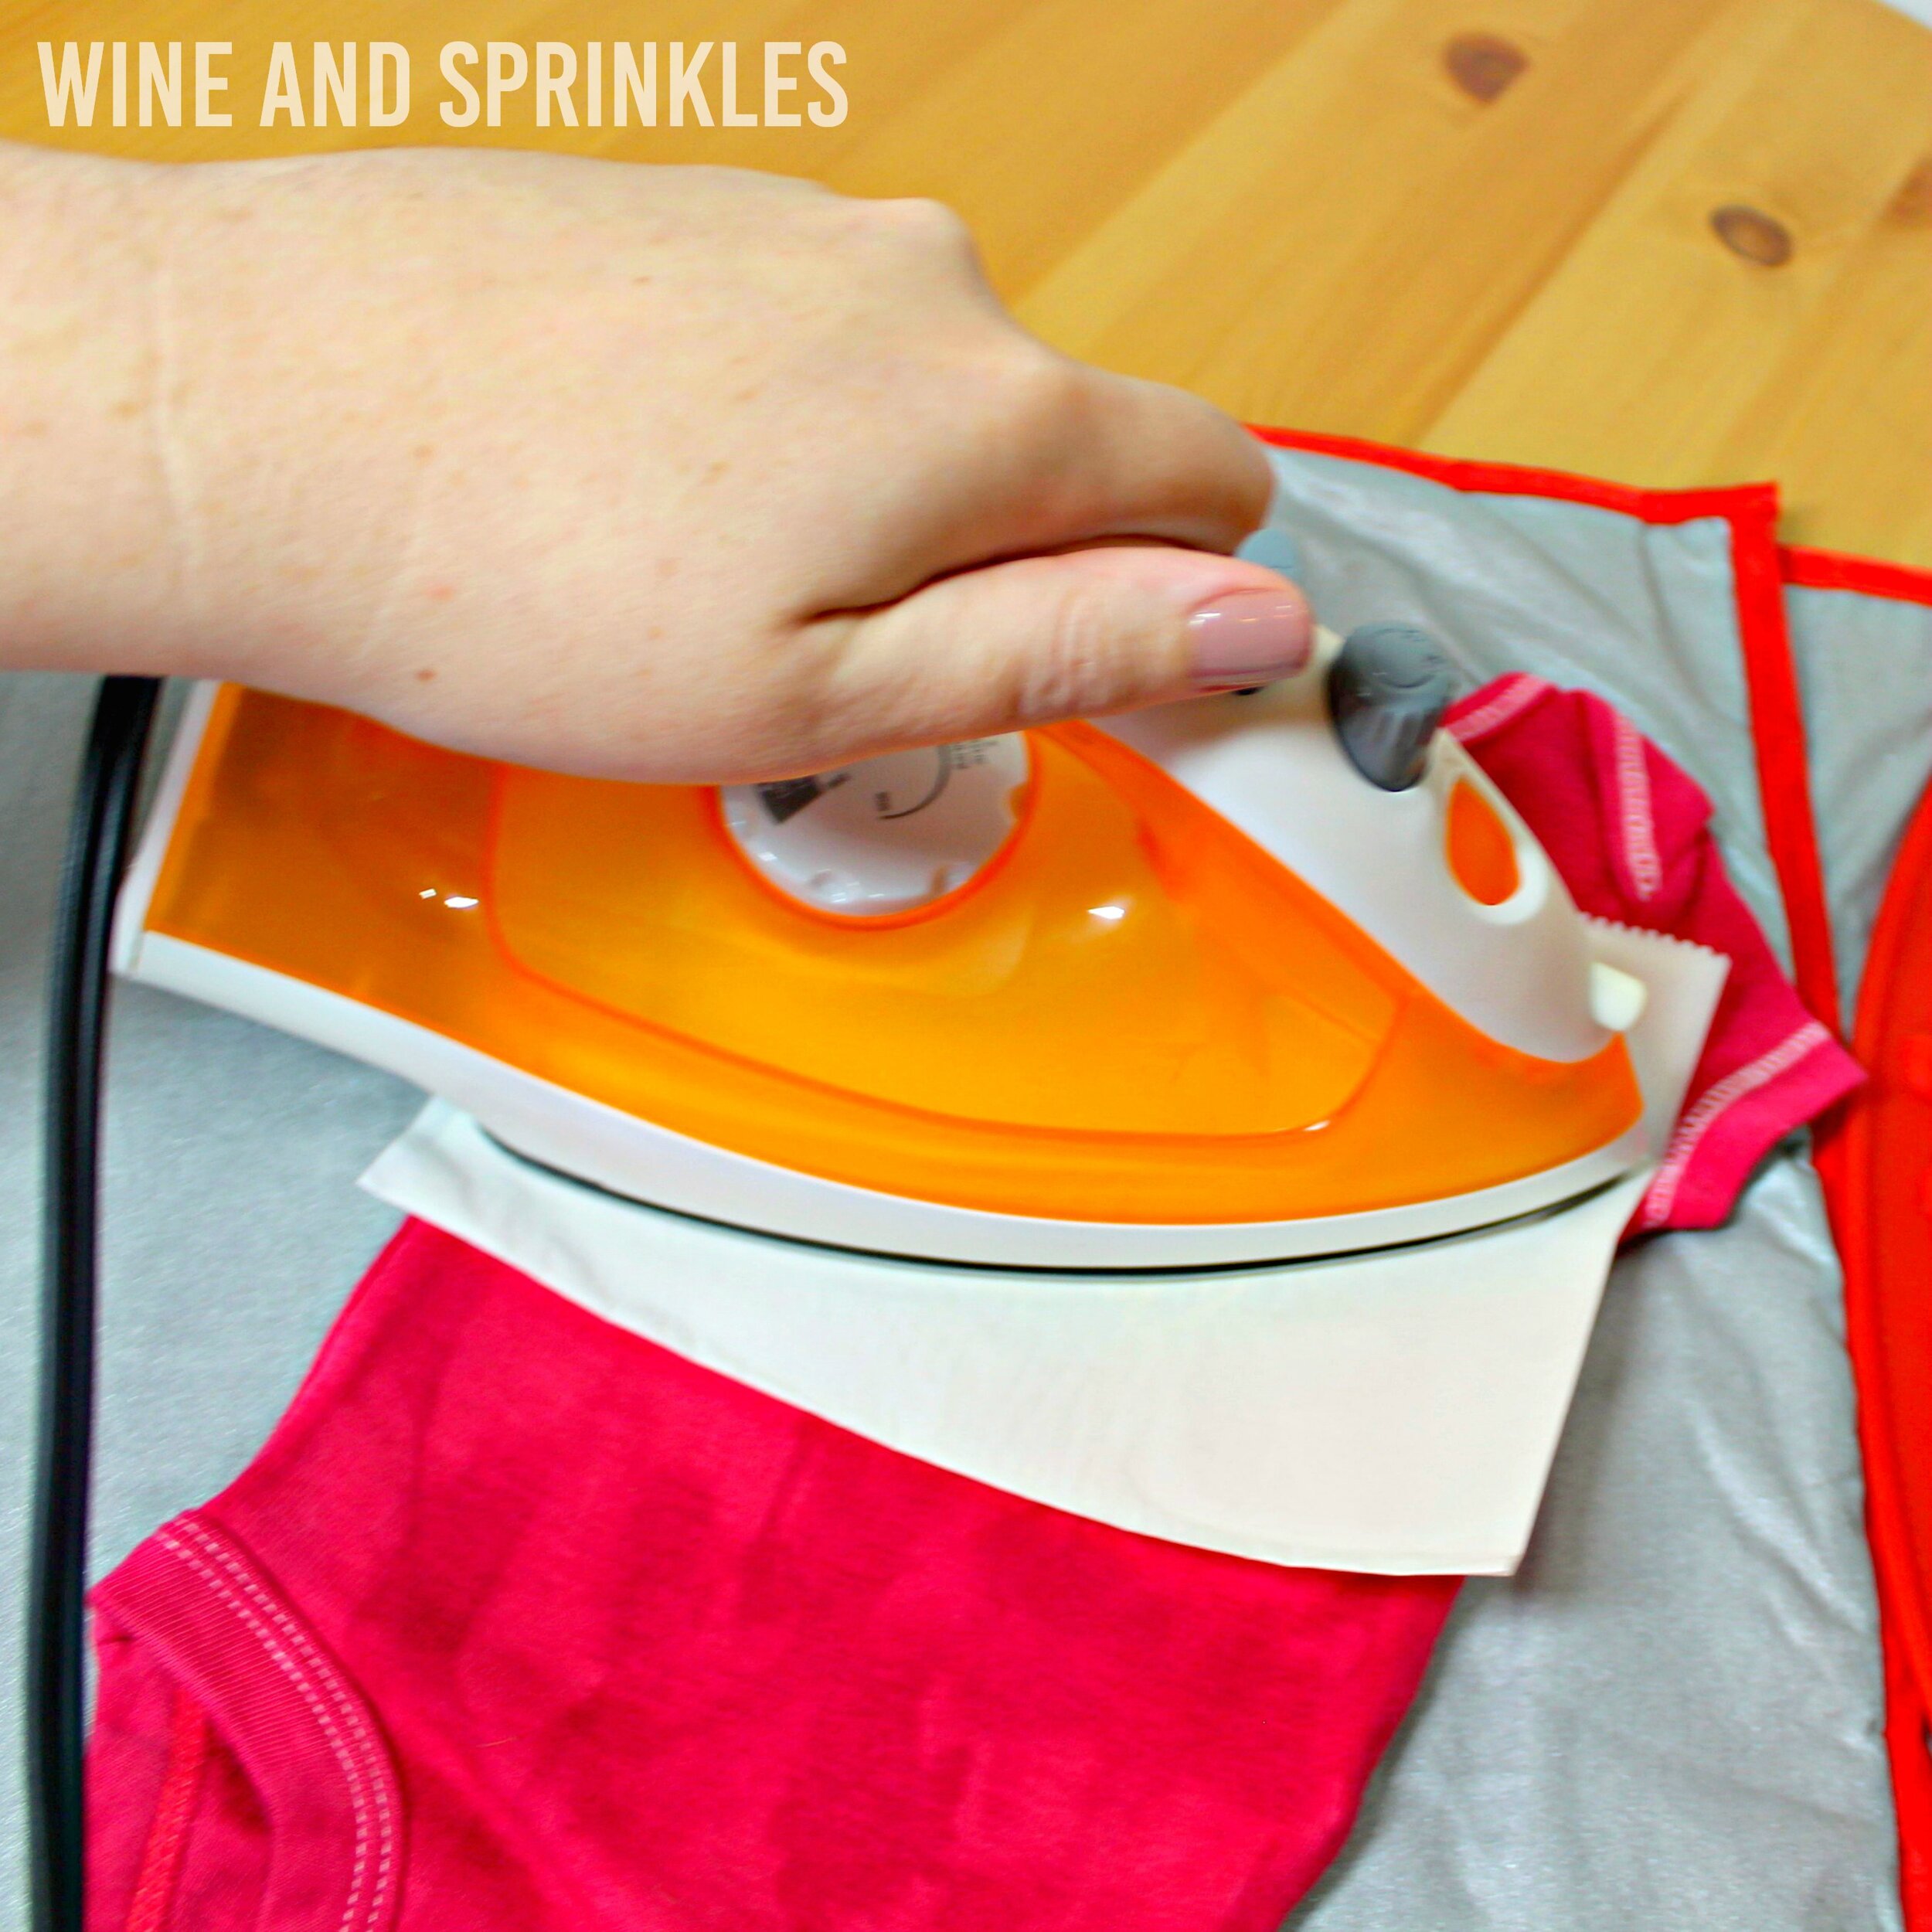
4. Set your Iron to the second Highest setting. Cover the parchment paper and decal with your iron, pressing down firmly on the design. Using your iron like a small heat press, press the design for at least 20-30 seconds, repeating and overlapping the last position as you move across the design. Luckily, onesie decals are so small, you should be able to fit the whole decal under the iron in a single press!

DIY HTV Brand Spankin New Newborn Baby Onesie for Baby Shower Gifts #onesies #babygift #babyshower

5. Remove the parchment paper and peel the clear  backing from the decal, leaving the design on the onesie. Now, arrange the second decal back on the onesie, sandwiching the “Spankin” decal between “Brand” and “New.” Cover with parchment paper and again press the design for at least 20-30 seconds.

DIY HTV Brand Spankin New Newborn Baby Onesie for Baby Shower Gifts #onesies #babygift #babyshower

6. Remove the parchment paper and peel the clear backing from the decal, leaving the end of the design on the onesie.

I paired this onesie with our Hello World Onesie for a fun blue and green onesie combo, which would you pick? I love pairing onesies together or creating sets, so try pairing this with any of our other Onesie Designs to make a handmade and heartfelt gift for any newborn in your life!

DIY HTV Brand Spankin New Newborn Baby Onesie for Baby Shower Gifts #onesies #babygift #babyshower

DIY HTV New to the Crew Newborn Baby Onesie

This post contains affiliate links, meaning that if you click on a link I will recieve a small comission. This costs you nothing extra and I only promote products I use and love! You can read our full disclosure here

DIY HTV New to the Crew Newborn Baby Onesie for Baby Shower Gifts #onesies #babygift #babyshower

Make sure to check out our other Baby Onesie Projects for more DIY Baby Shower Gift Inspiration!

My sister’s favorite halloween costume is being a pirate, so much so she's done it for the last several years! So her baby can join the fun, I designed this “New to the Crew” Onesie to celebrate her newest crew member! Regardless of your seafaring ways, this onesie is an adorable choice to add to any newborn ensemble!

In keeping with our pirate theme, I made the decal from Gold Metal Foil HTV on a Hand Dyed Red Onesie, perfect for a tiny future pirate! This project is a great beginner HTV transfer project; the decal is easy to cut, weed, and small enough to fit entirely under your iron in one press.

DIY HTV New to the Crew Newborn Baby Onesie for Baby Shower Gifts #onesies #babygift #babyshower


Download Cut Files Here!
DIY HTV New to the Crew Newborn Baby Onesie for Baby Shower Gifts #onesies #babygift #babyshower
  1. After downloading the cut files, import them into the Cricut Software. After creating a new project, select Upload Image. Select the file you wish to upload and it will automatically take you to the final upload screen, where you can name the file, then select Save. The SVG Files are sized so that they will automatically cut to the size you see in the photos, but if you want to change the size you can do so to fit your onesies the way you like.

  2. After selecting “Make It” Make sure to select the Mirror Mode on the cutting screen. Cut the design in your choice of heat transfer vinyl with the Iron On (for Easyweed HTV) or Iron On+ (for Glitter HTV) Setting on your Cricut, with the shiny side of the material down.

DIY HTV New to the Crew Newborn Baby Onesie for Baby Shower Gifts #onesies #babygift #babyshower

3. Weed the additional material off of the backing material so that, looking down with the shiny side up, you can see your design with the correct orientation.Iron your onesie to remove any creases, then center the design over the top half of the onesie. Arrange the design shiny side up, then cover with parchment paper. Make sure to keep the parchment paper between the design and the iron.

4. Set your Iron to the second Highest setting. Cover the parchment paper and decal with your iron, pressing down firmly on the design. Using your iron like a small heat press, press the design for 10-15 seconds for the Metal HTV or at least 20-30 seconds for Easyweed or Glitter HTV, repeating and overlapping the last position as you move across the design. Luckily, onesie decals are so small, you should be able to fit the whole decal under the iron in a single press!

DIY HTV New to the Crew Newborn Baby Onesie for Baby Shower Gifts #onesies #babygift #babyshower

5. Remove the parchment paper and peel the clear  backing from the decal, leaving the design on the onesie.

Check out our other Baby Onesie Projects for more DIY Baby Shower Gift Inspiration!

DIY HTV New to the Crew Newborn Baby Onesie for Baby Shower Gifts #onesies #babygift #babyshower

DIY HTV Adventure Awaits Newborn Baby Onesie

This post contains affiliate links, meaning that if you click on a link I will recieve a small comission. This costs you nothing extra and I only promote products I use and love! You can read our full disclosure here

DIY HTV Adventure Awaits Newborn Baby Onesie for Baby Shower Gifts #onesies #babygift #babyshower

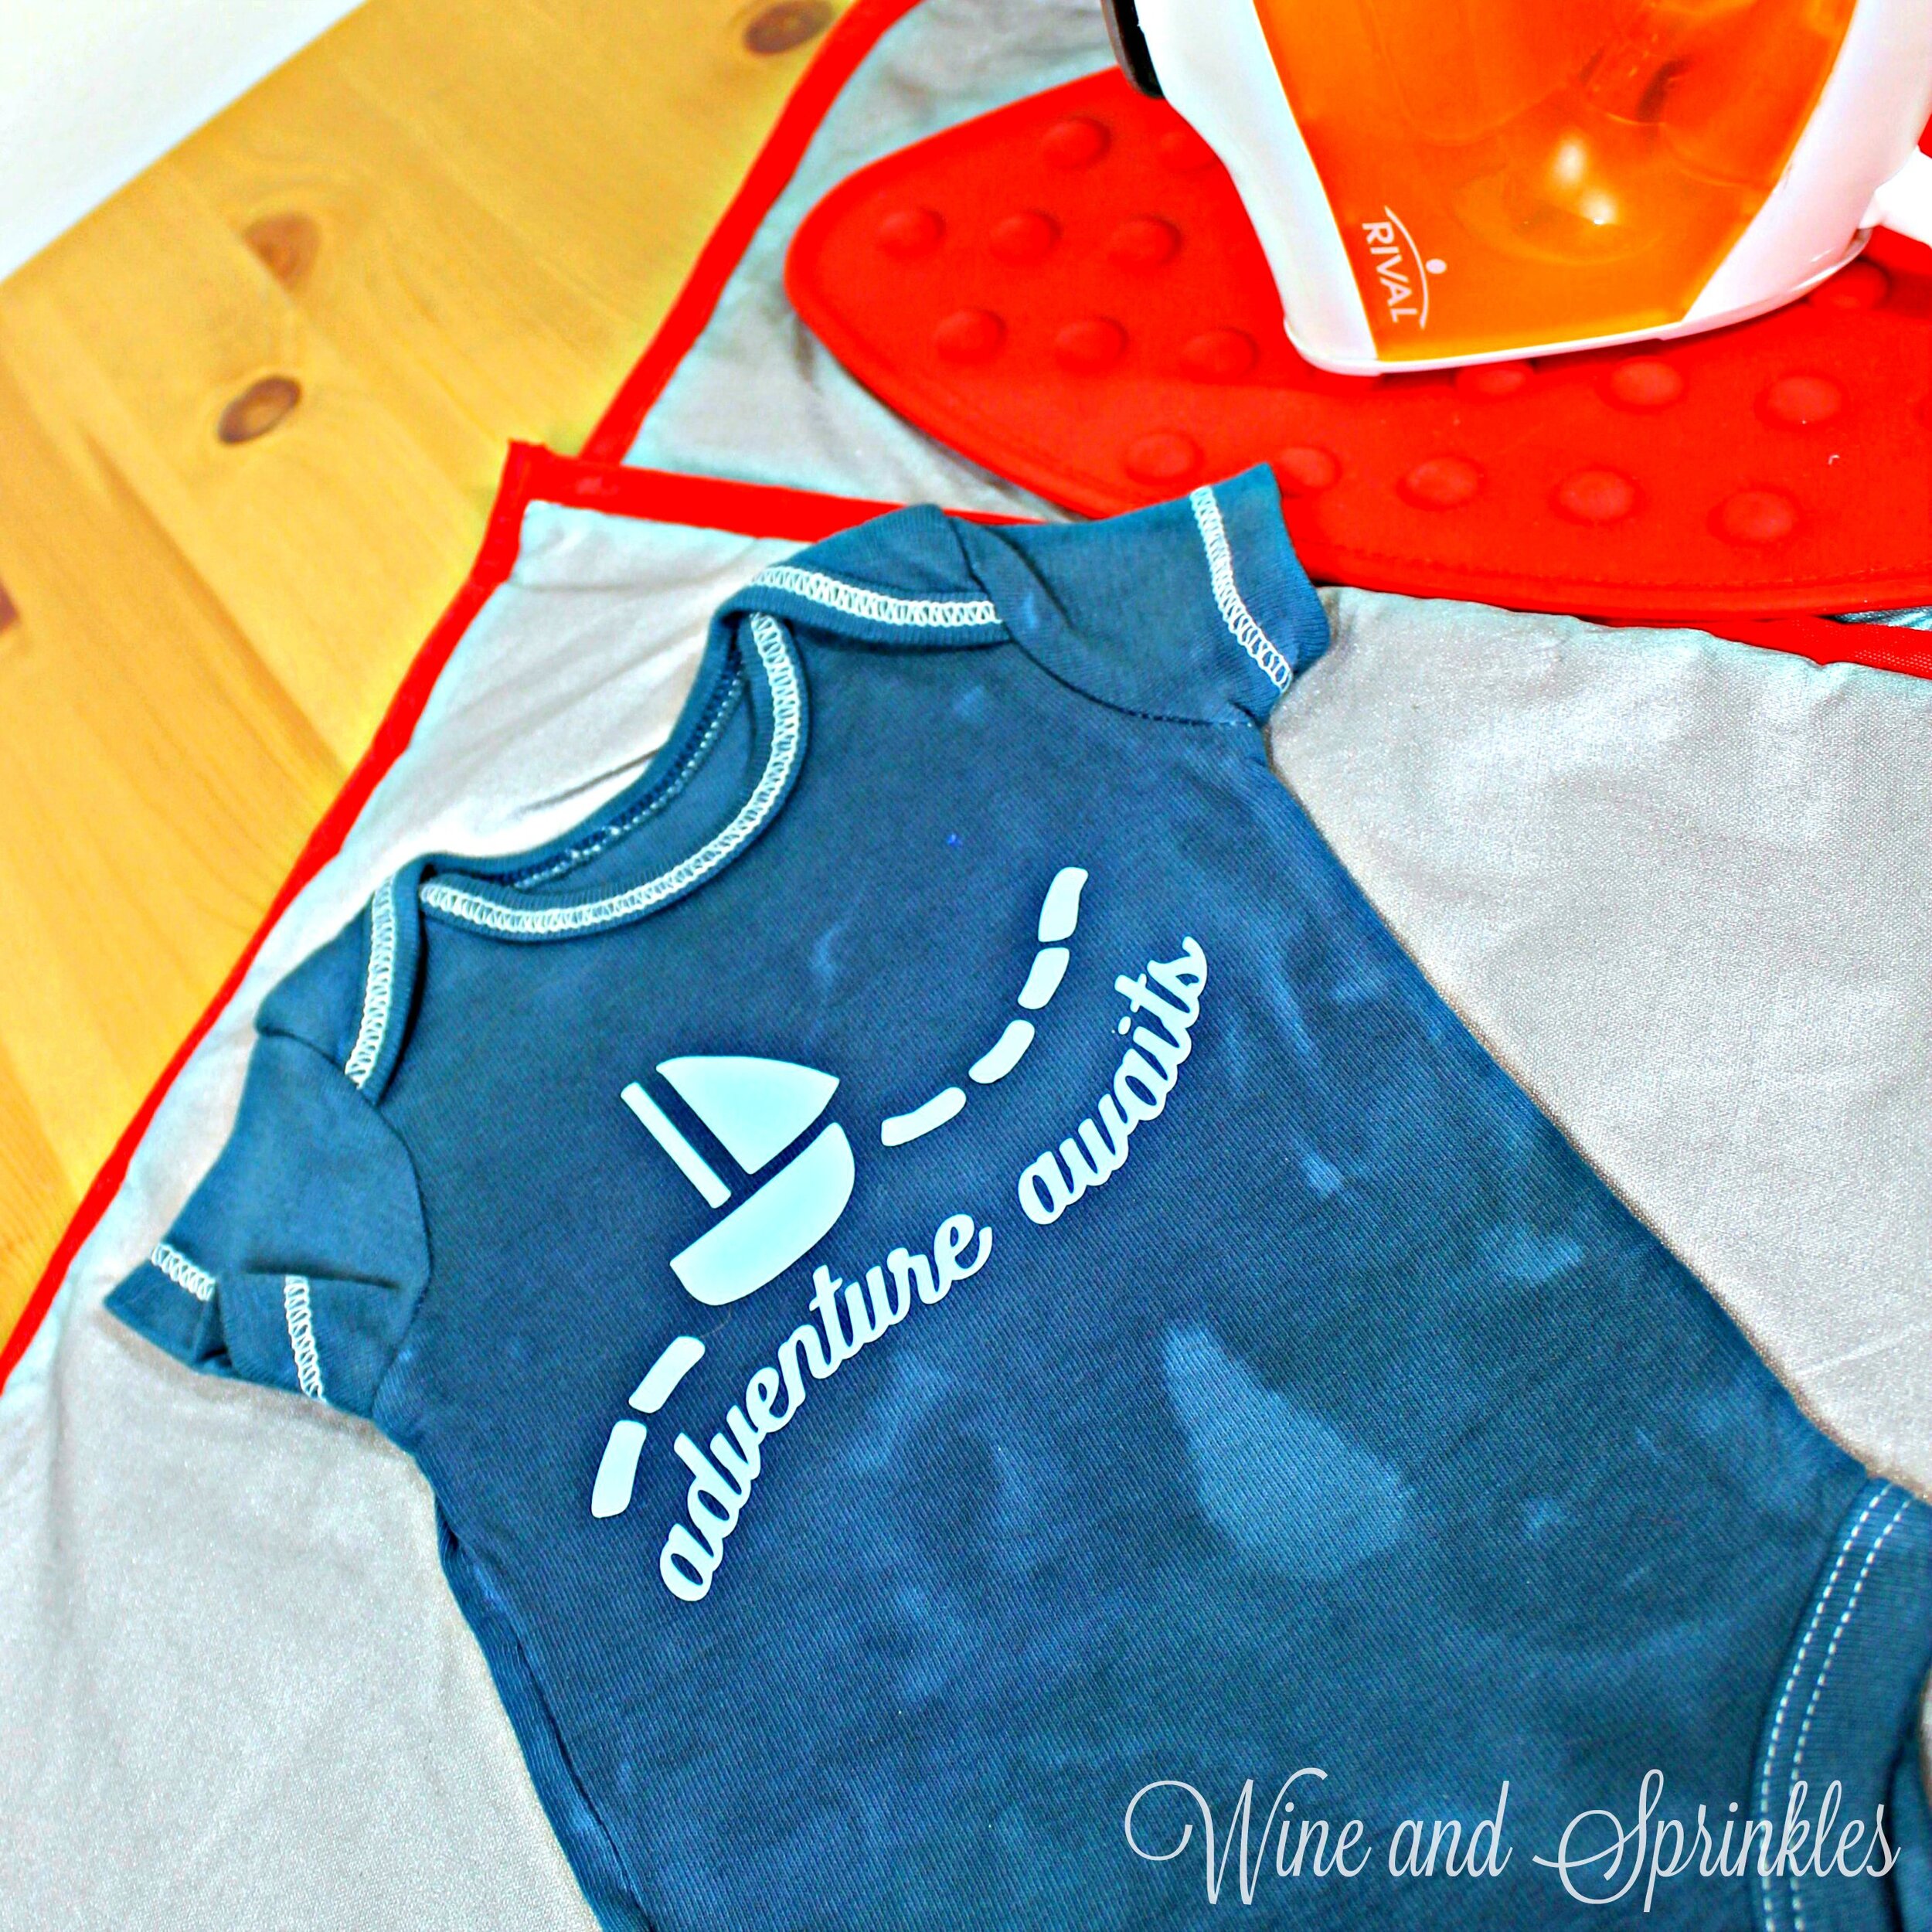
As any mother can attest, when you have your first baby you are quite literally setting off into a new life adventure! And no better way to bedeck a new baby than in this Adventure Awaits HTV Onesie! I went with a nautical theme on this onesie, complete with a little sailboat to set sail for the new adventures of mom and baby!


I made the decal in Tiffany Blue Easyweed Heat Transfer Vinyl on a Hand Dyed Blue Green Onesie and it turned out great! If you are looking to use this font for other projects, I used Bio Monster, a font that is free to use from dafont.com.

This project is a great beginner HTV transfer project; the decal is easy to cut, weed, and small enough to fit entirely under your iron in one press! Make sure to check out our other Baby Onesie Projects for more DIY Baby Shower Gift Inspiration!

DIY HTV Adventure Awaits Newborn Baby Onesie for Baby Shower Gifts #onesies #babygift #babyshower


DIY HTV Adventure Awaits Newborn Baby Onesie for Baby Shower Gifts #onesies #babygift #babyshower
  1. After downloading the cut files, import them into the Cricut Software. After creating a new project, select Upload Image. Select the file you wish to upload and it will automatically take you to the final upload screen, where you can name the file, then select Save. The SVG Files are sized so that they will automatically cut to the size you see in the photos, but if you want to change the size you can do so to fit your onesies the way you like.

  2. After selecting “Make It” Make sure to select the Mirror Mode on the cutting screen. Cut the design in your choice of heat transfer vinyl with the Iron On (for Easyweed HTV) or Iron On+ (for Glitter HTV) Setting on your Cricut, with the shiny side of the material down.

DIY HTV Adventure Awaits Newborn Baby Onesie for Baby Shower Gifts #onesies #babygift #babyshower

3. Weed the additional material off of the backing material so that, looking down with the shiny side up, you can see your design with the correct orientation.Iron your onesie to remove any creases, then center the design over the top half of the onesie. Arrange the design shiny side up, then cover with parchment paper. Make sure to keep the parchment paper between the design and the iron.

4. Set your Iron to the second Highest setting. Cover the parchment paper and decal with your iron, pressing down firmly on the design. Using your iron like a small heat press, press the design for at least 20-30 seconds, repeating and overlapping the last position as you move across the design. Luckily, onesie decals are so small, you should be able to fit the whole decal under the iron in a single press!

DIY HTV Adventure Awaits Newborn Baby Onesie for Baby Shower Gifts #onesies #babygift #babyshower

5. Remove the parchment paper and peel the clear  backing from the decal, leaving the design on the onesie.

Check out our other Baby Onesie Projects for more DIY Baby Shower Gift Inspiration!
DIY HTV Adventure Awaits Newborn Baby Onesie for Baby Shower Gifts #onesies #babygift #babyshower

DIY HTV Hello World Newborn Baby Onesie

This post contains affiliate links, meaning that if you click on a link I will recieve a small comission. This costs you nothing extra and I only promote products I use and love! You can read our full disclosure here

DIY HTV Hello World Newborn Baby Onesie for Baby Shower Gifts #onesies #babygift #babyshower

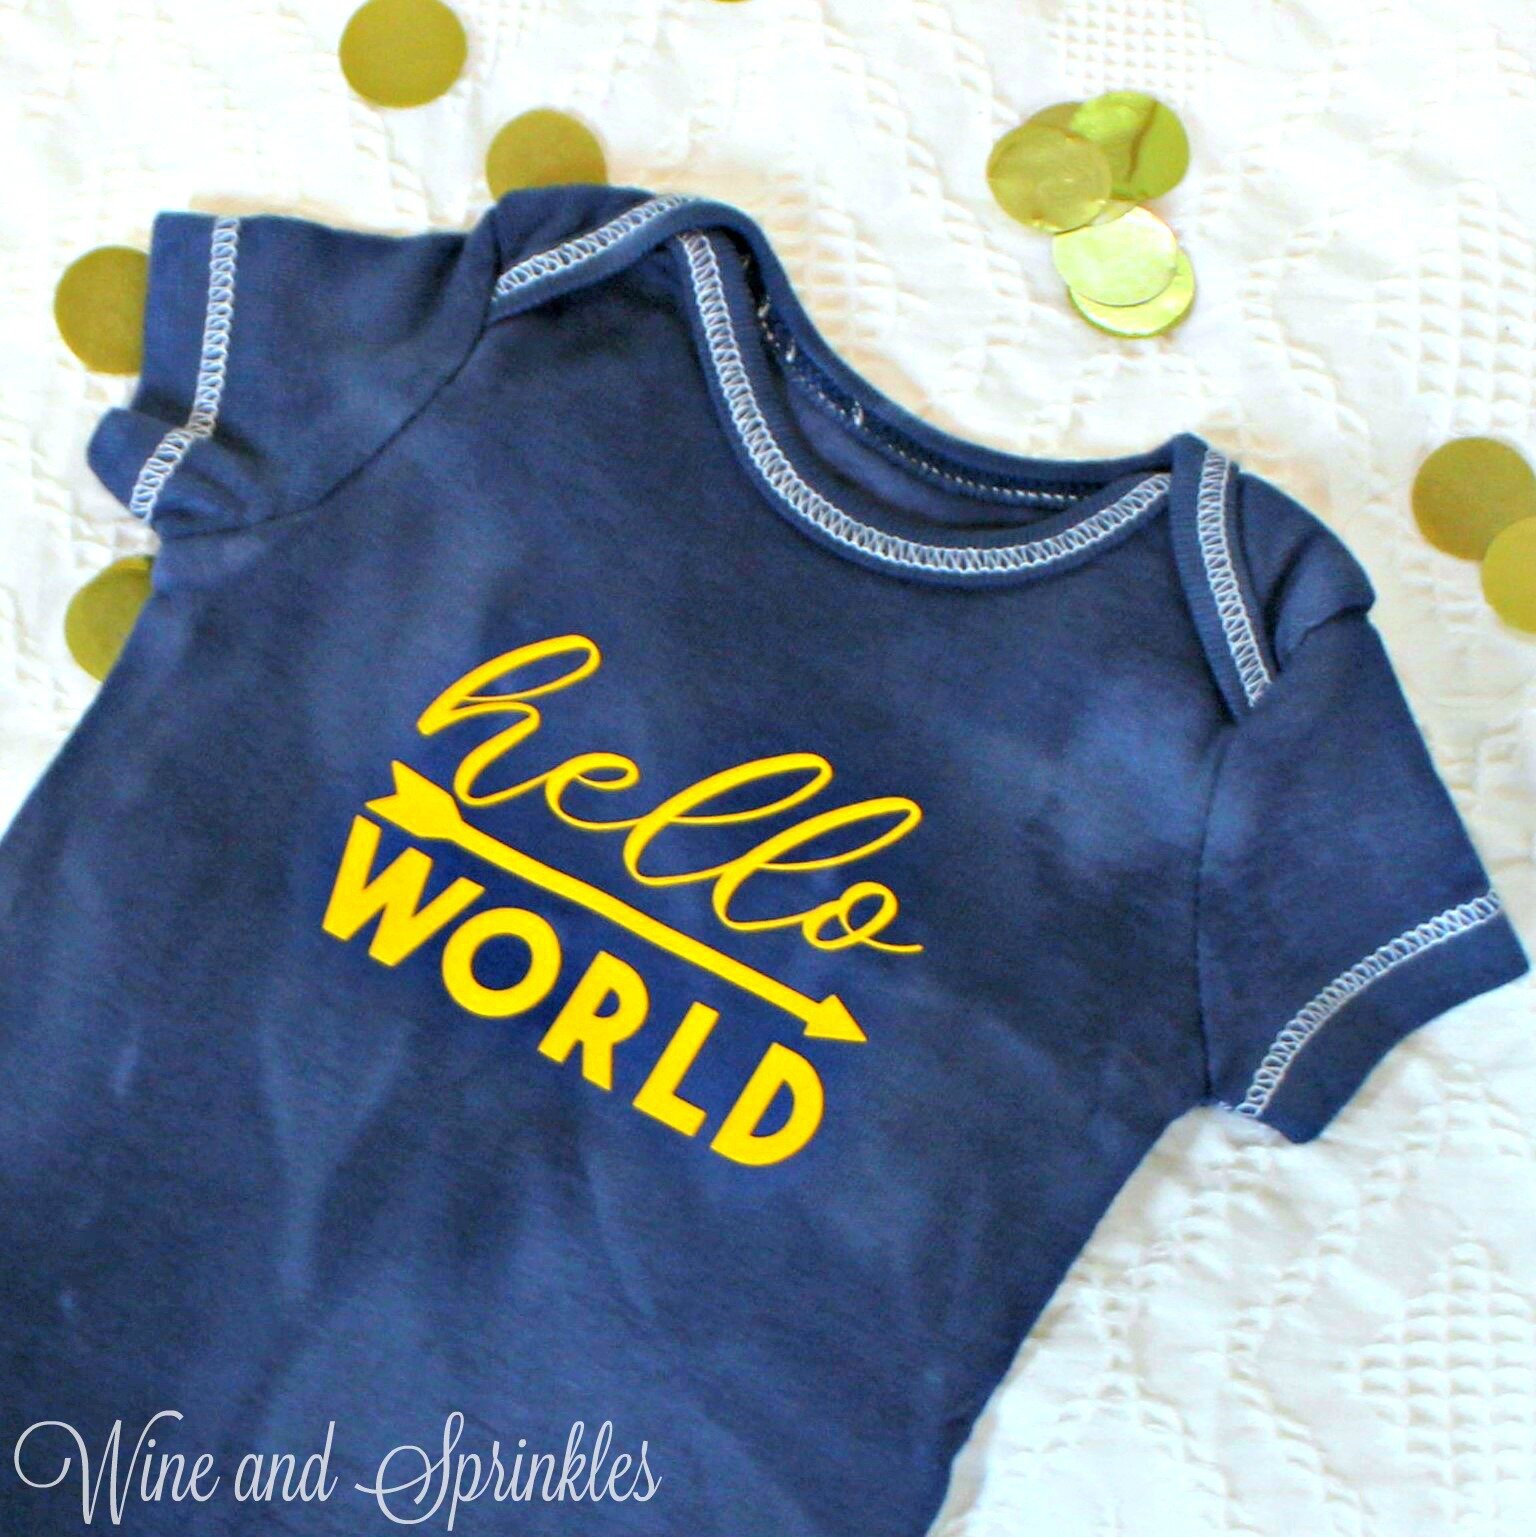
I had so much fun designing all sorts of onesies for my sister’s new baby, so we are starting our onesie designs of the year with a very appropriate newborn onesie that literally tells the world hello! :) This Hello World Onesie is a perfect choice for any newborn ensemble and is a beautiful handmade gift for any mama to be! 

I made the decal in Yellow Easyweed Heat Transfer Vinyl on a Hand Dyed Denim Onesie and I absolutely adore the color combination! This project is a great beginner HTV transfer project; the decal is easy to cut, weed, and small enough to fit entirely under your iron in one press. It's also a means to use up those little bits of colorful HTV you may save (like me), sure that you will find something to use them on! 

DIY HTV Hello World Newborn Baby Onesie for Baby Shower Gifts #onesies #babygift #babyshower

Make sure to check out our other Baby Onesie Projects for more DIY Baby Shower Gift Inspiration!


DIY HTV Hello World Newborn Baby Onesie for Baby Shower Gifts #onesies #babygift #babyshower
  1. After downloading the cut files, import them into the Cricut Software. After creating a new project, select Upload Image. Select the file you wish to upload and it will automatically take you to the final upload screen, where you can name the file, then select Save. The SVG Files are sized so that they will automatically cut to the size you see in the photos, but if you want to change the size you can do so to fit your onesies the way you like.

  2. After selecting “Make It” Make sure to select the Mirror Mode on the cutting screen. Cut the design in your choice of heat transfer vinyl with the Iron On (for Easyweed HTV) or Iron On+ (for Glitter HTV) Setting on your Cricut, with the shiny side of the material down.

DIY HTV Hello World Newborn Baby Onesie for Baby Shower Gifts #onesies #babygift #babyshower

3. Weed the additional material off of the backing material so that, looking down with the shiny side up, you can see your design with the correct orientation.Iron your onesie to remove any creases, then center the design over the top half of the onesie. Arrange the design shiny side up, then cover with parchment paper. Make sure to keep the parchment paper between the design and the iron.

4. Set your Iron to the second Highest setting. Cover the parchment paper and decal with your iron, pressing down firmly on the design. Using your iron like a small heat press, press the design for at least 20-30 seconds, repeating and overlapping the last position as you move across the design. Luckily, onesie decals are so small, you should be able to fit the whole decal under the iron in a single press!

5. Remove the parchment paper and peel the clear  backing from the decal, leaving the design on the onesie.

DIY HTV Hello World Newborn Baby Onesie for Baby Shower Gifts #onesies #babygift #babyshower

Check out our other Baby Onesie Projects for more DIY Baby Shower Gift Inspiration!

DIY HTV Hello World Newborn Baby Onesie for Baby Shower Gifts #onesies #babygift #babyshower

DIY I Washed Up Like This Bachelorette HTV Iron On Tank Top

This post contains affiliate links, meaning that if you click on a link I will recieve a small comission. This costs you nothing extra and I only promote products I use and love! You can read our full disclosure here

DIY HTV Iron On I Washed Up like this Bachelorette Tank Tops #bachelorette #beachbachelorette #svgfiles

Beachy Bachelorette Parties are never complete without some beachy matching tank tops! These tank tops would work wonderfully for a nautical, cruise ship, or beach Bachelorette Party!

For the Bride tank top, I used Mermaid Blue Glitter HTV for the Bottle and Jade Easyweed HTV for the lettering. For the Bridesmaids tanks, I kept the same color for the lettering and switched up the bottle color to Turquoise Easyweed HTV.

You can also check out our other Tank Top Projects Here!


DIY HTV Iron On I Washed Up like this Bachelorette Tank Tops #bachelorette #beachbachelorette #svgfiles

1. After downloading the cut files, import them into the Cricut Software. After creating a new project, select Upload Image. Select the file you wish to upload and it will automatically take you to the final upload screen, where you can name the file the select Save. The SVG Files are sized so that they will automatically cut to the size you see in the photos, but if you want to change the size you can do so to fit the tank tops the way you like.

2. After selecting “Make It” Make sure to select the Mirror Mode on the cutting screen. Cut the design in your choice of heat transfer vinyl (I used White HTV) with the Iron On (for Easyweed Vinyl) or Iron On+ (for Glitter Vinyl) Setting on your Cricut, with the shiny side of the material down.

3. Weed the additional material off of the backing material so that, looking down with the shiny side up, you can see your design with the correct orientation.

DIY HTV Iron On I Washed Up like this Bachelorette Tank Tops #bachelorette #beachbachelorette #svgfiles

4. Iron your tank top to remove any creases, then center the design over the top half of the tank top. Arrange the design shiny side up, then cover with parchment paper. Make sure to keep the parchment paper between the design and the iron.

5. Set your Iron to the second Highest setting and press the the iron down firmly on the design, not ironing but rather using it as a small heat press. I worked from the upper left to lower right on the design, pressing the iron on each part of the design for at least 30 seconds, then overlapping the last position as you move the iron across the design.

DIY HTV Iron On I Washed Up like this Bachelorette Tank Tops #bachelorette #beachbachelorette #svgfiles

6. Remove the backing from the design, leaving the design on the tank top.

DIY HTV Iron On I Washed Up like this Bachelorette Tank Tops #bachelorette #beachbachelorette #svgfiles

7. Now, arrange the lettering HTV decal on top of the bottle decals, arranging it such that the lettering is equally within the outline of the text and and “Bride” is arranged in the bottle’s outline, as shown below.

DIY HTV Iron On I Washed Up like this Bachelorette Tank Tops #bachelorette #beachbachelorette #svgfiles

8. Cover the second layer with parchment paper, then iron the lettering decal on top of the existing bottle layer as shown above, using your iron like a small heat press. Press the iron on each part of the design for at least 30 seconds, then overlap the last position as you move the iron across the design.

DIY HTV Iron On I Washed Up like this Bachelorette Tank Tops #bachelorette #beachbachelorette #svgfiles

9. Remove the backing, leaving the second layer on the tank top. Repeat with all remaining tank tops.

DIY HTV Iron On I Washed Up like this Bachelorette Tank Tops #bachelorette #beachbachelorette #svgfiles

Check out our other tank top projects here!

DIY HTV Iron On I Washed Up like this Bachelorette Tank Tops #bachelorette #beachbachelorette #svgfiles

DIY Love is Brewing HTV Iron On Koozies

This post contains affiliate links, meaning that if you click on a link I will recieve a small comission. This costs you nothing extra and I only promote products I use and love! You can read our full disclosure here

Love is Brewing DIY Wedding Koozies #koozies #diywedding #weddingfavor

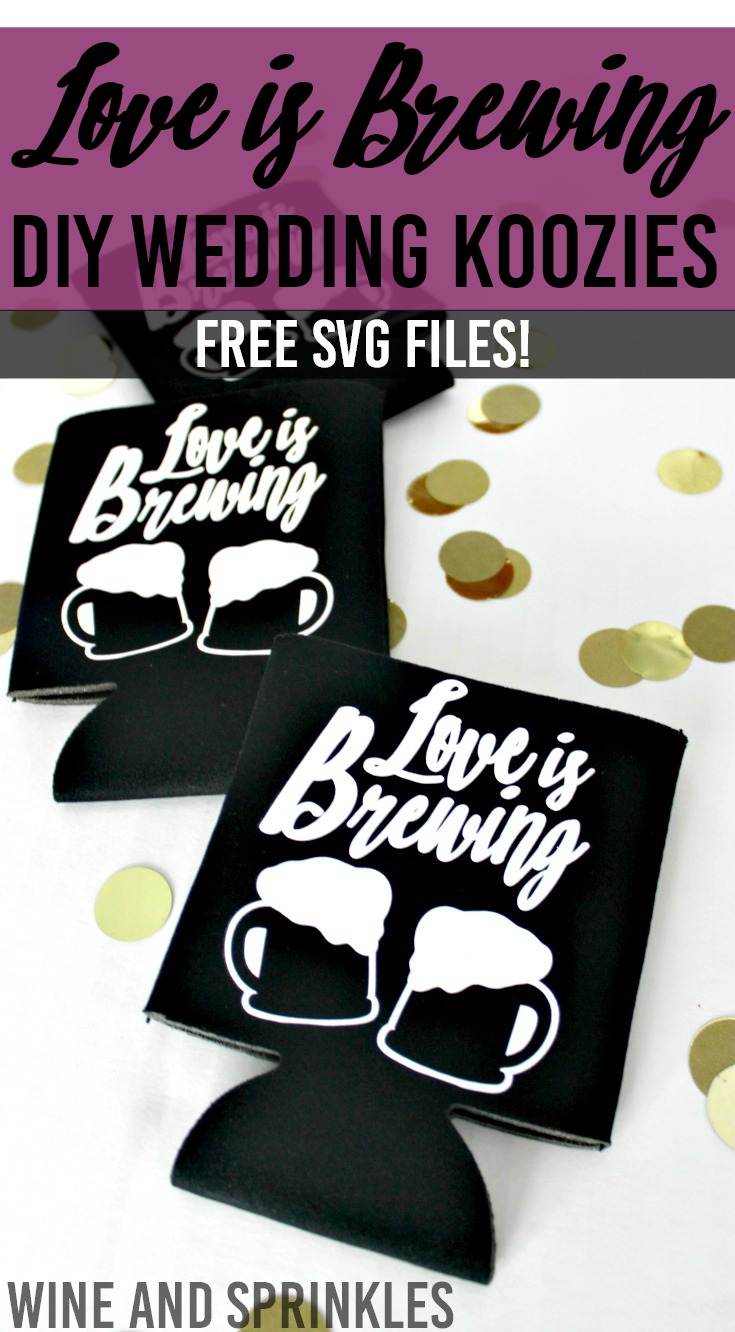
Koozies are always fun for wedding favors, and these “Love is Brewing” Koozies are a great choice for the craft brew loving Bride and Groom!

These designs aren’t hard to weed but I would recommend only using Easyweed Heat Transfer Vinyl as opposed to the Glitter HTV since some of holes in the text are small. If you have to make a bunch its nice to have a group to help you weed them since that’s the most time intensive part of this project.


Love is Brewing DIY Wedding Koozies #koozies #diywedding #weddingfavor

1. After downloading the cut files, import them into the Cricut Software. After creating a new project, select Upload Image. Select the file you wish to upload and it will automatically take you to the final upload screen, where you can name the file the select Save. The SVG Files are sized so that they will automatically cut to the size you see in the photos, but if you want to change the size you can do so to fit the koozies the way you like.

2. After selecting “Make It” Make sure to select the Mirror Mode on the cutting screen. Cut the design(s) in your choice of heat transfer vinyl with the Iron On (for Easyweed Vinyl) or Iron On+ (for Glitter Vinyl) Setting on your Cricut, with the shiny side of the material down.

3. Weed the additional material off of the backing material so that, looking down with the shiny side up, you can see your design with the correct orientation.

Love is Brewing DIY Wedding Koozies #koozies #diywedding #weddingfavor

4. Center the design in the middle of the koozie. Arrange the design shiny side up, then cover with parchment paper. Make sure to keep the parchment paper between the design and the iron.

5. Set your Iron to the second Highest setting and press the the iron down firmly on the design, not ironing but rather using it as a small heat press. The koozie design should be completely covered by the iron. Pressing the iron on the design for 15 - 30 seconds, mine took only 20 seconds. :) I’m always a little nervous ironing koozies, so I check them every 5 second or so until the design has transferred. :)

Love is Brewing DIY Wedding Koozies #koozies #diywedding #weddingfavor

6. Remove the backing from the design, leaving the design on the koozie. Repeat with all the remaining koozies.

I always love koozies for using up extra bits of HTV and they are the perfect favors for a wedding! Check out more of our Koozie Projects here! :)

Love is Brewing DIY Wedding Koozies #koozies #diywedding #weddingfavor

DIY Iron On Mermaid Bachelorette Tank Tops

This post contains affiliate links, meaning that if you click on a link I will recieve a small comission. This costs you nothing extra and I only promote products I use and love! You can read our full disclosure here

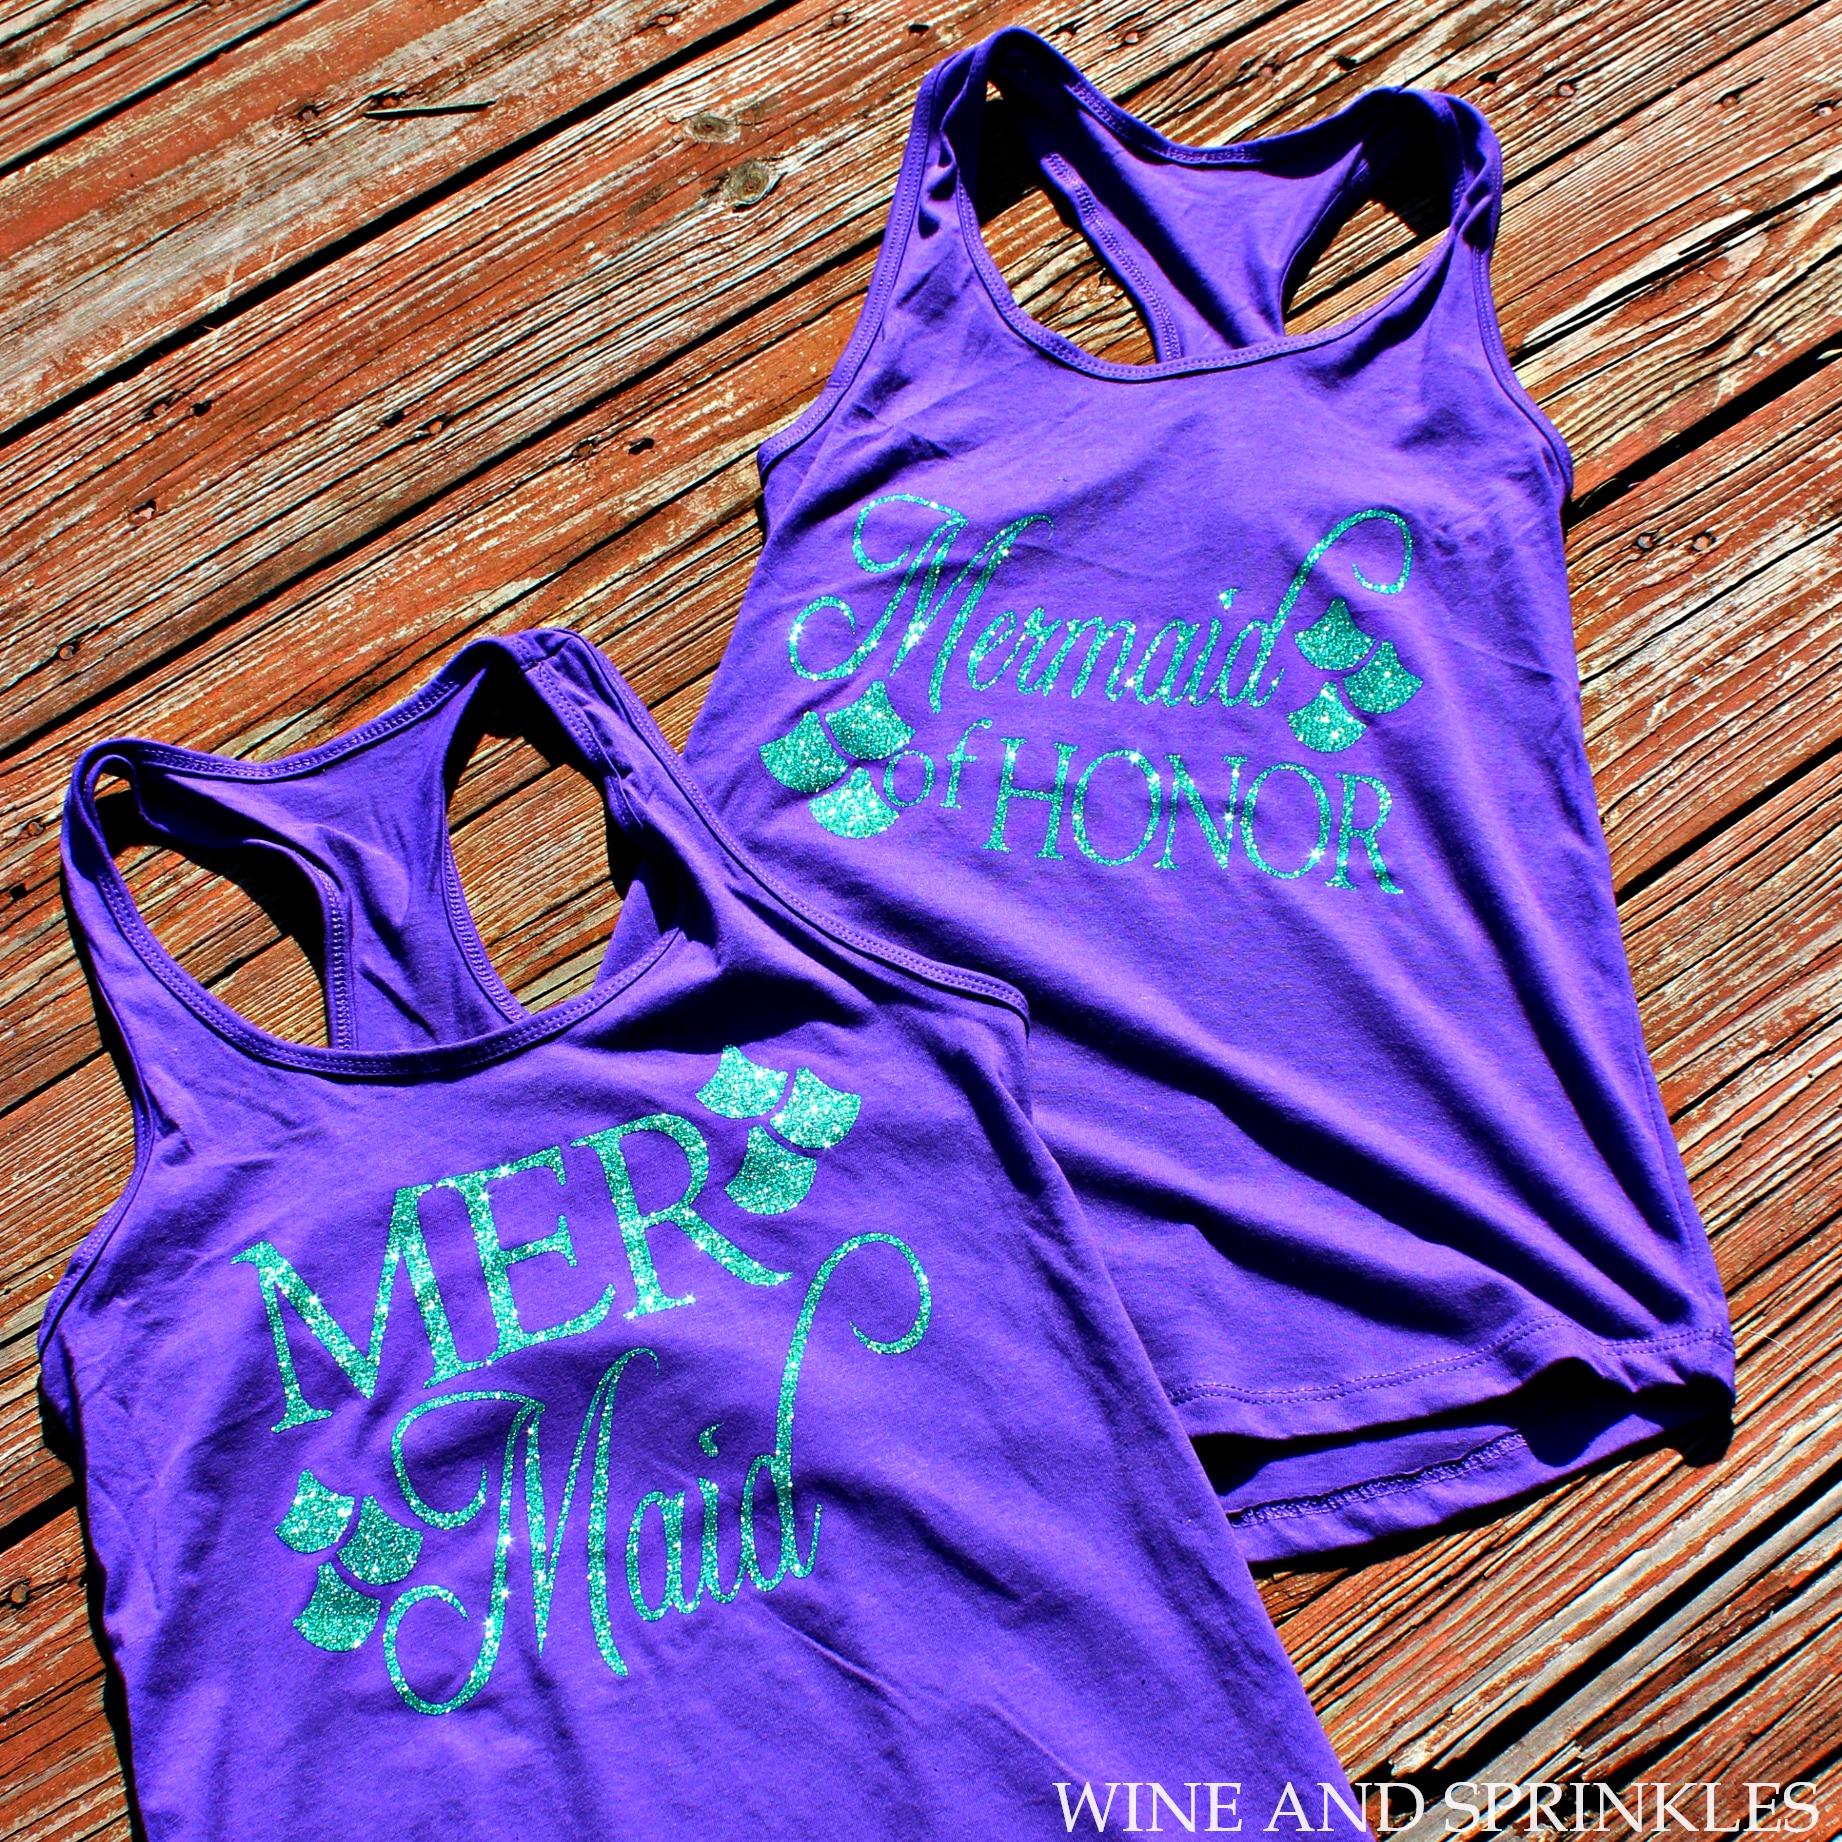
Of all the Beachy Bachelorette themes, my absolute favorite has to be a Mermaid Bachelorette! While brainstorming for one of my friend’s Mermaid Bachelorette Party, these scaley tail tank tops came to be! :)

I used Jade Glitter HTV for the Mer-Maids and Mer-Maid of Honor, and Silver Glitter HTV for the Bride’s! These tank tops are the perfect fit for any Mermaid Bachelorette Beach day or Bar Crawl!

DIY Iron On Mermaid Bachelorette Tank Tops #mermaid #bachelorette #cricutprojects

1. After downloading the cut files, import them into the Cricut Software. After creating a new project, select Upload Image. Select the file you wish to upload and it will automatically take you to the final upload screen, where you can name the file the select Save. The SVG Files are sized so that they will automatically cut to the size you see in the photos, but if you want to change the size you can do so to fit the tank tops the way you like.

DIY Iron On Mermaid Bachelorette Tank Tops #mermaid #bachelorette #cricutprojects

2. After selecting “Make It” Make sure to select the Mirror Mode on the cutting screen. Cut the design(s) in your choice of heat transfer vinyl (I used Jade Glitter and Silver Glitter HTV) with the Iron On (for Easyweed Vinyl) or Iron On+ (for Glitter Vinyl) Setting on your Cricut, with the shiny side of the material down.

3. Weed the additional material off of the backing material so that, looking down with the shiny side up, you can see your design with the correct orientation.

4. Iron your tank top to remove any creases, then center the design over the top half of the tank top. Arrange the design shiny side up, then cover with parchment paper. Make sure to keep the parchment paper between the design and the iron.

DIY Iron On Mermaid Bachelorette Tank Tops #mermaid #bachelorette #cricutprojects

5. Set your Iron to the second Highest setting and press the the iron down firmly on the design, not ironing but rather using it as a small heat press. I worked from the upper left to lower right on the design, pressing the iron on each part of the design for at least 30 seconds, then overlapping the last position as you move the iron across the design.

DIY Iron On Mermaid Bachelorette Tank Tops #mermaid #bachelorette #cricutprojects

6. Remove the backing from the design, leaving the design on the tank top. Repeat with all the remaining tank tops.

DIY Iron On Mermaid Bachelorette Tank Tops #mermaid #bachelorette #cricutprojects

DIY Bride's Beaches Bachelorette Tank Tops

This post contains affiliate links, meaning that if you click on a link I will recieve a small comission. This costs you nothing extra and I only promote products I use and love! You can read our full disclosure here

DIY HTV Iron On Bride's Beaches Bachelorette Tank Tops #bachelorette #beachbachelorette #svgfiles

We have a bunch of beachy bachelorette tanks the next couple weeks and we are starting out with one of my favorites, some Brides Beaches Tank Tops! These tank tops are perfect for any beach going Bachelorette and her whole crew! :)

I used (very appropriately named) Mermaid Blue Glitter HTV on a Warm Gray tank top and I love how they turned out! These are also easy designs for those who are still beginners to the weeding and HTV world, I had zero issues weeding or transferring them. :)


1. After downloading the cut files, import them into the Cricut Software. After creating a new project, select Upload Image. Select the file you wish to upload and it will automatically take you to the final upload screen, where you can name the file the select Save. The SVG Files are sized so that they will automatically cut to the size you see in the photos, but if you want to change the size you can do so to fit the tank tops the way you like.

DIY HTV Iron On Bride's Beaches Bachelorette Tank Tops #bachelorette #beachbachelorette #svgfiles

2. After selecting “Make It” Make sure to select the Mirror Mode on the cutting screen. Cut the design in your choice of heat transfer vinyl with the Iron On (for Easyweed Vinyl) or Iron On+ (for Glitter Vinyl) Setting on your Cricut, with the shiny side of the material down.

3. Weed the additional material off of the backing material so that, looking down with the shiny side up, you can see your design with the correct orientation.

DIY HTV Iron On Bride's Beaches Bachelorette Tank Tops #bachelorette #beachbachelorette #svgfiles

4. Iron your tank top to remove any creases, then center the design over the top half of the tank top. Arrange the design shiny side up, then cover with parchment paper. Make sure to keep the parchment paper between the design and the iron.

5. Set your Iron to the second Highest setting and press the the iron down firmly on the design, not ironing but rather using it as a small heat press. I worked from the upper left to lower right on the design, pressing the iron on each part of the design for at least 20-30 seconds, then overlapping the last position as you move the iron across the design.

6. Remove the backing from the design, leaving the design on the tank top.

DIY HTV Iron On Bride's Beaches Bachelorette Tank Tops #bachelorette #beachbachelorette #svgfiles

7. Repeat with all remaining tank tops! :) You can find more designs for your bridal party in our Tank Top Projects! :)

DIY HTV Iron On Bride's Beaches Bachelorette Tank Tops #bachelorette #beachbachelorette #svgfiles