Bridal Shower

D.I.Y. Wood Wick Teacup Candles

This post contains affiliate links, meaning that if you click on a link I will recieve a small comission. This costs you nothing extra and I only promote products I use and love! You can read our full disclosure here

There is nothing that adds a fun vintage flair to a shower quite like these teacup candles. And they are so versatile! I will be using them for a Beauty and the Beast themed bridal shower, but they could just as easily be used for a tea party, Jane Austen Shower, or Mother’s Day Brunch!

Teacups Favor with text.jpg

For me, the wood wicks were a requirement on this batch, they just remind me so much of a fire in the hearth, and for a Beauty and the Beast Shower, it is the perfect touch since most of the story takes place in the winter where crackling fires are most welcome! In addition, the teacups are the perfect ode to my favorite characters, Mrs. Potts and Chip!

I have wanted to make these candles for a while but was always discouraged for one reason, finding the teacups! While you can find teacups at yard sales and estate sales, I could rarely find them and when I could, they were $10+ per cup! Luckily, I had the thought to check Etsy for teacups and I was not disappointed! :)

I was very impressed with the Etsy shop, The Acerage, which I purchased my teacups from. First, they were half the price I see at estate sales for the same cups due to what they term “minor damage.” So when I received them I was expecting some stains, chips, or even small cracks. Imagine my surprise when all the cups that came not only were in great condition (I could hardly find any chips), but they were in fact much better than the aforementioned teacups I paid double for at the estate sale! I have linked in the supplies the set I used, which are great to make a whole set of candles for shower favors. When someone orders them, the listing will disappear but as soon as they gather the next set they list it again.

If giving the teacups as a favor is not quite in your budget, use them as bridal shower prizes and only make a couple! I have been using them for the last couple showers I have gone to as prizes for games and they have been beloved by all!


Supplies:  

Mismatched Teacups and Saucers
Wooden Candle Wicks
Candle Wax*
Candle Pouring Pot
Powdered Candle Dye
Essential Oils for Scent

*I used leftover candle stubs, but the wax linked here will make about 20 -8oz teacup candles

1.  Melt wax on low heat in your pot. If, like me, you are using candle stubs, remove the wicks from the old candles once the wax is completely melted using either tongs or a fork.

2. For these candles, the full wax wick is far too long. Insert the wood wick into its metal stand and place in the cup. Cut the wicks at the top of the teacup with a pair of scissors, then remove the candle wax from heat and soak them in the wax for 10 minutes. Soaking these wicks is VERY IMPORTANT, they are not like the standard wicks that are already coated in wax and not soaking them will lead to the candles not staying lit.

3. Once wicks have been soaked, remove them with tongs or a fork. Once they are cool enough to handle (I was able to touch them immediately) insert them into the metal holder stands included and let dry.

4. Now, attach the wicks to the bottom of your teacups by dipping the metal holder into the melted wax, then position at the bottom of the jar. 

5. Let the wax cool for a couple more minutes, then add color and fragrance of your choice. The ones I have recommended are great for candles, bath bombs, soaps, and bath salts, so you can get a lot of use out of them! I made pastel pink, purple, and yellow candles that were scented as peppermint-lemon, lavender-lemon, and rosemary-lemon (I know you can't tell that I like lemon).

pouring candles.png

6. Pour cooled (but still liquid) wax into the teacups. Reserve about 25% of your wax to remelt and top off your candles if a divot is created in the middle due to the wax cooling. The cooler the wax is, the less of a divot will form. Some of mine with the cool wax needed no additional wax to fill in, while the ones where I started with hot wax needed a lot of extra to make them look nice!

7. Once candles are cooled and solidified, remelt the excess wax and fill in any divots that were caused during the first pour. Now you have a lovely set of candles for your home or favors for your next party!

These have been by far one of my favorite DIY projects I have done lately and a project I have wanted to do for a long time! Now I just need to find homes for all the teacups I can’t keep, time for a tea party! :)

Painted Wine & Martini Glass Candles

This post contains affiliate links, meaning that if you click on a link I will recieve a small comission. This costs you nothing extra and I only promote products I use and love! You can read our full disclosure here

I always love receiving those special painted wine glasses as gifts, but then I never end up using them! Either I want them all to match or I don’t want to deal with hand washing it every time I use it. Since I’ve been on a candle kick lately, I decided to turn them into candles! I made both Wine Glass Candles and Martini Glasses; both came out beautiful!

I used regular wicks on these candles but you could just as easily use the wood wicks as I previously did for my jar candles. Regardless of your choice of wick, this is a great way to use the extra unique glasses in your collection that or to turn into prizes for your next bridal shower or baby shower!

Supplies:

Wine or Martini Glasses
Candle Wax
Wicks
Candle Melting Pot
Essential Oils and Coloring (Optional)


1.     Melt down candle wax in pot over low heat. If, like me, you are using old candle stubs, remove the wicks from the wax when melted with a fork or tongs.

2.     Remove wax from heat. Let cool for 5-10 minutes; then stir in coloring and fragrance if desired. I used pink and purple for my glasses and a peppermint –lemon fragrance.

3.     Dip the end of your wick (the metal stand bit) into the wax then press it into the bottom of your glass. Wait for the wax to harden before pouring the candle. Note: I had no issues with the glasses and hot wax, but if you are worried about the wax being too hot, soak your glasses in hot water and dry them just prior to placing your wicks.

4.     Pour melted wax into the glasses. Reserve 25% of your wax to top off the candles as they cool. The cooler your wax prior to pouring, the less you will need to fix divots that form while cooling. Your wicks may not want to stand up straight when you pour the wax; I used a wooden stick placed on the top of the glass to balance the wick in the right position.

5.     Once the wax in the glass has hardened and cooled, re-melt the excess wax if needed and top off the candle to create a smooth top.

And there you have it, super easy prizes or as fun accessories to your house! What glasses or containers would you make candles out of?

Bath Salts Favor Bar

This post contains affiliate links, meaning that if you click on a link I will recieve a small comission. This costs you nothing extra and I only promote products I use and love! You can read our full disclosure here

Bath Salts Favor Bar Title.jpg

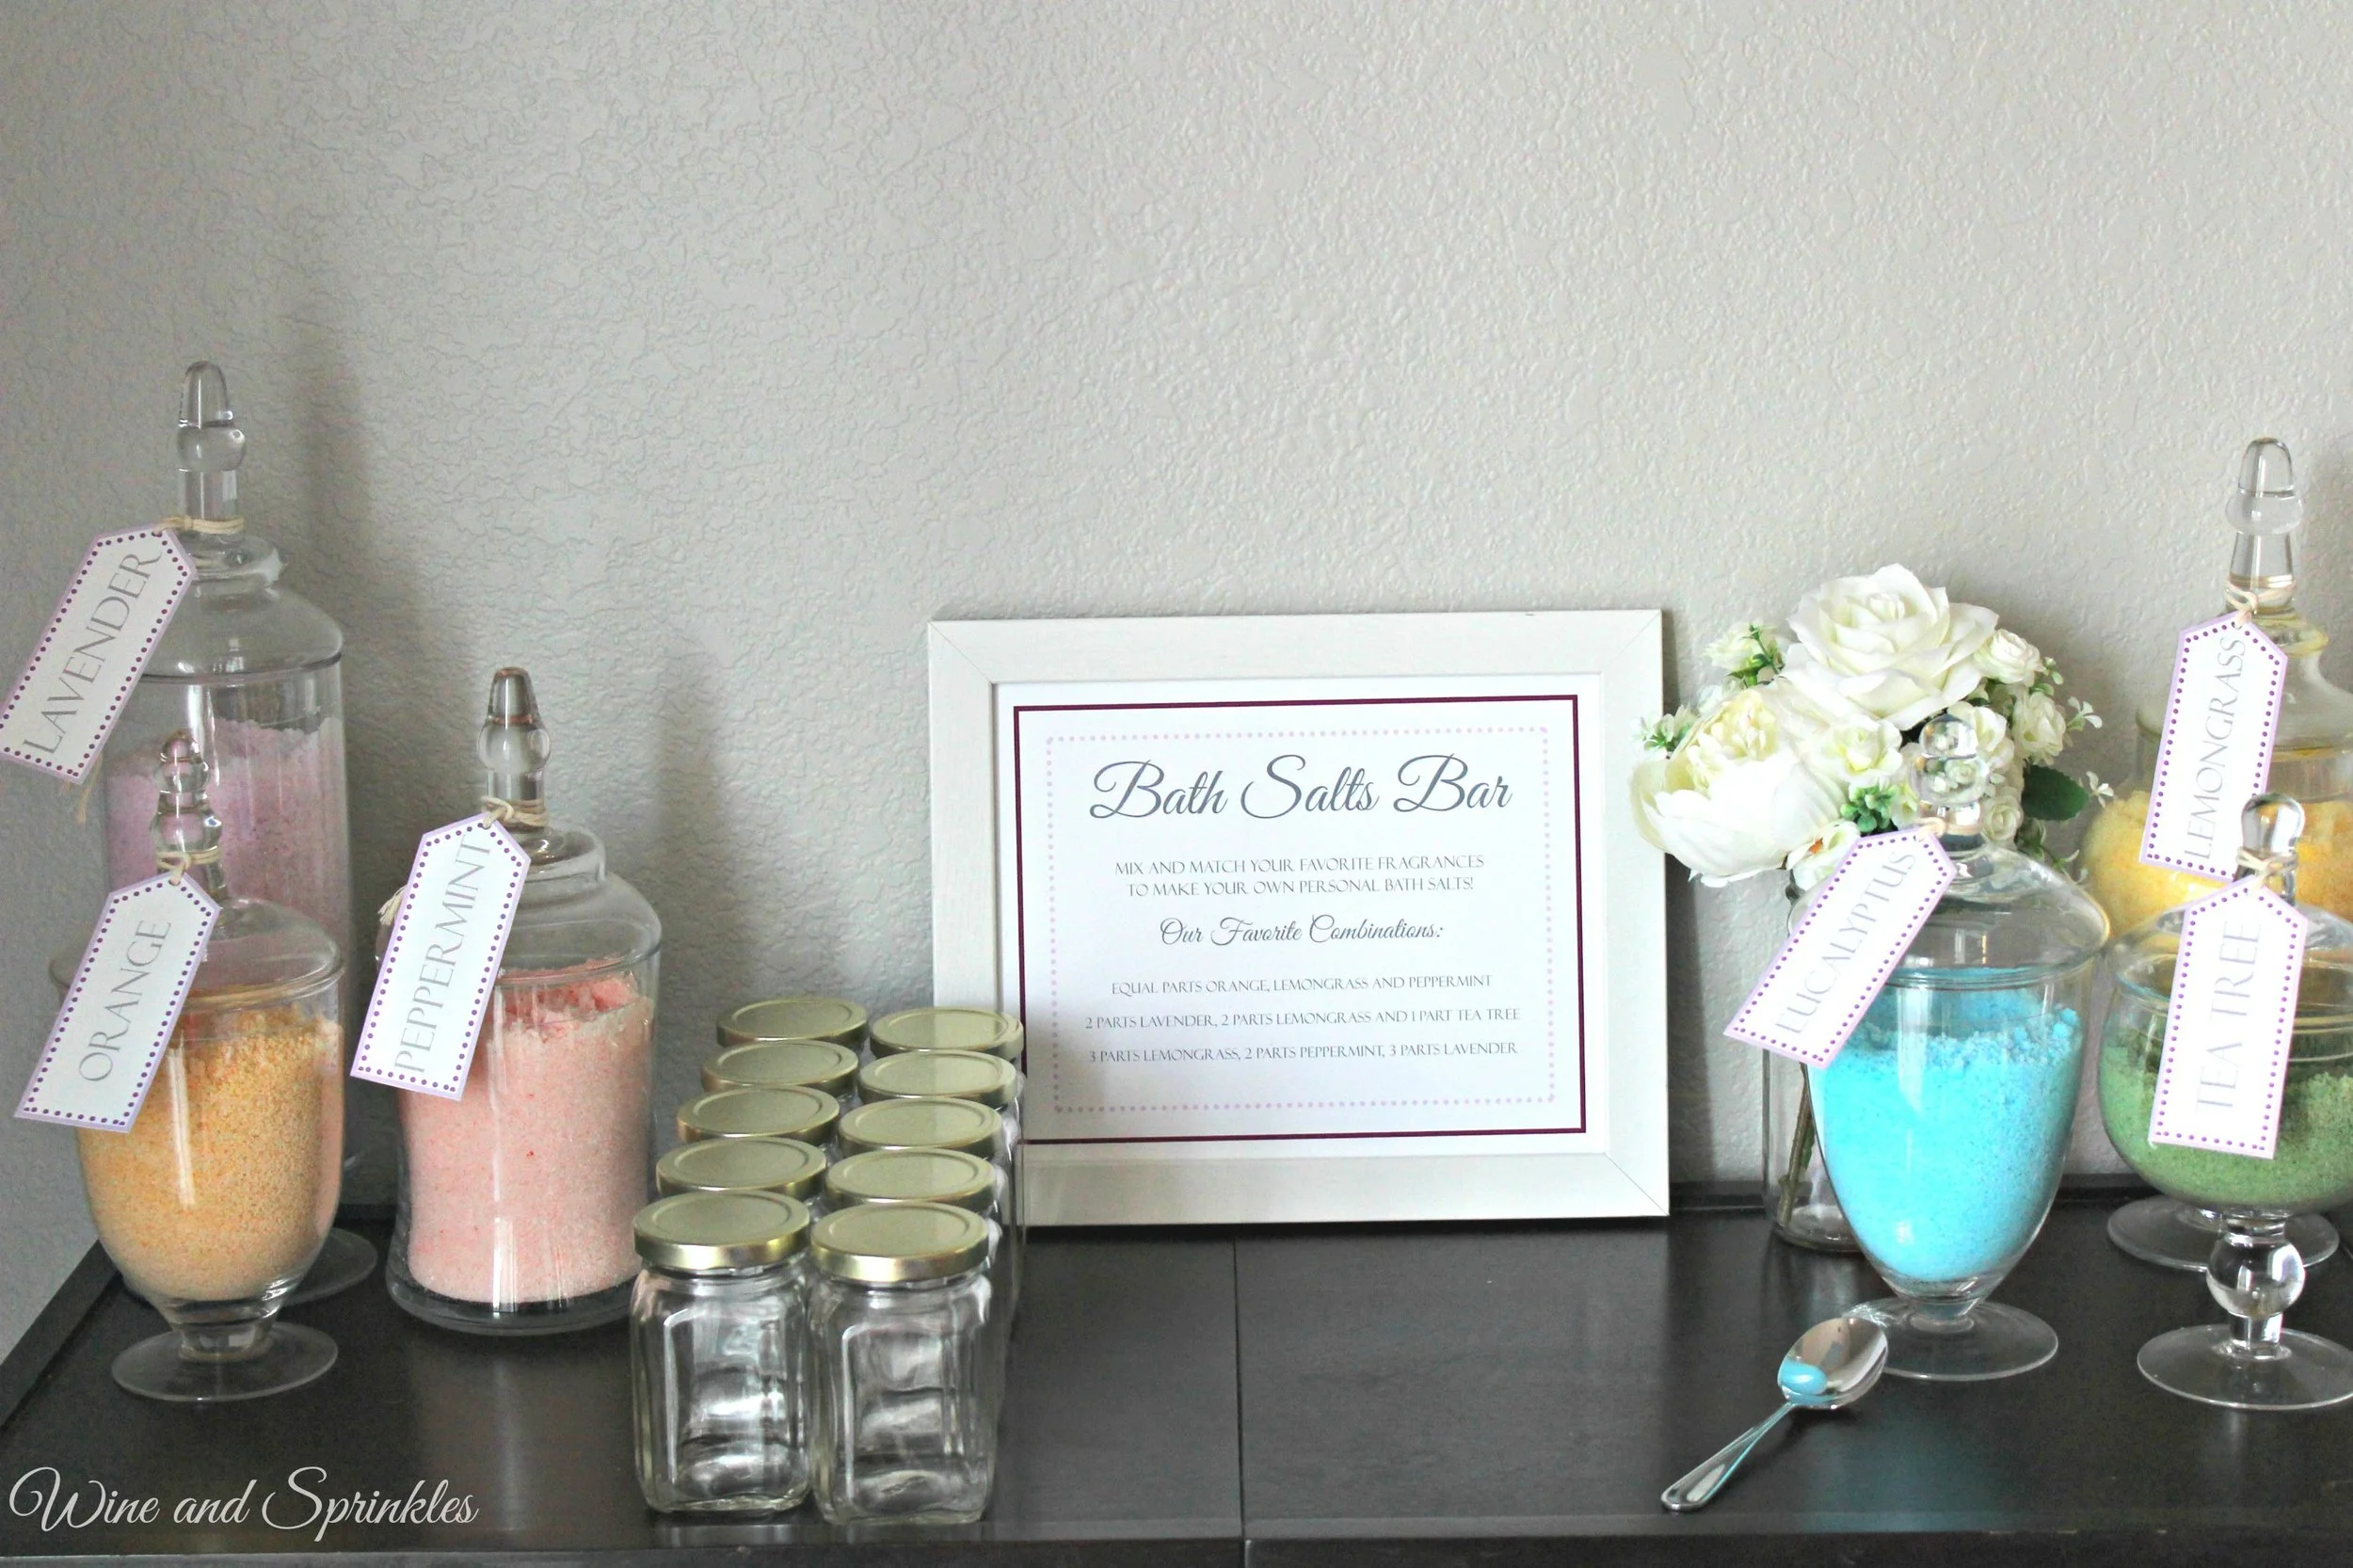
I don’t know about you but one of my favorite trends in the wedding industry are food bars; smore’s bars, mashed potato bars, mac and cheese bars, I love them all! With that in mind, I thought to myself, why not do a favor bar?

bath salts 1

Favors seem to be falling out of style with budget conscious brides and maids, but I am still a huge fan! I always want my guests to feel valued and thanked for attending and even if it’s just a little something, I think favors are a nice touch of appreciation. That being said, favors don’t have to be crazy expensive to be unique and fun for guests!

For my first favor bar, I went with bath salts! Why? Because you can easily make multiple types and colors with the same set of ingredients, then let your guests mix together their favorite combination and take it home in a cute little jar! Better yet, you can store your extra salts in Tupperware or bags to use yourself.

bath salts finished

Supplies:
Baking Soda
Epsom Salt – 5lb Bag
Deep Sea Salt – Fine Grain, 5 lb Bag
Essential Oils
Powdered Dye
Bath Salt Tags
Bath Salts Bar Sign

1.     First, start by making the basic bath salt mixture. You will use this same base for all your fragrances and colors. Mix together the following proportions of salts and baking soda:

4 cups Deep Sea Salt
5 cups Espom Salt
1 cup Baking Soda

Each 5 lb bag contains approximately 10 cups of salt so you will be able to make almost 20 cups of Bath Salts from one set of bags. I mixed my salts as two batches of the above recipe because I didn’t have a bowl big enough for 20 cups!

2.     Now, decide what containers you will display your bath salts in. I personally adore apothecary jars and have used my two sets (linked here and here :) ) for almost every party I have had. They give such a great finishing touch to any display and you can use them again and again! Whatever you decide to display your salts in, record how many cups of salts they can hold. For my jars, they hold anywhere between 2 – 4 cups of bath salts.

3.     Once you know how much each jar holds, you can start mixing in coloring and fragrance. For my salts, I used the following fragrances and colors.

Yellow – Lemongrass
Blue – Eucalyptus
Orange – Sweet Orange
Green – Tea Tree
Purple – Lavender
Pink – Peppermint

Measure the desired amount of premixed bath salts into a separate bowl. Add ¼ tsp. of color and 5-10 drops of oil depending on your preference. Whisk in oils and color until fully combined, then transfer the mixture into its associated jar. Repeat with the additional colors until you have all the fragrances you want. The great thing about the essential oils starter set is that you have a popular fragrance assortment that go well with the powdered colors!

4.     Now the final thing to do is to make sure that your guests understand what they need to do, that’s where the signs and tags come in! If you are using the fragrances and colors I have recommended, you can use the free printables available on this post! Punch a hole in each bath salts tag and tie around your apothecary jars and simply place the bath salts bar sign into an 8 x 10 frame. Make sure to place out some spoons to scoop salts and you are done!

Now I can’t take credit for the combinations on the sign, they came straight from the essential oils set I bought. But, I love what they came up with! I use the dyes and essential oils over many projects; including candles, soaps, bath bombs, and salts. You will see with my Bath Salts Bar I provided 6 oz jars to be filled and taken home, making almost 30 favors if each jar got completely filled!

blue bath salts

Pomander Flower Frames

This post contains affiliate links, meaning that if you click on a link I will recieve a small comission. This costs you nothing extra and I only promote products I use and love! You can read our full disclosure here

July is upon us and what does that mean? We are in the middle of Wedding Season! Better yet to me, we are in Bridal Shower Season, and I’ve been crafting for one of my best friend’s showers! I ended up being able to use a couple of the flowers leftover from the bouquets and decorations from a different wedding to make these cute little frame accents!

The best part of these is how easy they are to make; the floral foam makes it super simple as it already has the adhesive on the back and is the perfect size for making little pomander style accents to frames, signs, or table numbers. I made two types, one that was mixed hydrangeas, for my friend’s shower, and one that was spray roses for a more English feel.

Supplies:
Oasis Deco Mini Foam
Silk Flowers of your Choice (I used Purple Hydrangeas, Lilac Hydrangeas, and Spray Roses on mine)
8 x 10 Frame
Tacky Glue (Optional)

1.     Start by removing the heads of your silk flowers. Mine popped off no problem but you may need wire cutters based on the flowers you choose.

2.     Remove Floral Foam from its attached grid. Starting at the top of the round, push the head of the flowers into the foam. If they are having trouble staying put, use a little tacky glue to keep them in.

roses collage

3.     Once you have arranged the flowers as you wish, remove the adhesive backing on the back of the foam. Stick directly to the picture frame you have chosen and you’re done!

Yep it’s really that simple and they look adorable! An added plus with this foam is that if you want to use real flowers, you can simply soak it in water beforehand and then press the flower heads directly into the foam like the silk ones, just make sure to keep a little bit of their stems on. Fresh flowers will last a couple days this way. These Flower frames are super easy to make and are a cute addition to any shower, as an extra accent to wedding signs or table numbers!

D.I.Y. Wooden Wick Candles

This post contains affiliate links, meaning that if you click on a link I will recieve a small comission. This costs you nothing extra and I only promote products I use and love! You can read our full disclosure here

DIY Wooden Wick Candles #candles #diy

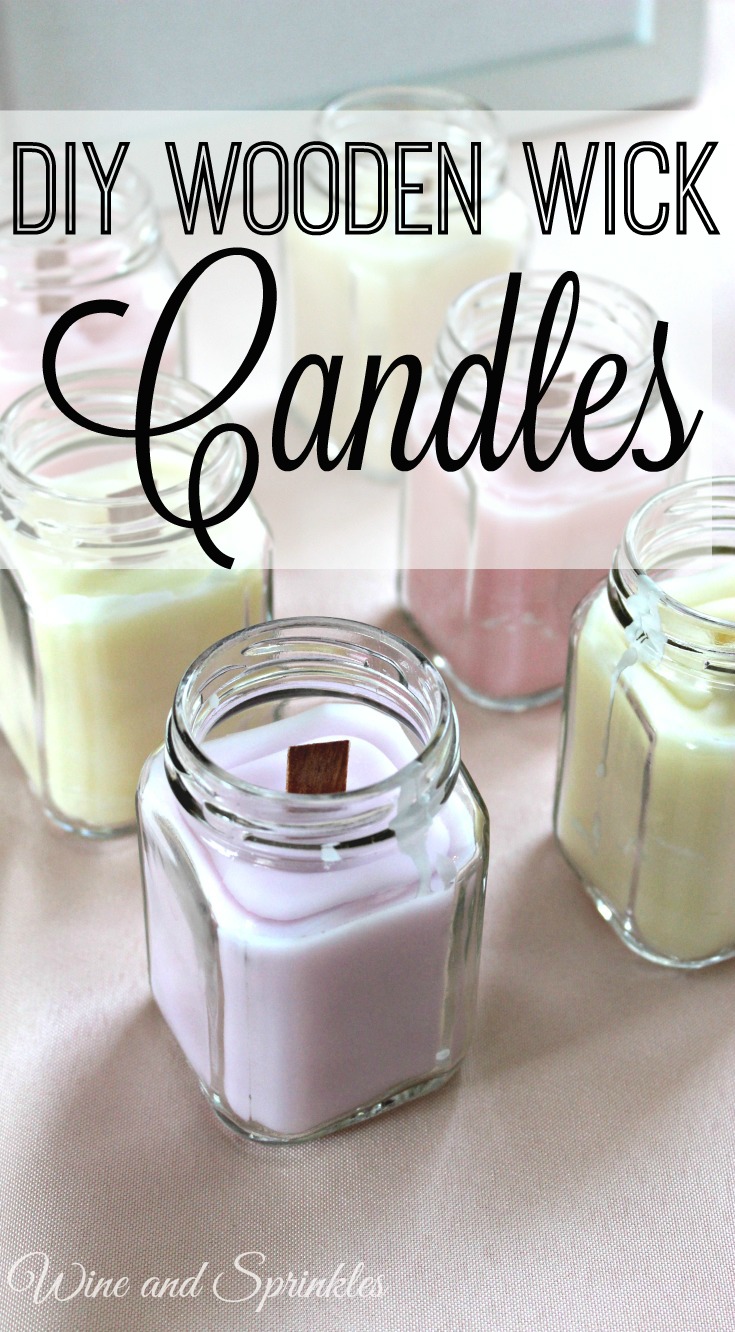
These lovely crackling candles first came to be based on my own bridal shower. One of my friends won one as a prize and absolutely loved it! When it finally burned out a couple weeks ago, I went looking for a way to replace it as her birthday present. Luckily, I had the thought to check for the wooden wicks first!

DIY Wooden Wick Candles #candles #diy

I love these wooden wicks compared to the regular ones, where you can achieve the comfort of a crackling fire with a little candle. I didn’t realize it would be so easy to make them myself, or that amazon would have had such an assortment to choose from (last time I doubt that Amazon doesn't have everything under the sun).

DIY Wooden Wick Candles #candles #diy

Now, I have a wonderful assortment of these candles which were cheap to make and so nice to have! I would highly recommend making them if you have candle stubs at home; I used the ends of my wedding candles for them and was able to make a bunch of them in both leftover favor jars and teacups as prizes for upcoming showers and gifts for my friends! These also work wonderfully for Bridal Shower favors, Wedding Favors, or Baby Shower Favors!

DIY Wooden Wick Candles #candles #diy

Some things to note on this project: for your candle making supplies, you need a pouring pot or an old pot you don’t care about to melt the wax. I made the unfortunate choice of using one of my cooking pots with an old measuring cup and it took me a good couple hours to get all the wax remnants out. Seeing as I could’ve bought an actual candle pouring pot for a little over $10, it would’ve been a far better choice and I wouldn’t have been spilling wax all over the place!

Supplies:  
Wooden Candle Wicks
6 oz Jars with Lids
Candle Wax*
Candle Pouring Pot
Powdered Candle Dye
Essential Oils for Scent

*I used leftover candle stubs, but the wax linked here will make about 26 -6oz candles

1.  Melt wax on low heat in your pot. If, like me, you are using candle stubs, remove the wicks from the old candles once the wax is completely melted using either tongs or a fork.

2. For these candles, the full wax wick is far too long. Cut the wicks in half with a pair of scissors, then remove the candle wax from heat and soak them in the wax for 10 minutes. Soaking these wicks is VERY IMPORTANT, they are not like the standard wicks that are already coated in wax and not soaking them will lead to the candles not staying lit.

DIY Wooden Wick Candles #candles #diy

3. Once wicks have been soaked, remove them with tongs or a fork. Once they are cool enough to handle (I was able to touch them immediately) insert them into the metal holder stands included and let dry.

4. Now, attach the wicks to the bottom of your jars by dipping the metal holder into the melted wax, then position at the bottom of the jar. 

5. Let the wax cool for a couple more minutes, then add color and fragrance of your choice. The ones I have recommended are great for candles, bath bombs, soaps, and bath salts, so you can get a lot of use out of them! I made pastel pink, purple, and yellow candles that were scented as peppermint-lemon, lavender-lemon, and rosemary-lemon (I know you can't tell that I like lemon).

DIY Wooden Wick Candles #candles #diy

6. Pour cooled (but still liquid) was into the jars. Reserve about 25% of your wax to remelt and top off your candles if a divot is created in the middle due to the wax cooling. The cooler the wax is, the less of a divot will form. Some of mine with the cool wax needed no additional wax to fill in, while the ones where I started with hot wax needed a lot of extra to make them look nice!

7. Once candles are cooled and solidified, remelt the excess wax and fill in any divots that were caused during the first pour. Now you have a lovely set of candles for your home or favors for your next party!

The crackling of these candles makes me want to make a slew of them for a fall or winter wedding, just with different colors and scents. :) What would you make these cute little candles for?

DIY Wooden Wick Candles #candles #diy

Disney Pin Monogram

This post contains affiliate links, meaning that if you click on a link I will recieve a small comission. This costs you nothing extra and I only promote products I use and love! You can read our full disclosure here

I have a couple friends getting married in 2017 so I have been having oodles of fun thinking of bridal shower and bachelorette themes for them. One I can't seem to get out of my head is a Disney bridal shower, so regardless of if either of them choose it in the end I have started crafting!

First up is an art piece I made for my craft room, but would look great hanging over the food or gift table at and bridal or baby shower, a monogrammed canvas. :) For this version I used Disney Pins to make the first letter of my last name, but you can make it just about any letter you want, depending on the number of pins you have. :)

Note: This page may contain affiliate links, meaning that if you click on the link and buy the product, I will receive a small commission. This will not change your cost at all and I only recommend products I use and love!

Supplies:
Disney Pins (if you don't have a collection already)
20" x 30" Canvas
1/2-1 yard Disney Fabric
Fabric Glue
 

1. First, Iron out your piece of fabric and arrange it over you canvas. I tried to make mine so that my favorite princess wasn't in the center of the fabric so she wouldn't get completely covered up by the pins. :) 

2. Once you have you fabric arranged, flip both your fabric and canvas over to the opposite side. trim the edges of the fabric so that they meet up with the edge of the canvas. Using fabric glue, stretch and adhere the short sides of fabric to the canvas. Wait until one side is dry before stretching and gluing the other so that you don't accidentally move you fabric!

3. Finish covering the canvas with the long sides in a similar fashion. I folded the corners in like a Christmas present to give it a nice clean look, as shown below:

Monogram Pic 2.jpg

4. Now that you canvas is ready, its time to pick what you want to put on it! I did an uppercase C for my last name but you could do the first letter of the bride's/baby's name, the age a child is turning on their birthday; there are lots of choices! Using Microsoft Publisher or Word, make you letter as big as you can to take up an 11" x 17" page and print.

5. If your printer is like mine, it doesn't accept that big of pages. Using the tiled printing, your letter should print onto three separate pages. Once it is printed, cut out the inside of the letter and tape the sheets together.

6. Now comes the fun part, putting on all your pins! I will admit that this is rather time consuming, but still a lot of fun. :) Arrange your letter in the center of the canvas, then start by pushing pins in along the edges of your design. I chose not to put on the pin backs until the end, which saved time in this stage.

Monogram Pic 3.jpg

7. Once the outline pins are done, fill in the middle. I ended up making one base layer and filled in the holes I had as a top layer. As I collect more pins I will fill it in to define the letter more and more.

8. After you have placed all the pins, remove your paper stencil. Turning the canvas over, put the backs into all the pins, pushing the backs in as much as possible. Once this is done, just reposition any pins that rotated while you were securing them.

Monogram Pic 4.jpg

I love this project for either a baby or bridal shower, and if the bride or mama-to-be loves Disney, it also makes a great gift to hang on their wall. :) Tune in later for more projects for a Disney themed Bridal Shower!

IMG_20160731_113503927.jpg