Baby Shower

DIY HTV Daddy’s First Mate Baby Onesie

This post contains affiliate links, meaning that if you click on a link I will recieve a small comission. This costs you nothing extra and I only promote products I use and love! You can read our full disclosure here

DIY HTV Daddy’s First Mate Baby Onesie #babygift #onesie #svgfile

It's always fun to include daddy’s in the baby onesie fun, so for the next onesie in our Pirate Themed Onesie Set is the perfect choice for a pirate papa, the Daddy’s First Mate Onesie! 

This decal was cut in Black Easyweed HTV for a Yellow Hand Dyed Onesie and the color combo was a perfect fit for the pirate theme! I used the fonts Passengers Script and Antique Book Cover while designing this decal, which are both free to download from dafont.com to use in customizing these onesies or any other Baby Projects you can think of!


Make sure to check out our other Baby Onesie Projects for more DIY Baby Shower Gift and Onesie Inspiration!

DIY HTV Daddy’s First Mate Baby Onesie #babygift #onesie #svgfile


DIY HTV Daddy’s First Mate Baby Onesie #babygift #onesie #svgfile
  1. After downloading the cut files, import them into the Cricut Software. After creating a new project, select Upload Image. Select the file you wish to upload and it will automatically take you to the final upload screen, where you can name the file, then select Save. The SVG Files are sized so that they will automatically cut to the size you see in the photos, but if you want to change the size you can do so to fit your onesies the way you like.

  2.  After selecting “Make It” Make sure to select the Mirror Mode on the cutting screen. Cut the design in your choice of heat transfer vinyl with the Iron On (for Easyweed HTV) or Iron On+ (for Glitter HTV) Setting on your Cricut, with the shiny side of the material down.

  3. Weed the additional material off of the backing material so that, looking down with the shiny side up, you can see your design with the correct orientation.Iron your onesie to remove any creases, then center the design over the top half of the onesie. Arrange the design shiny side up, then cover with parchment paper. Make sure to keep the parchment paper between the design and the iron.

DIY HTV Daddy’s First Mate Baby Onesie #babygift #onesie #svgfile

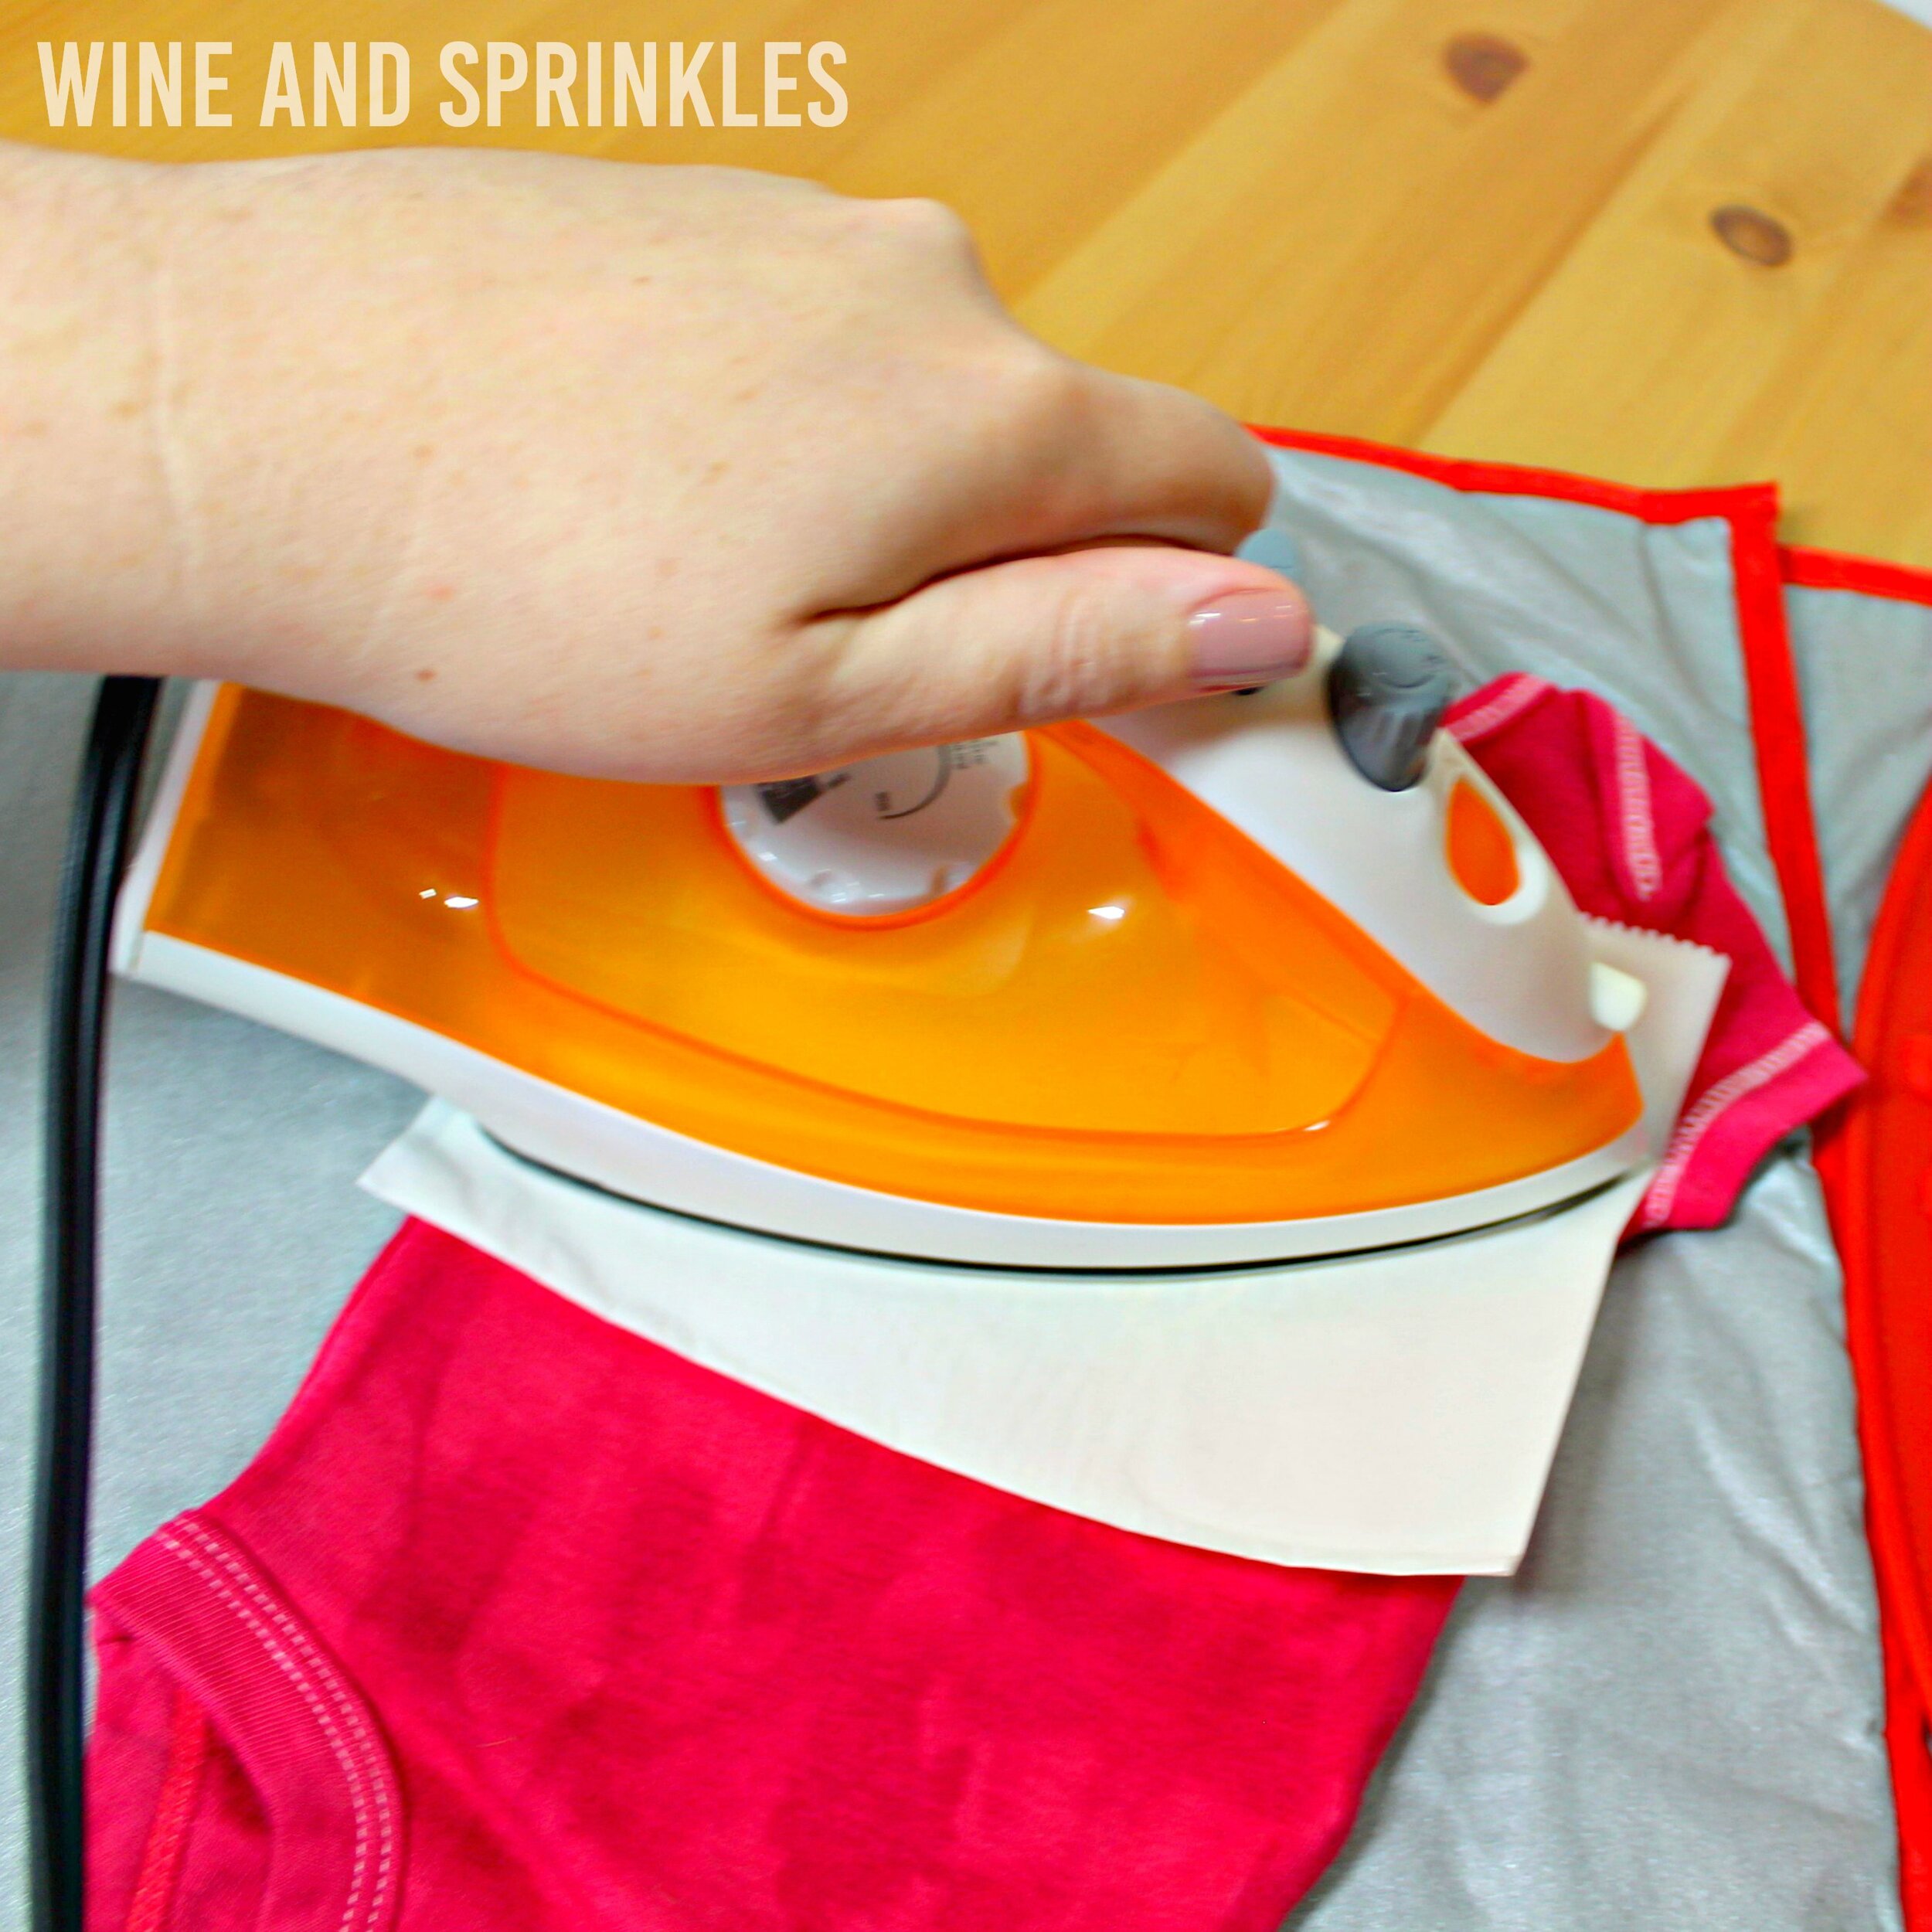
4. Set your Iron to the second Highest setting. Cover the parchment paper and decal with your iron, pressing down firmly on the design. Using your iron like a small heat press, press the design for at least 20-30 seconds, repeating and overlapping the last position as you move across the design. Luckily, onesie decals are so small, you should be able to fit the whole decal under the iron in a single press!

5. Remove the parchment paper and peel the clear  backing from the decal, leaving the design on the onesie.

DIY HTV Daddy’s First Mate Baby Onesie #babygift #onesie #svgfile

Check out our other Baby Onesie Projects for more DIY Baby Shower Gift Inspiration!

DIY HTV Daddy’s First Mate Baby Onesie #babygift #onesie #svgfile

DIY HTV Pirate Life Baby Onesie

This post contains affiliate links, meaning that if you click on a link I will recieve a small comission. This costs you nothing extra and I only promote products I use and love! You can read our full disclosure here

DIY HTV Pirate Life Baby Onesie #babygift #onesie #svgfile

I love theming onesies for new parents, so when my sister was having her baby I had to include some pirate themed onesies, especially because she lives on an island and has dressed as a pirate for Halloween for several years! So her new little one can join in her fun, I made a whole set of pirate onesies in different sizes. First was our newborn New to the Crew Onesie, and now we are adding to the collection with this adorable Pirate Life Onesie!

I made the decal with Black Easyweed HTV on a Emerald Hand Dyed Baby Onesie and I love the way it turned out! I used the font Antique Book Cover for this decal, which you can download for free at dafont.com to use in customizing this onesie further or for any seafaring baby projects!

DIY HTV Pirate Life Baby Onesie #babygift #onesie #svgfile

Make sure to check out our other Baby Onesie Projects for more DIY Baby Shower Gift and Onesie Inspiration!


DIY HTV Pirate Life Baby Onesie #babygift #onesie #svgfile
  1. After downloading the cut files, import them into the Cricut Software. After creating a new project, select Upload Image. Select the file you wish to upload and it will automatically take you to the final upload screen, where you can name the file, then select Save. The SVG Files are sized so that they will automatically cut to the size you see in the photos, but if you want to change the size you can do so to fit your onesies the way you like.

  2. After selecting “Make It” Make sure to select the Mirror Mode on the cutting screen. Cut the design in your choice of heat transfer vinyl with the Iron On (for Easyweed HTV) or Iron On+ (for Glitter HTV) Setting on your Cricut, with the shiny side of the material down.

  3. Weed the additional material off of the backing material so that, looking down with the shiny side up, you can see your design with the correct orientation.Iron your onesie to remove any creases, then center the design over the top half of the onesie. Arrange the design shiny side up, then cover with parchment paper. Make sure to keep the parchment paper between the design and the iron.

DIY HTV Pirate Life Baby Onesie #babygift #onesie #svgfile

4. Set your Iron to the second Highest setting. Cover the parchment paper and decal with your iron, pressing down firmly on the design. Using your iron like a small heat press, press the design for at least 20-30 seconds, repeating and overlapping the last position as you move across the design. Luckily, onesie decals are so small, you should be able to fit the whole decal under the iron in a single press!

5. Remove the parchment paper and peel the clear  backing from the decal, leaving the design on the onesie. Pair this design with any of our pirate themed onesies, but one of my favorites is the New to the Crew Onesie!

DIY HTV Pirate Life Baby Onesie #babygift #onesie #svgfile

Check out our other Baby Onesie Projects for more DIY Baby Shower Gift Inspiration!

DIY HTV Pirate Life Baby Onesie #babygift #onesie #svgfile

DIY HTV Animal Paw Print Patterned Baby Onesie

This post contains affiliate links, meaning that if you click on a link I will recieve a small comission. This costs you nothing extra and I only promote products I use and love! You can read our full disclosure here

DIY HTV Animal Pawprints Baby Onesie #diybaby #diyonesie #craftsforbaby

While making all these fun critter inspired onesies for the spring, I couldn’t help but think of all the little paw prints of the baby animals in the forest. While my newest baby niece is not  crawling yet, she undoubtedly will be all too soon, and before she starts leaving footprints of her own, she will be looking cute in this Paw Print Patterned onesie!

I made the decal from Black Easyweed HTV on a Hand Dyed Emerald Onesie, perfect for any foresty little sprite you know!! This project is a great beginner HTV transfer project; the decal is easy to cut, weed, and each paw print set is small enough to fit entirely under your iron in one press. Experiment with different placements of the paw prints and make your own custom patterns.


Make sure to check out our other Baby Onesie Project for more DIY Baby Shower Gift Inspiration!


DIY HTV Animal Pawprints Baby Onesie #diybaby #diyonesie #craftsforbaby
  1. After downloading the cut files, import them into the Cricut Software. After creating a new project, select Upload Image. Select the file you wish to upload and it will automatically take you to the final upload screen, where you can name the file, then select Save. The SVG Files are sized so that they will automatically cut to the size you see in the photos, but if you want to change the size you can do so to fit your onesies the way you like.

  2. After selecting “Make It” Make sure to select the Mirror Mode on the cutting screen. Cut the design in your choice of heat transfer vinyl with the Iron On (for Easyweed HTV) or Iron On+ (for Glitter HTV) Setting on your Cricut, with the shiny side of the material down.

  3. Weed the additional material off of the backing material so that, looking down with the shiny side up, you can see your design with the correct orientation.Iron your onesie to remove any creases, then arrange the decals on the onesie for transfer. I arranged one decal along the left side of the onesie and the other going from under the right arm to the neckline, as shown in the photos. Arrange the design shiny side up, then cover with parchment paper. Make sure to keep the parchment paper between the design and the iron.

DIY HTV Animal Pawprints Baby Onesie #diybaby #diyonesie #craftsforbaby

4. Set your Iron to the second Highest setting. Cover the parchment paper and decal with your iron, pressing down firmly on the design. Using your iron like a small heat press, press the design for at least 20-30 seconds, repeating and overlapping the last position as you move across the design. Luckily, onesie decals are so small, you should be able to fit the each paw print decal set under the iron in a single press!

DIY HTV Animal Pawprints Baby Onesie #diybaby #diyonesie #craftsforbaby

5. Remove the parchment paper and peel the clear  backing from the decal, leaving the design on the onesie. Repeat the iron press process with the remaining paw print decal to complete the onesie. You can easily pair this design with any of our other critter inspired onesies, but my favorite is with the Cutest Critter in the Forest Onesie!

DIY HTV Animal Pawprints Baby Onesie #diybaby #diyonesie #craftsforbaby

Check out our other Baby Onesie Projects for more DIY Baby Shower Gift Inspiration!

DIY HTV Animal Pawprints Baby Onesie #diybaby #diyonesie #craftsforbaby

Wild Child DIY HTV Onesie

This post contains affiliate links, meaning that if you click on a link I will recieve a small comission. This costs you nothing extra and I only promote products I use and love! You can read our full disclosure here

DIY HTV Wild Child Baby Onesie #wildchild #diybaby #diyonesie #craftsforbaby

My sister and I were a little bit of trouble makers when we were babies, at least once we started crawling! For all those mothers with feisty little ones, this Wild Child Onesie is a perfect fit! 

I wanted the lettering to look like it was surrounded by a Lion’s Mane and ears, so I made the decal from Red Easyweed HTV on a Hand Dyed Yellow Onesie, and it turned out so adorable! This project is a great beginner HTV transfer project; the decal is easy to cut, weed, and small enough to fit entirely under your iron in one press. I used the fonts Passengers Script and African in this decal, which you can download for free from dafont.com to future personalize your onesie!


Make sure to check out our other Baby Onesie Projects for more DIY Baby Shower Gift Inspiration!


DIY HTV Wild Child Baby Onesie #wildchild #diybaby #diyonesie #craftsforbaby
  1. After downloading the cut files, import them into the Cricut Software. After creating a new project, select Upload Image. Select the file you wish to upload and it will automatically take you to the final upload screen, where you can name the file, then select Save. The SVG Files are sized so that they will automatically cut to the size you see in the photos, but if you want to change the size you can do so to fit your onesies the way you like.

  2.  After selecting “Make It” Make sure to select the Mirror Mode on the cutting screen. Cut the design in your choice of heat transfer vinyl with the Iron On (for Easyweed HTV) or Iron On+ (for Glitter HTV) Setting on your Cricut, with the shiny side of the material down.

  3. Weed the additional material off of the backing material so that, looking down with the shiny side up, you can see your design with the correct orientation.Iron your onesie to remove any creases, then center the design over the top half of the onesie. Arrange the design shiny side up, then cover with parchment paper. Make sure to keep the parchment paper between the design and the iron.

DIY HTV Wild Child Baby Onesie #wildchild #diybaby #diyonesie #craftsforbaby

4. Set your Iron to the second Highest setting. Cover the parchment paper and decal with your iron, pressing down firmly on the design. Using your iron like a small heat press, press the design for at least 20-30 seconds, repeating and overlapping the last position as you move across the design. Luckily, onesie decals are so small, you should be able to fit the whole decal under the iron in a single press!

5. Remove the parchment paper and peel the clear  backing from the decal, leaving the design on the onesie.

DIY HTV Wild Child Baby Onesie #wildchild #diybaby #diyonesie #craftsforbaby

Check out our other Baby Onesie Projects for more DIY Baby Shower Gift Inspiration!

DIY HTV Wild Child Baby Onesie #wildchild #diybaby #diyonesie #craftsforbaby

Baby Bear DIY HTV Baby Onesie

This post contains affiliate links, meaning that if you click on a link I will recieve a small comission. This costs you nothing extra and I only promote products I use and love! You can read our full disclosure here

Baby Bear DIY HTV Baby Onesie #babybear #diybaby #diyonesie #craftsforbaby

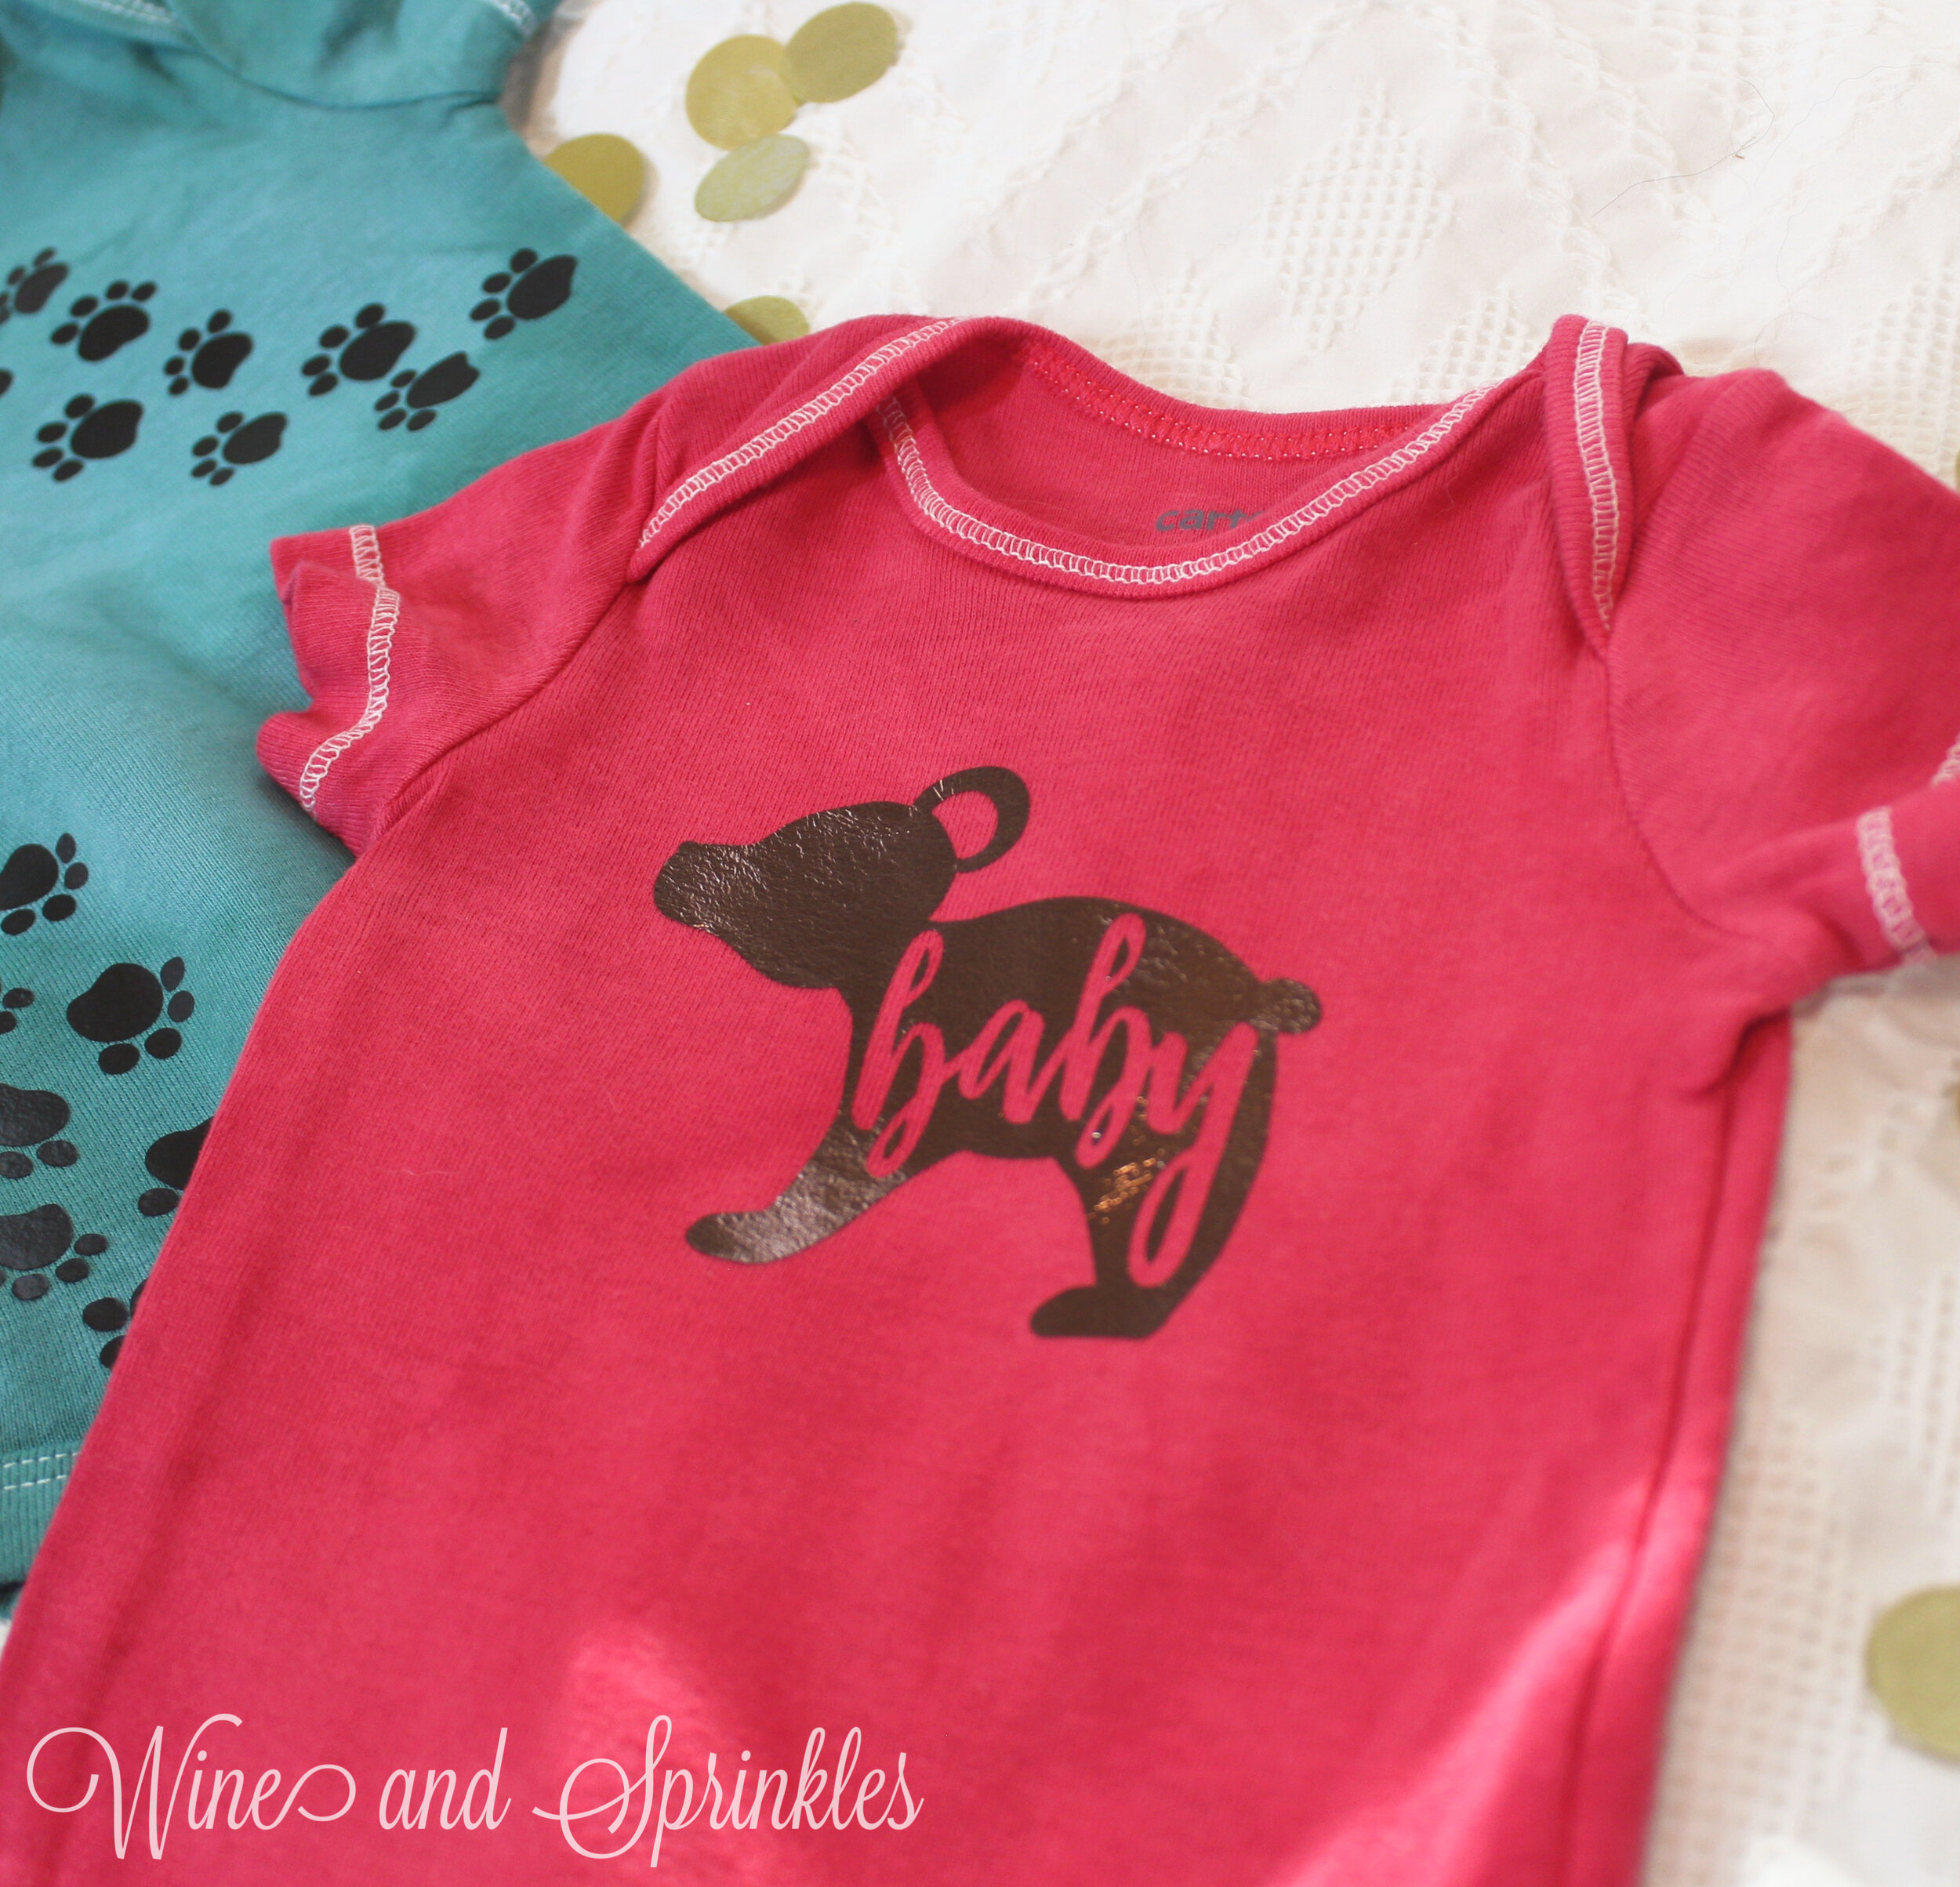
One of my best friends is expecting a baby soon and received an adorable Mama Bear themed sweater for the winter, and as soon as I saw it I knew there had to be a baby bear onesie to go with it for when her little one arrived! Thus, my baby bear onesie was born! Since her sweater has the silhouette of a bear with Mama cut out of it oh, it was only fitting that her little girls onesie was a little bear cub silhouette with baby cut out!  

The decal was made with Brown Easyweed HTV on a Hand Dyed Red Onesie and it turned out so adorable! Can't wait to see what it looks like in silver glitter and purple next!  This project is a great beginner HTV transfer project; the decal is easy to cut, weed, and small enough to fit entirely under your iron in one press.


Make sure to check out our other Baby Onesie Projects for more DIY Baby Shower Gift Inspiration!

Baby Bear DIY HTV Baby Onesie #babybear #diybaby #diyonesie #craftsforbaby


Baby Bear DIY HTV Baby Onesie #babybear #diybaby #diyonesie #craftsforbaby
  1. After downloading the cut files, import them into the Cricut Software. After creating a new project, select Upload Image. Select the file you wish to upload and it will automatically take you to the final upload screen, where you can name the file, then select Save. The SVG Files are sized so that they will automatically cut to the size you see in the photos, but if you want to change the size you can do so to fit your onesies the way you like.

  2. After selecting “Make It” Make sure to select the Mirror Mode on the cutting screen. Cut the design in your choice of heat transfer vinyl with the Iron On (for Easyweed HTV) or Iron On+ (for Glitter HTV) Setting on your Cricut, with the shiny side of the material down.

Baby Bear DIY HTV Baby Onesie #babybear #diybaby #diyonesie #craftsforbaby

4. Set your Iron to the second Highest setting. Cover the parchment paper and decal with your iron, pressing down firmly on the design. Using your iron like a small heat press, press the design for at least 20-30 seconds, repeating and overlapping the last position as you move across the design. Luckily, onesie decals are so small, you should be able to fit the whole decal under the iron in a single press!

3. Weed the additional material off of the backing material so that, looking down with the shiny side up, you can see your design with the correct orientation.Iron your onesie to remove any creases, then center the design over the top half of the onesie. Arrange the design shiny side up, then cover with parchment paper. Make sure to keep the parchment paper between the design and the iron.

Baby Bear DIY HTV Baby Onesie #babybear #diybaby #diyonesie #craftsforbaby

5. Remove the parchment paper and peel the clear backing from the decal, leaving the design on the onesie.

Baby Bear DIY HTV Baby Onesie #babybear #diybaby #diyonesie #craftsforbaby

Check out our other Baby Onesie Projects for more DIY Baby Shower Gift Inspiration!

Baby Bear DIY HTV Baby Onesie #babybear #diybaby #diyonesie #craftsforbaby

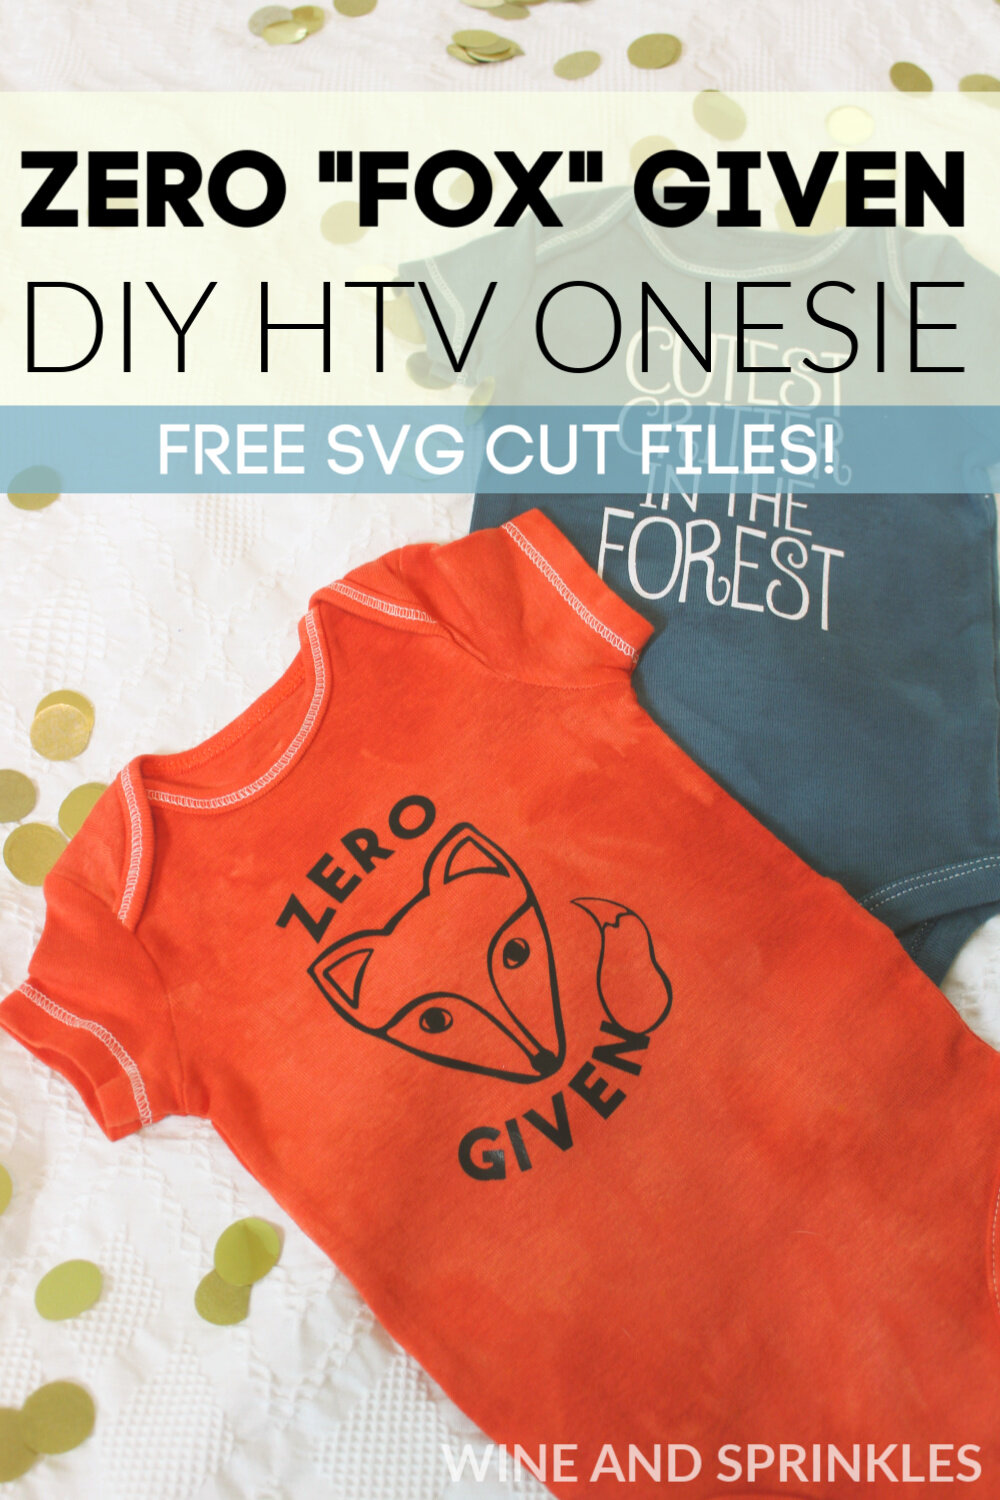
DIY HTV Zero Fox Given Baby Onesie

This post contains affiliate links, meaning that if you click on a link I will recieve a small comission. This costs you nothing extra and I only promote products I use and love! You can read our full disclosure here

DIY HTV Zero Fox Given Baby Onesie #zerofoxgiven #diybaby #diyonesie #craftsforbaby

As soon as I heard of this clever pun involving foxes, I had to use it in my critter themed onesie collection! Because if there's one thing newborns and little ones are good at, it's not giving any cares about things when they are hungry or need a nap.

For this onesie, I made the decal in Black Easyweed Heat Transfer Vinyl on a Hand Dyed Orange Onesie, and it turned out super perfect considering the foxy theme! This project is a great beginner HTV transfer project; the decal is easy to cut, weed, and small enough to fit entirely under your iron in one press.

Make sure to check out our other Baby Onesie Projects for more DIY Baby Shower Gift Inspiration!

DIY HTV Zero Fox Given Baby Onesie #zerofoxgiven #diybaby #diyonesie #craftsforbaby


DIY HTV Zero Fox Given Baby Onesie #zerofoxgiven #diybaby #diyonesie #craftsforbaby
  1. After downloading the cut files, import them into the Cricut Software. After creating a new project, select Upload Image. Select the file you wish to upload and it will automatically take you to the final upload screen, where you can name the file, then select Save. The SVG Files are sized so that they will automatically cut to the size you see in the photos, but if you want to change the size you can do so to fit your onesies the way you like.

  2. After selecting “Make It” Make sure to select the Mirror Mode on the cutting screen. Cut the design in your choice of heat transfer vinyl with the Iron On (for Easyweed HTV) or Iron On+ (for Glitter HTV) Setting on your Cricut, with the shiny side of the material down.

  3. Weed the additional material off of the backing material so that, looking down with the shiny side up, you can see your design with the correct orientation.Iron your onesie to remove any creases, then center the design over the top half of the onesie. Arrange the design shiny side up, then cover with parchment paper. Make sure to keep the parchment paper between the design and the iron.

DIY HTV Zero Fox Given Baby Onesie #zerofoxgiven #diybaby #diyonesie #craftsforbaby

4. Set your Iron to the second Highest setting. Cover the parchment paper and decal with your iron, pressing down firmly on the design. Using your iron like a small heat press, press the design for at least 20-30 seconds, repeating and overlapping the last position as you move across the design. Luckily, onesie decals are so small, you should be able to fit the whole decal under the iron in a single press!

5. Remove the parchment paper and peel the clear  backing from the decal, leaving the design on the onesie. I love pairing this design with yesterday’s onesie, the Cutest Critter in the Forest Onesie!

DIY HTV Zero Fox Given Baby Onesie #zerofoxgiven #diybaby #diyonesie #craftsforbaby

Check out our other Baby Onesie Projects for more DIY Baby Shower Gift Inspiration!

DIY HTV Zero Fox Given Baby Onesie #zerofoxgiven #diybaby #diyonesie #craftsforbaby

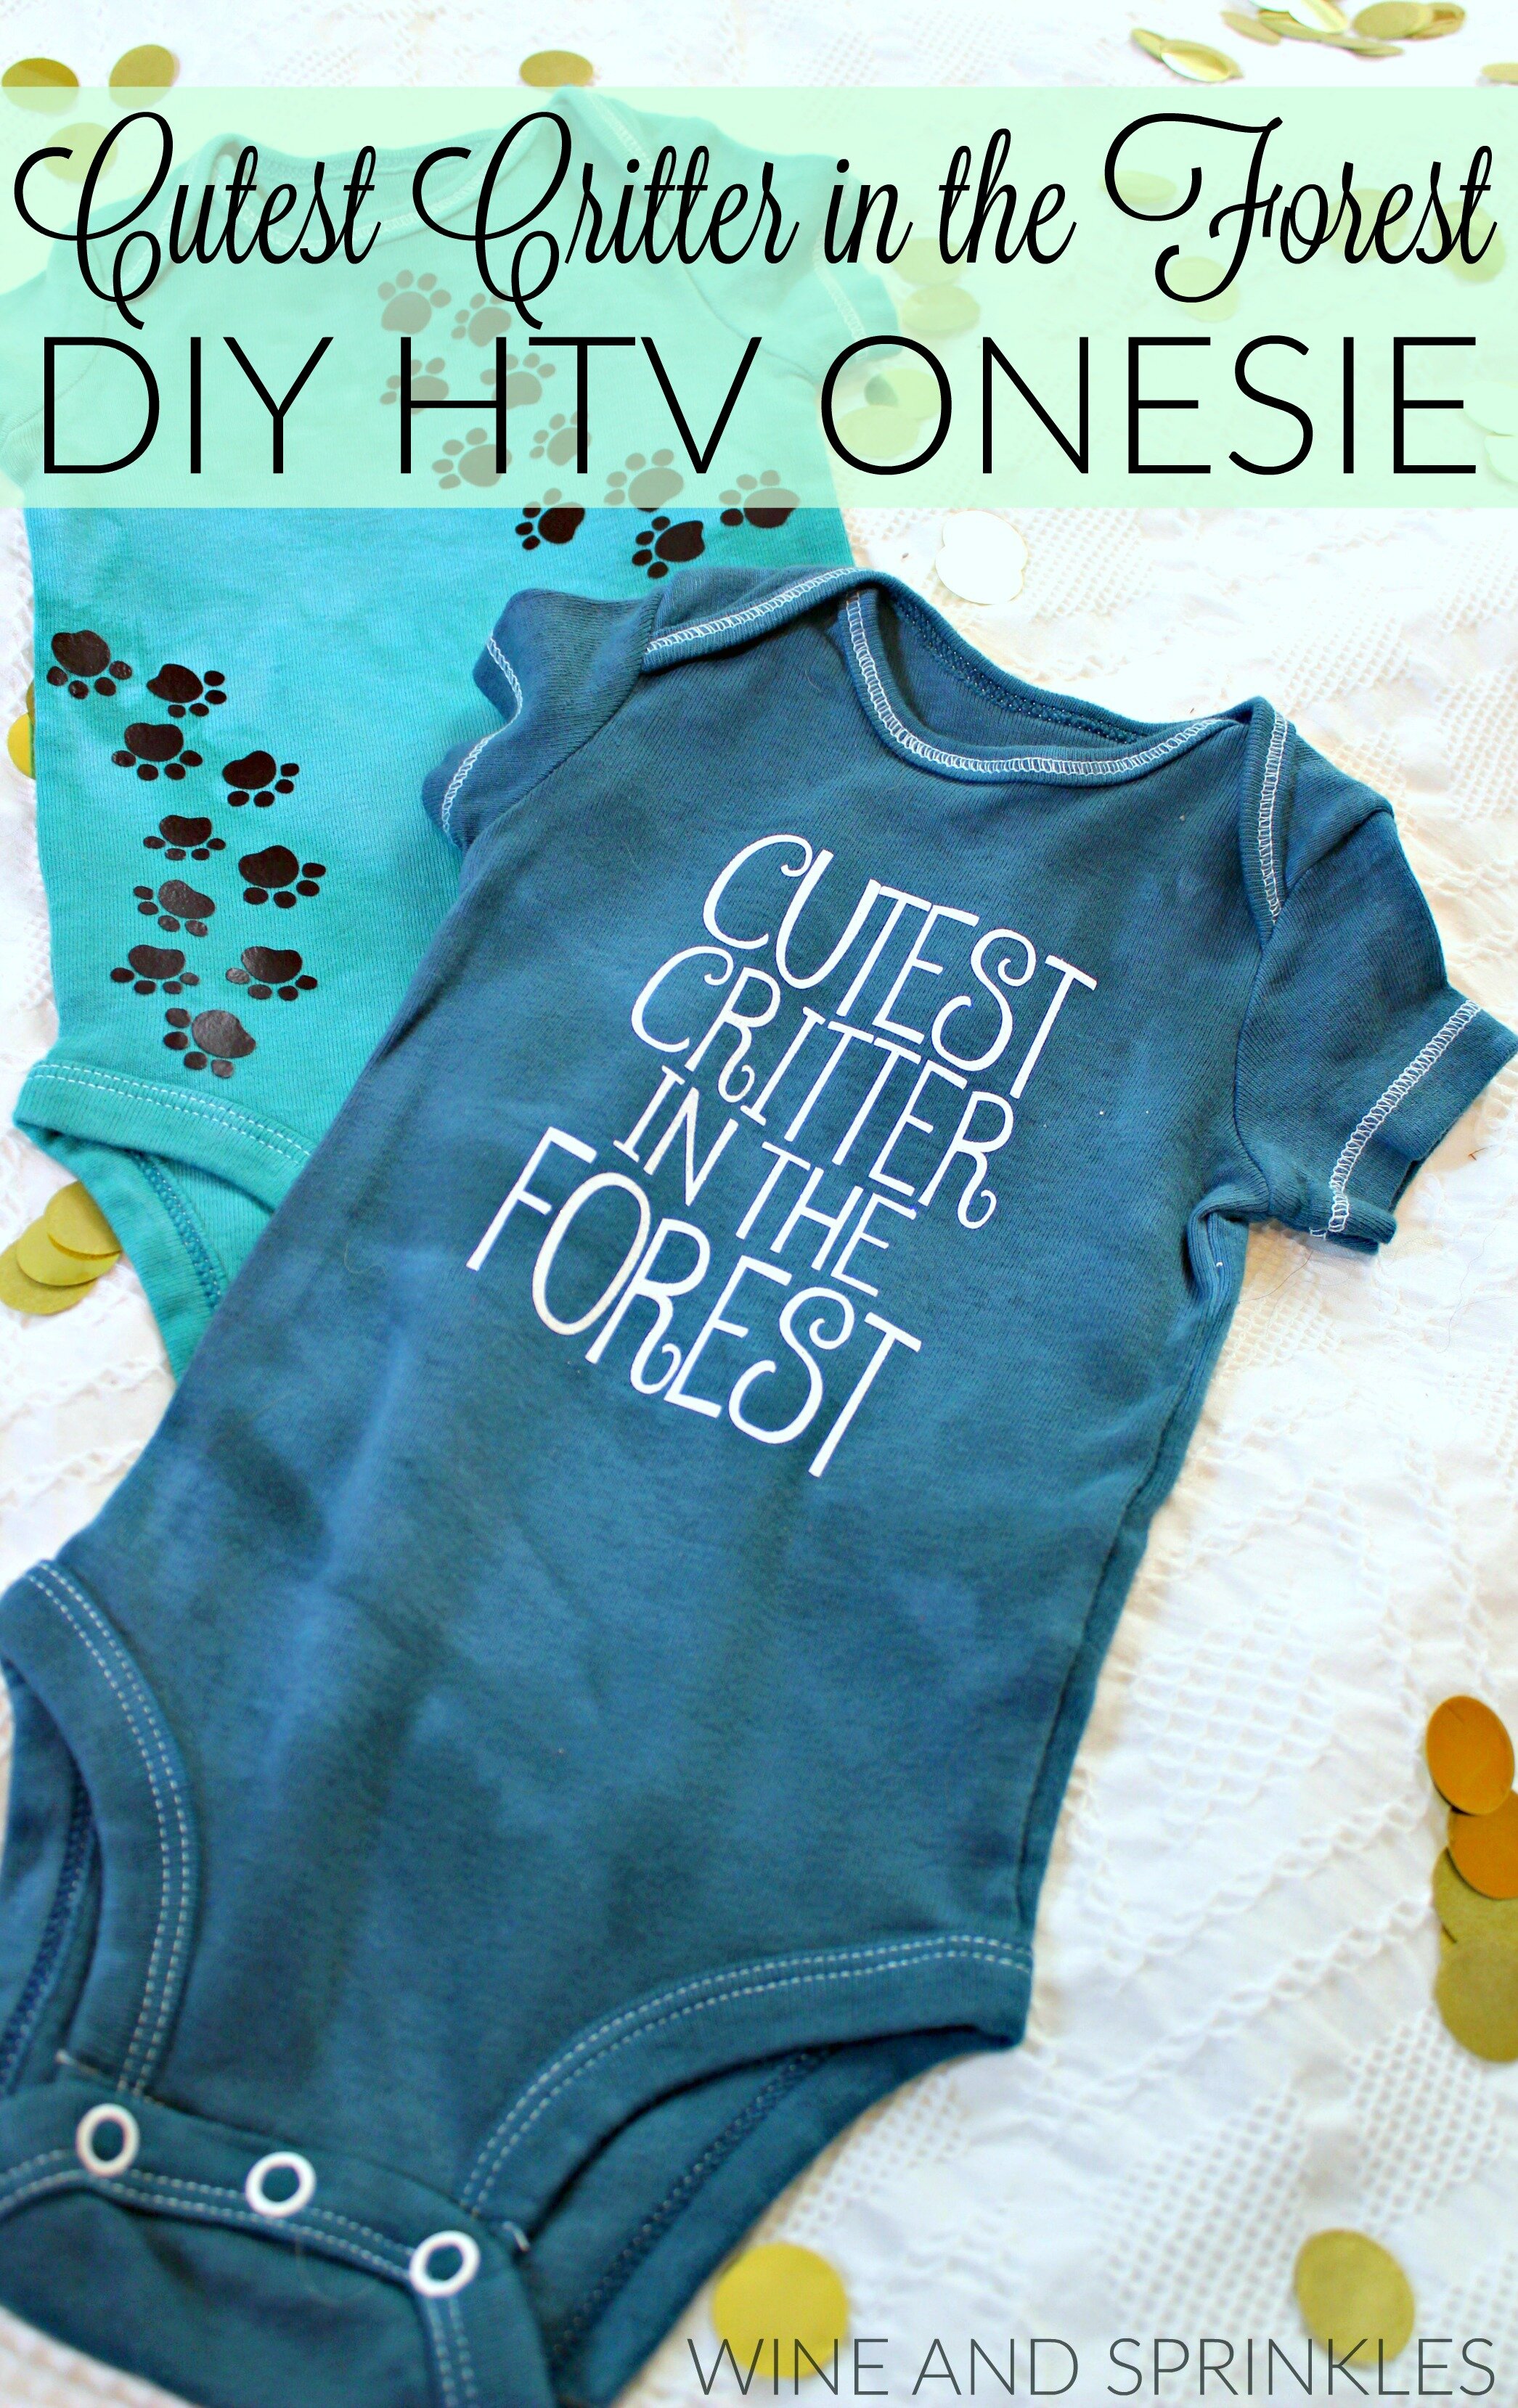
Cutest Critter in the Forest DIY HTV Onesie

This post contains affiliate links, meaning that if you click on a link I will recieve a small comission. This costs you nothing extra and I only promote products I use and love! You can read our full disclosure here

DIY HTV Cutest Critter in the Forest Baby Onesie #diybaby #diyonesie #craftsforbaby

Spring is in the air and all the babies are decked out in their adorable spring outfits! Springtime in a forest is my personal favorite, so in honor of spring I designed some woodland inspired onesies, starting with this Cutest Critter in the Forest Onesie!


I made the decal from White Glitter HTV on a Hand Dyed Blue Green Onesie and it turned out absolutely adorable! This project is a great beginner HTV transfer project; the decal is easy to cut, weed, and small enough to fit entirely under your iron in one press. I used the font Betty for the decal, which you can download for free from dafont.com

Make sure to check out our other Baby Onesie Projects for more DIY Baby Shower Gift Inspiration!

DIY HTV Cutest Critter in the Forest Baby Onesie #diybaby #diyonesie #craftsforbaby


DIY HTV Cutest Critter in the Forest Baby Onesie #diybaby #diyonesie #craftsforbaby
  1. After downloading the cut files, import them into the Cricut Software. After creating a new project, select Upload Image. Select the file you wish to upload and it will automatically take you to the final upload screen, where you can name the file, then select Save. The SVG Files are sized so that they will automatically cut to the size you see in the photos, but if you want to change the size you can do so to fit your onesies the way you like.

  2. After selecting “Make It” Make sure to select the Mirror Mode on the cutting screen. Cut the design in your choice of heat transfer vinyl with the Iron On (for Easyweed HTV) or Iron On+ (for Glitter HTV) Setting on your Cricut, with the shiny side of the material down.

  3. Weed the additional material off of the backing material so that, looking down with the shiny side up, you can see your design with the correct orientation.Iron your onesie to remove any creases, then center the design over the top half of the onesie. Arrange the design shiny side up, then cover with parchment paper. Make sure to keep the parchment paper between the design and the iron.

DIY HTV Cutest Critter in the Forest Baby Onesie #diybaby #diyonesie #craftsforbaby

4. Set your Iron to the second Highest setting. Cover the parchment paper and decal with your iron, pressing down firmly on the design. Using your iron like a small heat press, press the design for at least 20-30 seconds, repeating and overlapping the last position as you move across the design. Luckily, onesie decals are so small, you should be able to fit the whole decal under the iron in a single press!

5. Remove the parchment paper and peel the clear  backing from the decal, leaving the design on the onesie.

DIY HTV Cutest Critter in the Forest Baby Onesie #diybaby #diyonesie #craftsforbaby

Check out our other Baby Onesie Projects for more DIY Baby Shower Gift Inspiration!

DIY HTV Cutest Critter in the Forest Baby Onesie #diybaby #diyonesie #craftsforbaby

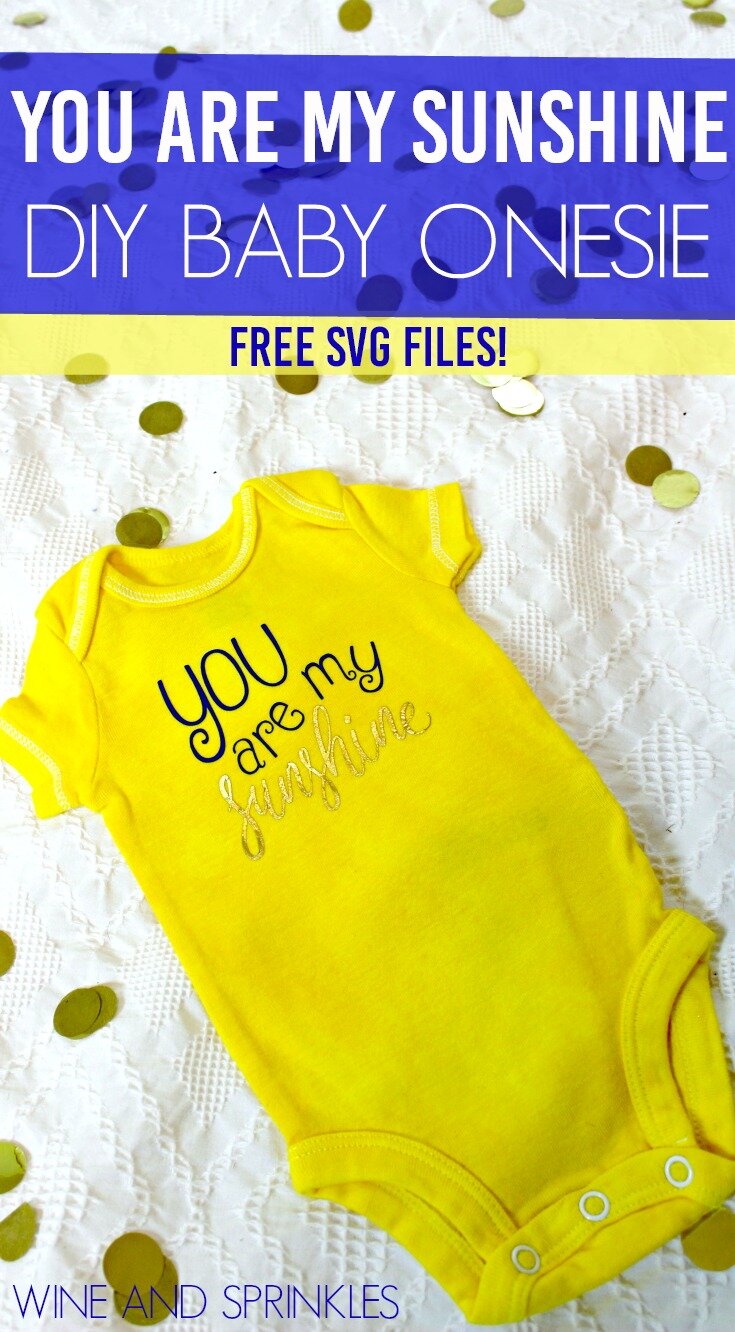
DIY HTV You are my Sunshine Newborn Baby Onesie

This post contains affiliate links, meaning that if you click on a link I will recieve a small comission. This costs you nothing extra and I only promote products I use and love! You can read our full disclosure here

DIY HTV You are my Sunshine Newborn Baby Onesie for Baby Shower Gifts #onesies #babygift #babyshower

Growing up, one of our favorite childhood songs was “You are my Sunshine” and I think it is such a fitting saying for a new baby coming into your life. Despite the sleepiness and tough times, your baby is still a little ray of sunshine! So for the last (newborn) onesie I designed, I made this beautiful “You are my Sunshine” two toned onesie!


The decal was made in Turquoise Easyweed HTV for the top lettering and Gold Metal Foil HTV for the bottom lettering on a Hand Dyed Yellow Onesie. I absolutely love the onesie and decal color combination, bright and cheerful just like your little ray of sunshine! If you wish to use them for other projects, this decal was made with the fonts Betty and Clarissa, both of which are available at dafont.com!

DIY HTV You are my Sunshine Newborn Baby Onesie for Baby Shower Gifts #onesies #babygift #babyshower

Make sure to check out our other Baby Onesie Projects for more DIY Baby Shower Gift Inspiration!


DIY HTV You are my Sunshine Newborn Baby Onesie for Baby Shower Gifts #onesies #babygift #babyshower
  1. After downloading the cut files, import them into the Cricut Software. After creating a new project, select Upload Image. Select the file you wish to upload and it will automatically take you to the final upload screen, where you can name the file, then select Save. The SVG Files are sized so that they will automatically cut to the size you see in the photos, but if you want to change the size you can do so to fit your onesies the way you like.

  2. After selecting “Make It” Make sure to select the Mirror Mode on the cutting screen. Cut the design in your choice of heat transfer vinyl with the Iron On (for Easyweed and Metal Look HTV) or Iron On+ (for Glitter HTV) Setting on your Cricut, with the shiny side of the material down. Repeat for the remaining color of your decal.

DIY HTV You are my Sunshine Newborn Baby Onesie for Baby Shower Gifts #onesies #babygift #babyshower

3. Weed the additional material off of the backing material so that, looking down with the shiny side up, you can see your design with the correct orientation.Iron your onesie to remove any creases, then center the design over the top half of the onesie, shiny side up. Start by arranging the whole design (both colors) so that you can see how they will fit together, with the “Sunshine” Decal under the other text decal. Once the design is placed to your satisfaction, remove the “You are my” lettering, leaving only the “Sunshine” Decal to transfer first.  Cover with parchment paper, making sure to keep the parchment paper between the design and the iron.

DIY HTV You are my Sunshine Newborn Baby Onesie for Baby Shower Gifts #onesies #babygift #babyshower

4. Set your Iron to the second Highest setting. Cover the parchment paper and decal with your iron, pressing down firmly on the design. Using your iron like a small heat press, press the design for at least 20-30 seconds for Easyweed or Glitter HTV or 10-15 seconds for Metal Look HTV, repeating and overlapping the last position as you move across the design. Luckily, onesie decals are so small, you should be able to fit the whole decal under the iron in a single press!

5. Remove the parchment paper and peel the clear  backing from the decal, leaving the design on the onesie. Now, arrange the second decal back on the onesie, fitting the text to run along the top of the “Sunshine” lettering. Cover with parchment paper and again press the design for 20-30 seconds, checking every 10 seconds until the second design is adhered. I was worried about Foil HTV I had already transferred, but it didn’t seem to hurt it by repressing it with the iron.

DIY HTV You are my Sunshine Newborn Baby Onesie for Baby Shower Gifts #onesies #babygift #babyshower

6. Remove the parchment paper and peel the clear backing from the decal, leaving the end of the design on the onesie.

DIY HTV You are my Sunshine Newborn Baby Onesie for Baby Shower Gifts #onesies #babygift #babyshower

Check out our other Baby Onesie Projects for more DIY Baby Shower Gift Inspiration!

DIY HTV You are my Sunshine Newborn Baby Onesie for Baby Shower Gifts #onesies #babygift #babyshower

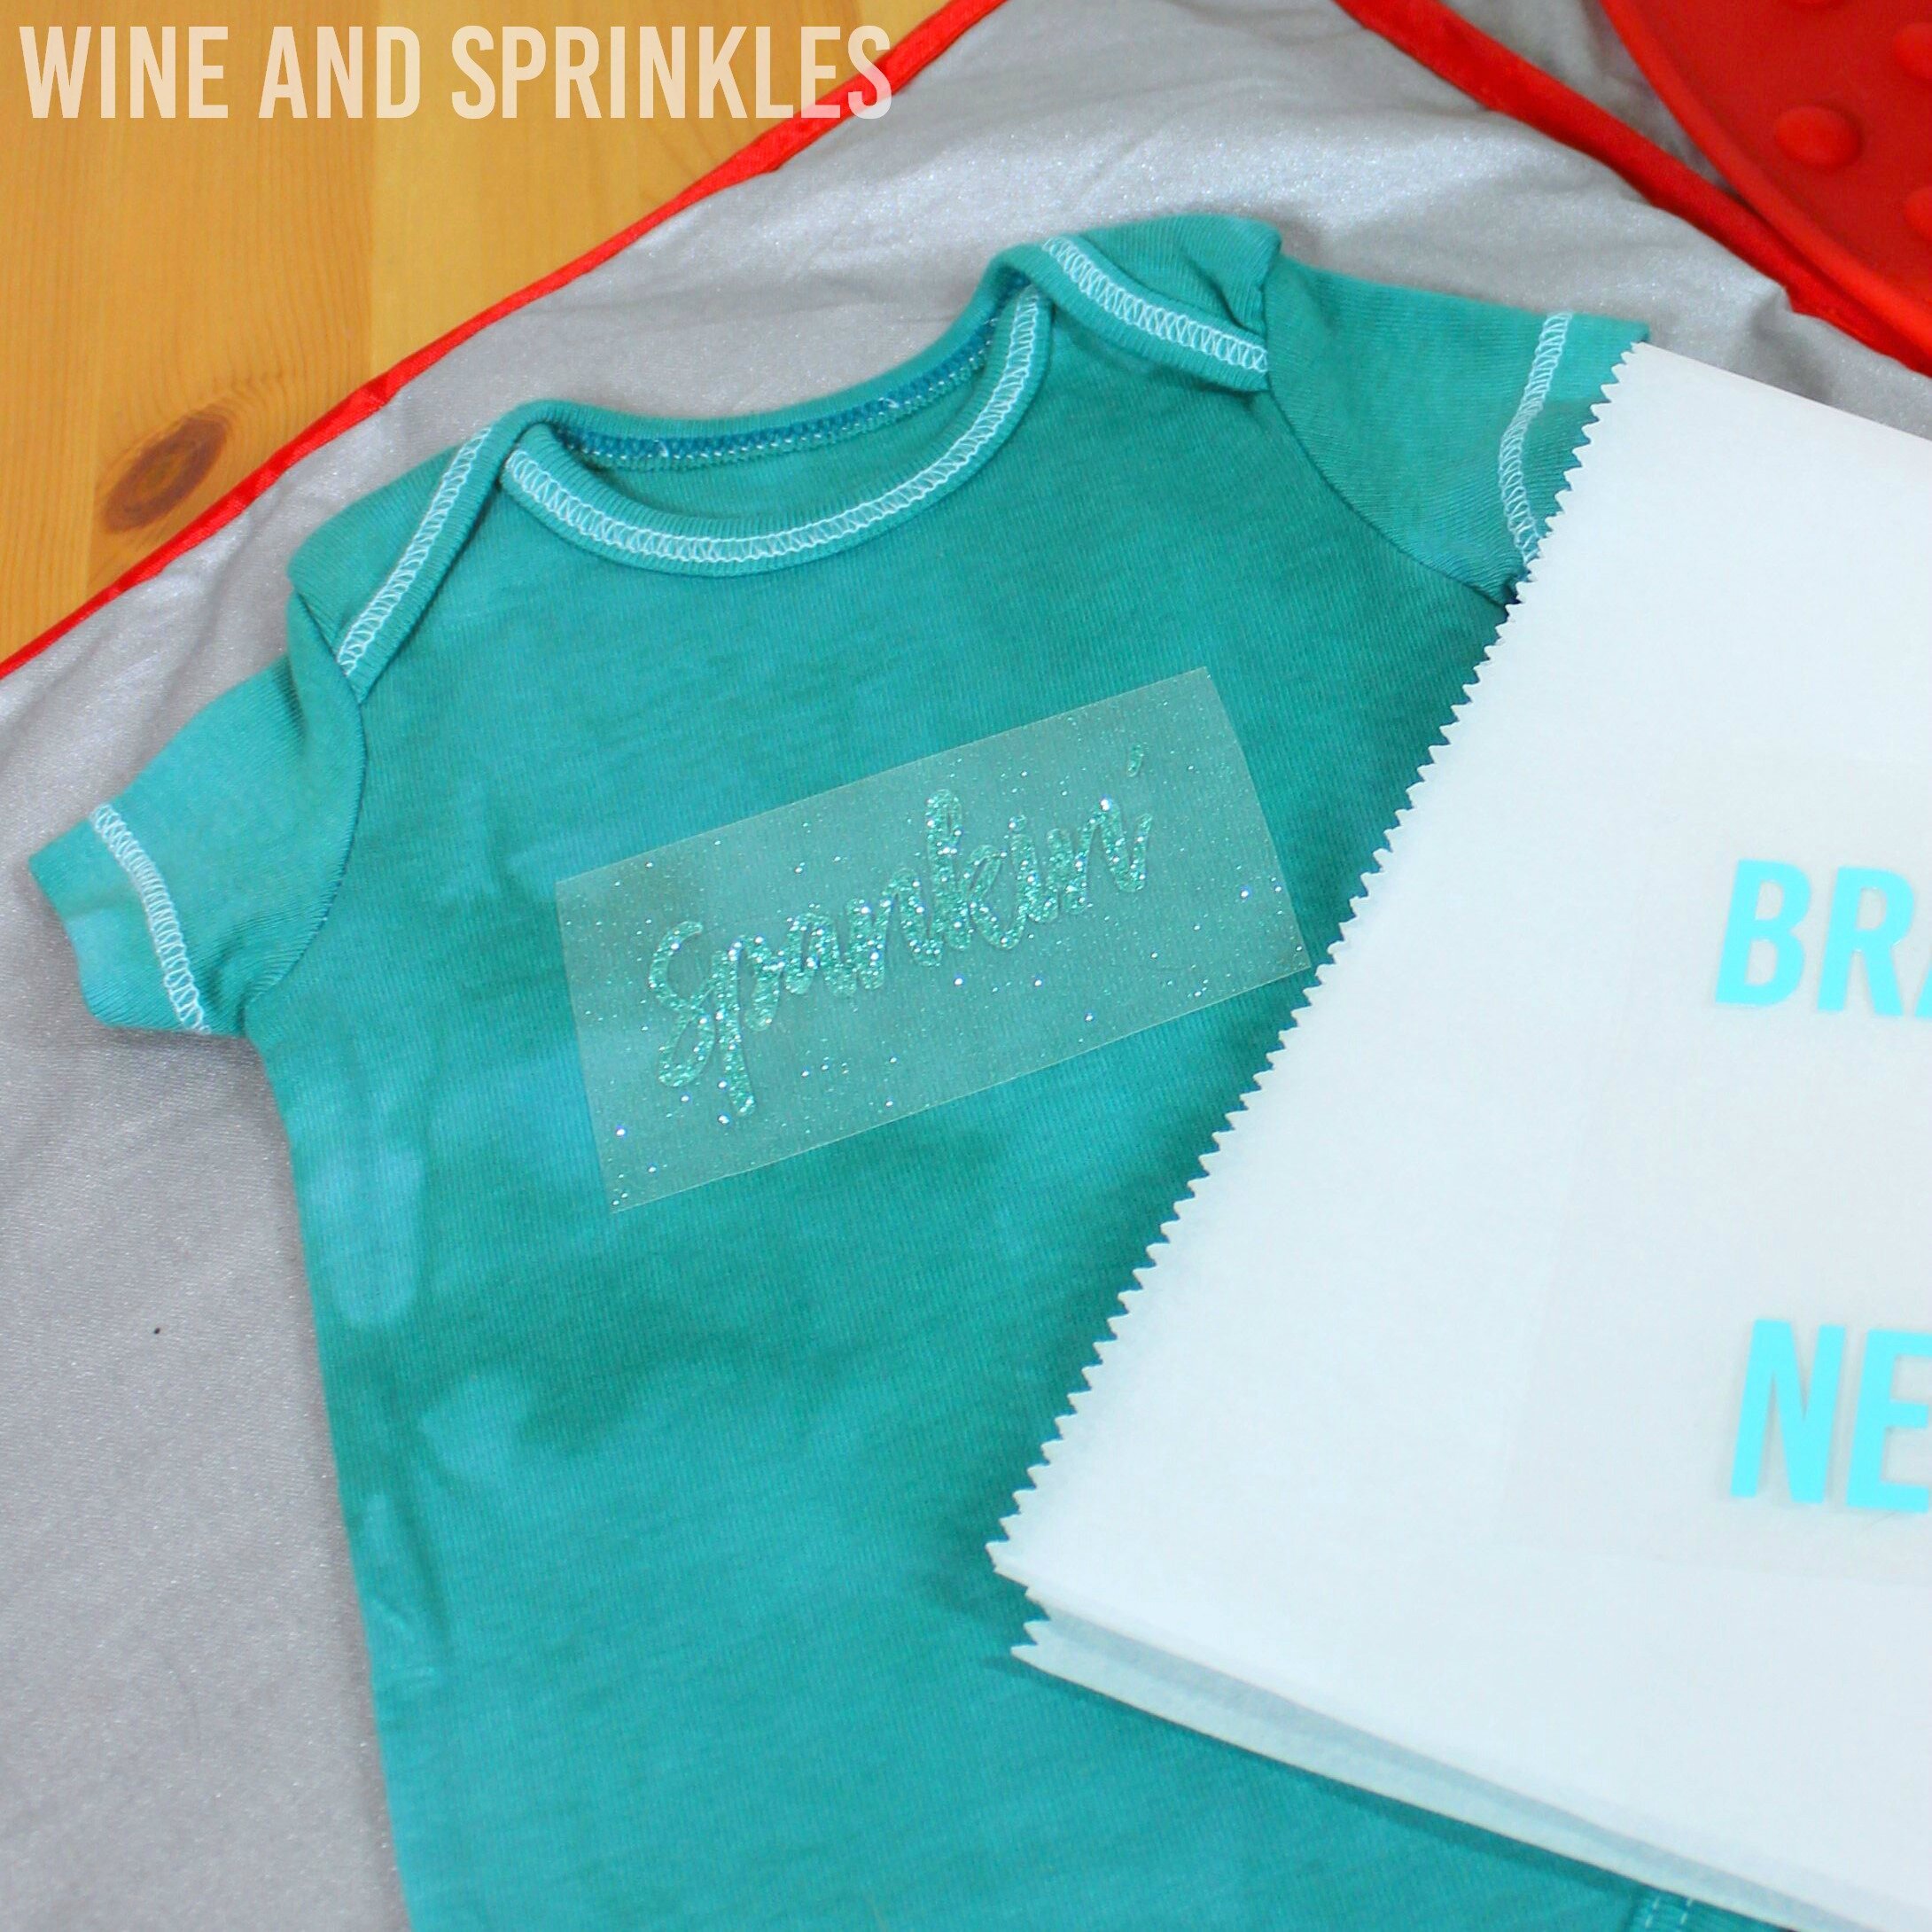
DIY HTV Brand Spankin New Newborn Baby Onesie

This post contains affiliate links, meaning that if you click on a link I will recieve a small comission. This costs you nothing extra and I only promote products I use and love! You can read our full disclosure here

DIY HTV Brand Spankin New Newborn Baby Onesie for Baby Shower Gifts #onesies #babygift #babyshower

There are so many cute designs and sayings to make for onesies, I had to include this adorable Brand Spankin’ New onesie in my decal collection! This two toned onesie is a super fun and easy choice to gift to any “Brand Spankin” New Born you know!

I made the decal in Tiffany Blue Easyweed HTV and Silver Glitter HTV on a Hand Dyed Emerald Onesie and it came out adorable! The fonts used were Bebas Kai and Passenger Script, in case you want to use them to design your own projects!


Make sure to check out our other Baby Onesie Projects for more DIY Baby Shower Gift Inspiration!

DIY HTV Brand Spankin New Newborn Baby Onesie for Baby Shower Gifts #onesies #babygift #babyshower


DIY HTV Brand Spankin New Newborn Baby Onesie for Baby Shower Gifts #onesies #babygift #babyshower
  1. After downloading the cut files, import them into the Cricut Software. After creating a new project, select Upload Image. Select the file you wish to upload and it will automatically take you to the final upload screen, where you can name the file, then select Save. The SVG Files are sized so that they will automatically cut to the size you see in the photos, but if you want to change the size you can do so to fit your onesies the way you like.

  2. After selecting “Make It” Make sure to select the Mirror Mode on the cutting screen. Cut the design in your choice of heat transfer vinyl with the Iron On (for Easyweed HTV) or Iron On+ (for Glitter HTV) Setting on your Cricut, with the shiny side of the material down.

DIY HTV Brand Spankin New Newborn Baby Onesie for Baby Shower Gifts #onesies #babygift #babyshower

3. Weed the additional material off of the backing material so that, looking down with the shiny side up, you can see your design with the correct orientation.Iron your onesie to remove any creases, then center the design over the top half of the onesie, shiny side up.. Start by arranging the whole design (both colors) so that you can see how they will fit together, with the “Spankin” Decal under the other text decal. Once the design is placed to your satisfaction, remove the “Brand - New” lettering, leaving only the “Spankin” Decal to transfer first.  Cover with parchment paper, making sure to keep the parchment paper between the design and the iron.

4. Set your Iron to the second Highest setting. Cover the parchment paper and decal with your iron, pressing down firmly on the design. Using your iron like a small heat press, press the design for at least 20-30 seconds, repeating and overlapping the last position as you move across the design. Luckily, onesie decals are so small, you should be able to fit the whole decal under the iron in a single press!

DIY HTV Brand Spankin New Newborn Baby Onesie for Baby Shower Gifts #onesies #babygift #babyshower

5. Remove the parchment paper and peel the clear  backing from the decal, leaving the design on the onesie. Now, arrange the second decal back on the onesie, sandwiching the “Spankin” decal between “Brand” and “New.” Cover with parchment paper and again press the design for at least 20-30 seconds.

DIY HTV Brand Spankin New Newborn Baby Onesie for Baby Shower Gifts #onesies #babygift #babyshower

6. Remove the parchment paper and peel the clear backing from the decal, leaving the end of the design on the onesie.

I paired this onesie with our Hello World Onesie for a fun blue and green onesie combo, which would you pick? I love pairing onesies together or creating sets, so try pairing this with any of our other Onesie Designs to make a handmade and heartfelt gift for any newborn in your life!

DIY HTV Brand Spankin New Newborn Baby Onesie for Baby Shower Gifts #onesies #babygift #babyshower

DIY HTV New to the Crew Newborn Baby Onesie

This post contains affiliate links, meaning that if you click on a link I will recieve a small comission. This costs you nothing extra and I only promote products I use and love! You can read our full disclosure here

DIY HTV New to the Crew Newborn Baby Onesie for Baby Shower Gifts #onesies #babygift #babyshower

Make sure to check out our other Baby Onesie Projects for more DIY Baby Shower Gift Inspiration!

My sister’s favorite halloween costume is being a pirate, so much so she's done it for the last several years! So her baby can join the fun, I designed this “New to the Crew” Onesie to celebrate her newest crew member! Regardless of your seafaring ways, this onesie is an adorable choice to add to any newborn ensemble!

In keeping with our pirate theme, I made the decal from Gold Metal Foil HTV on a Hand Dyed Red Onesie, perfect for a tiny future pirate! This project is a great beginner HTV transfer project; the decal is easy to cut, weed, and small enough to fit entirely under your iron in one press.

DIY HTV New to the Crew Newborn Baby Onesie for Baby Shower Gifts #onesies #babygift #babyshower


Download Cut Files Here!
DIY HTV New to the Crew Newborn Baby Onesie for Baby Shower Gifts #onesies #babygift #babyshower
  1. After downloading the cut files, import them into the Cricut Software. After creating a new project, select Upload Image. Select the file you wish to upload and it will automatically take you to the final upload screen, where you can name the file, then select Save. The SVG Files are sized so that they will automatically cut to the size you see in the photos, but if you want to change the size you can do so to fit your onesies the way you like.

  2. After selecting “Make It” Make sure to select the Mirror Mode on the cutting screen. Cut the design in your choice of heat transfer vinyl with the Iron On (for Easyweed HTV) or Iron On+ (for Glitter HTV) Setting on your Cricut, with the shiny side of the material down.

DIY HTV New to the Crew Newborn Baby Onesie for Baby Shower Gifts #onesies #babygift #babyshower

3. Weed the additional material off of the backing material so that, looking down with the shiny side up, you can see your design with the correct orientation.Iron your onesie to remove any creases, then center the design over the top half of the onesie. Arrange the design shiny side up, then cover with parchment paper. Make sure to keep the parchment paper between the design and the iron.

4. Set your Iron to the second Highest setting. Cover the parchment paper and decal with your iron, pressing down firmly on the design. Using your iron like a small heat press, press the design for 10-15 seconds for the Metal HTV or at least 20-30 seconds for Easyweed or Glitter HTV, repeating and overlapping the last position as you move across the design. Luckily, onesie decals are so small, you should be able to fit the whole decal under the iron in a single press!

DIY HTV New to the Crew Newborn Baby Onesie for Baby Shower Gifts #onesies #babygift #babyshower

5. Remove the parchment paper and peel the clear  backing from the decal, leaving the design on the onesie.

Check out our other Baby Onesie Projects for more DIY Baby Shower Gift Inspiration!

DIY HTV New to the Crew Newborn Baby Onesie for Baby Shower Gifts #onesies #babygift #babyshower

DIY HTV Adventure Awaits Newborn Baby Onesie

This post contains affiliate links, meaning that if you click on a link I will recieve a small comission. This costs you nothing extra and I only promote products I use and love! You can read our full disclosure here

DIY HTV Adventure Awaits Newborn Baby Onesie for Baby Shower Gifts #onesies #babygift #babyshower

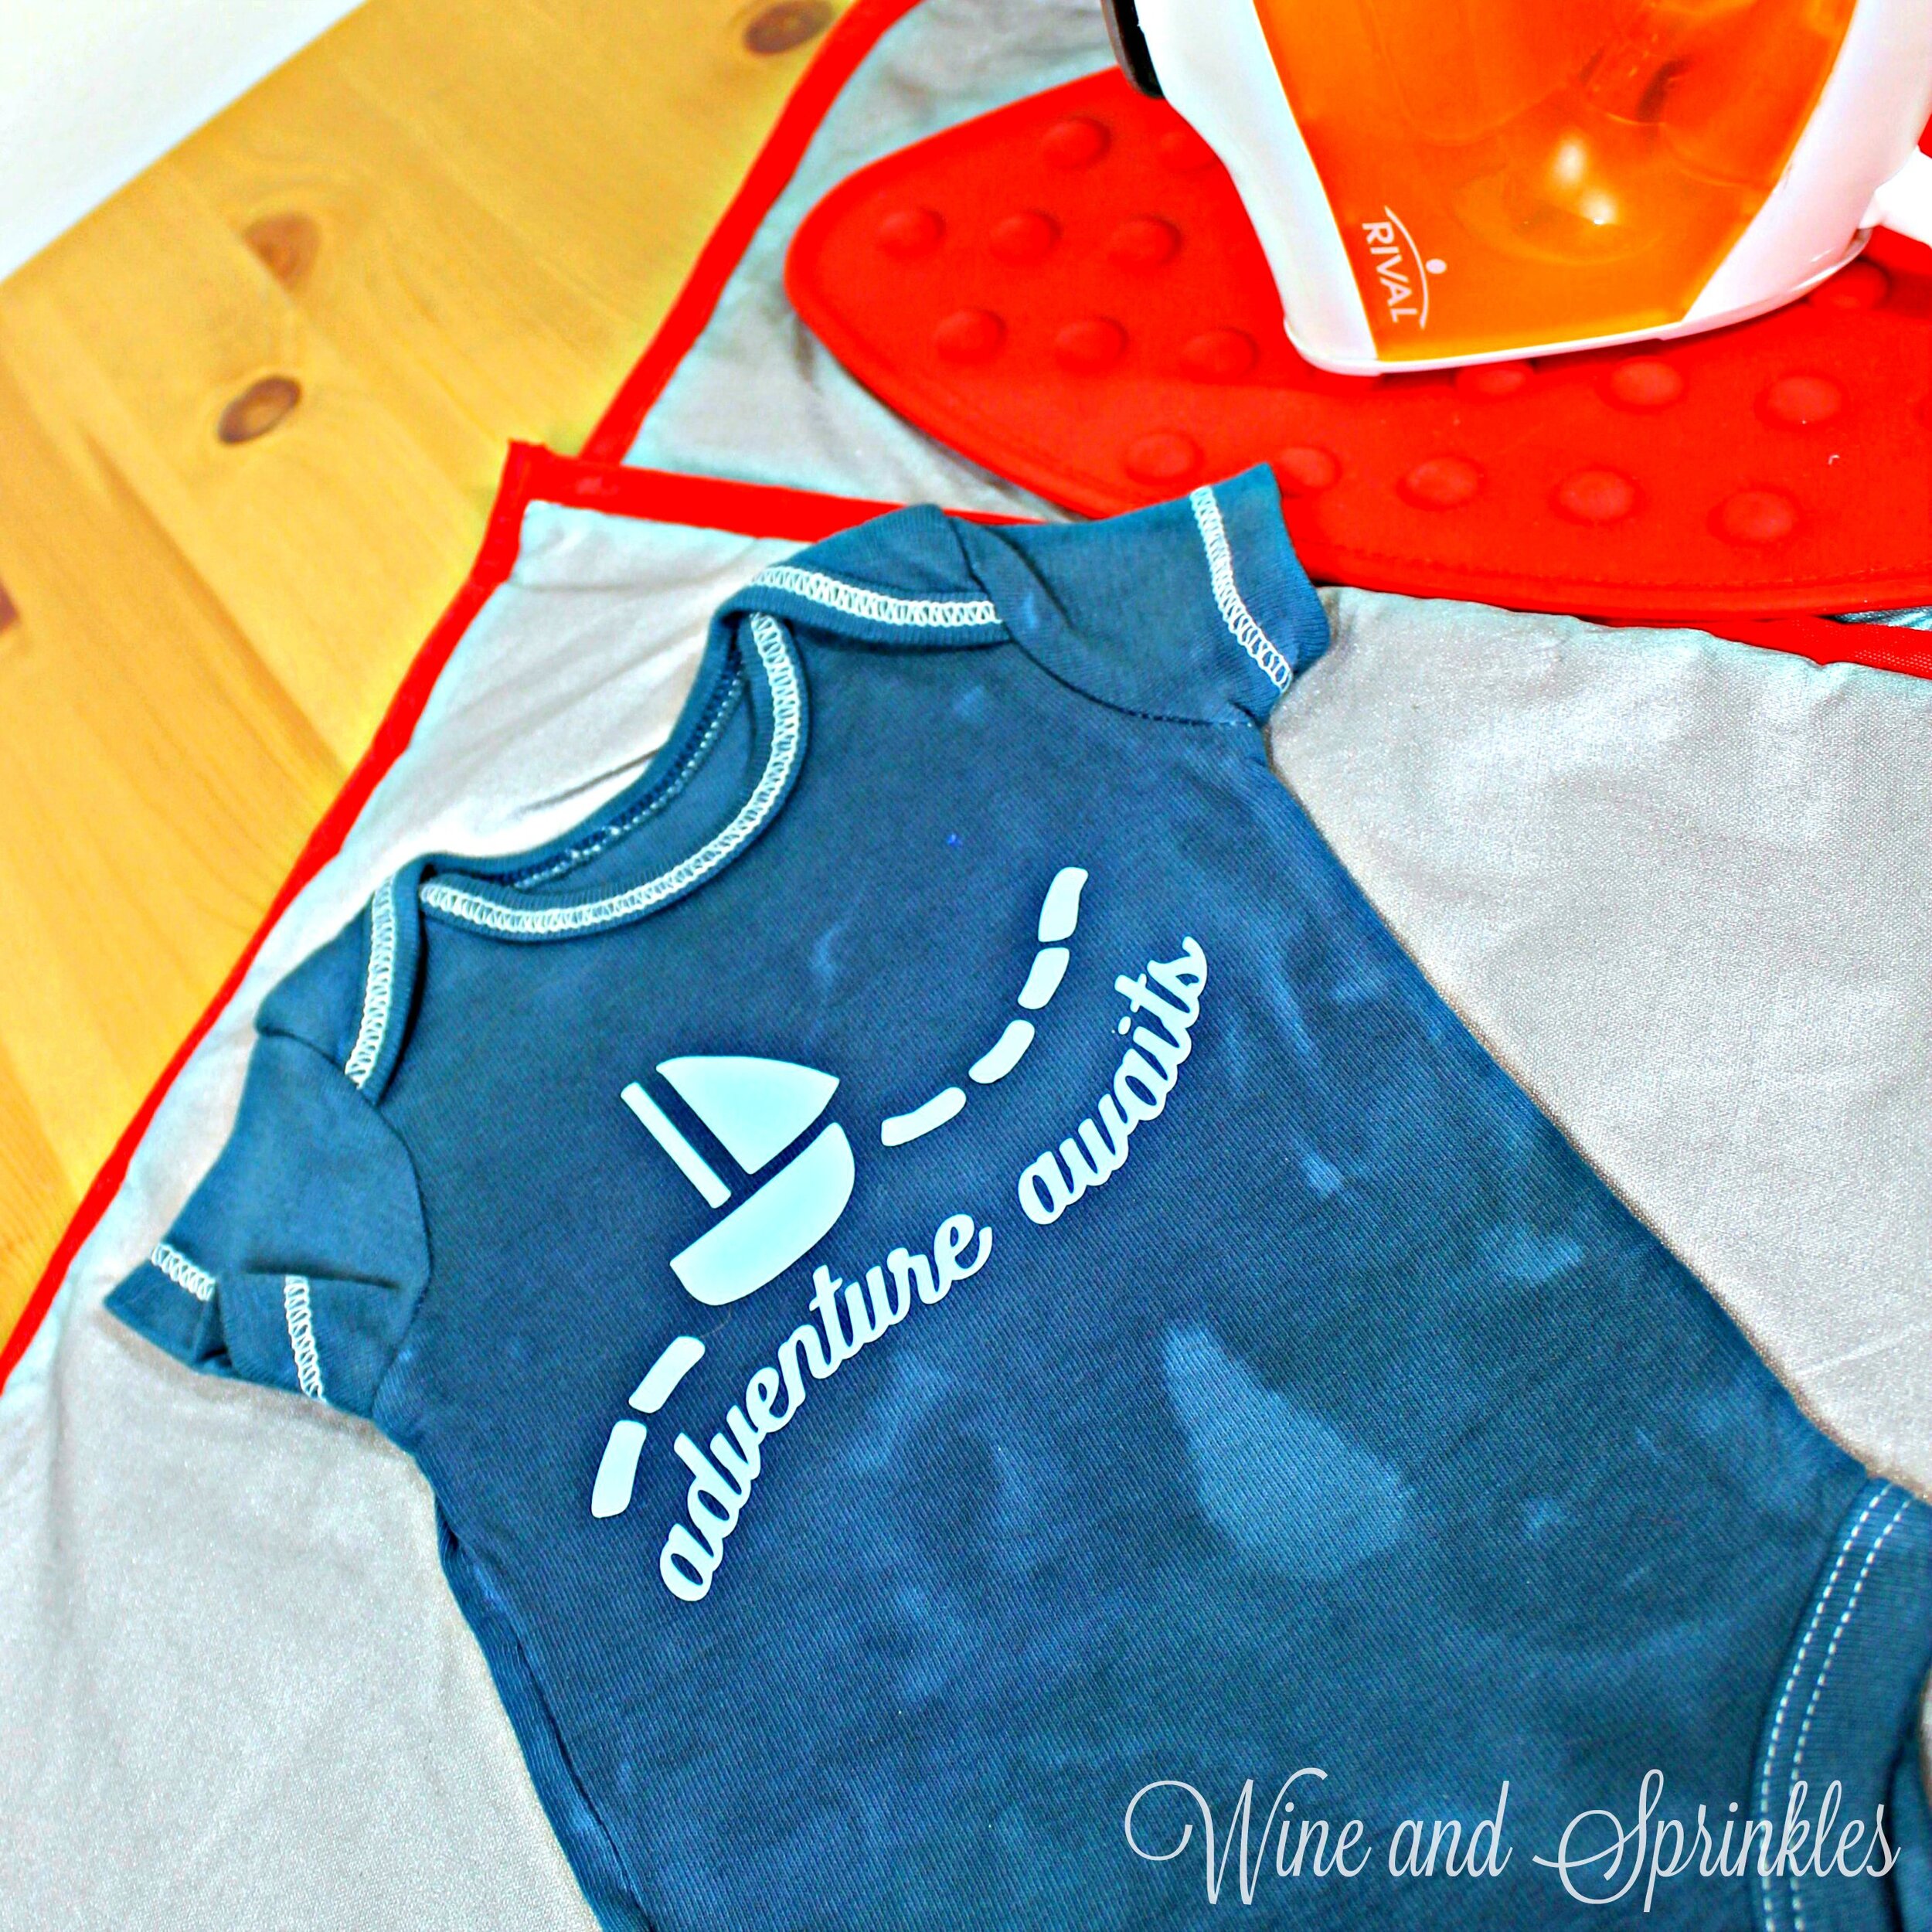
As any mother can attest, when you have your first baby you are quite literally setting off into a new life adventure! And no better way to bedeck a new baby than in this Adventure Awaits HTV Onesie! I went with a nautical theme on this onesie, complete with a little sailboat to set sail for the new adventures of mom and baby!


I made the decal in Tiffany Blue Easyweed Heat Transfer Vinyl on a Hand Dyed Blue Green Onesie and it turned out great! If you are looking to use this font for other projects, I used Bio Monster, a font that is free to use from dafont.com.

This project is a great beginner HTV transfer project; the decal is easy to cut, weed, and small enough to fit entirely under your iron in one press! Make sure to check out our other Baby Onesie Projects for more DIY Baby Shower Gift Inspiration!

DIY HTV Adventure Awaits Newborn Baby Onesie for Baby Shower Gifts #onesies #babygift #babyshower


DIY HTV Adventure Awaits Newborn Baby Onesie for Baby Shower Gifts #onesies #babygift #babyshower
  1. After downloading the cut files, import them into the Cricut Software. After creating a new project, select Upload Image. Select the file you wish to upload and it will automatically take you to the final upload screen, where you can name the file, then select Save. The SVG Files are sized so that they will automatically cut to the size you see in the photos, but if you want to change the size you can do so to fit your onesies the way you like.

  2. After selecting “Make It” Make sure to select the Mirror Mode on the cutting screen. Cut the design in your choice of heat transfer vinyl with the Iron On (for Easyweed HTV) or Iron On+ (for Glitter HTV) Setting on your Cricut, with the shiny side of the material down.

DIY HTV Adventure Awaits Newborn Baby Onesie for Baby Shower Gifts #onesies #babygift #babyshower

3. Weed the additional material off of the backing material so that, looking down with the shiny side up, you can see your design with the correct orientation.Iron your onesie to remove any creases, then center the design over the top half of the onesie. Arrange the design shiny side up, then cover with parchment paper. Make sure to keep the parchment paper between the design and the iron.

4. Set your Iron to the second Highest setting. Cover the parchment paper and decal with your iron, pressing down firmly on the design. Using your iron like a small heat press, press the design for at least 20-30 seconds, repeating and overlapping the last position as you move across the design. Luckily, onesie decals are so small, you should be able to fit the whole decal under the iron in a single press!

DIY HTV Adventure Awaits Newborn Baby Onesie for Baby Shower Gifts #onesies #babygift #babyshower

5. Remove the parchment paper and peel the clear  backing from the decal, leaving the design on the onesie.

Check out our other Baby Onesie Projects for more DIY Baby Shower Gift Inspiration!

DIY HTV Adventure Awaits Newborn Baby Onesie for Baby Shower Gifts #onesies #babygift #babyshower

DIY HTV Hello World Newborn Baby Onesie

This post contains affiliate links, meaning that if you click on a link I will recieve a small comission. This costs you nothing extra and I only promote products I use and love! You can read our full disclosure here

DIY HTV Hello World Newborn Baby Onesie for Baby Shower Gifts #onesies #babygift #babyshower

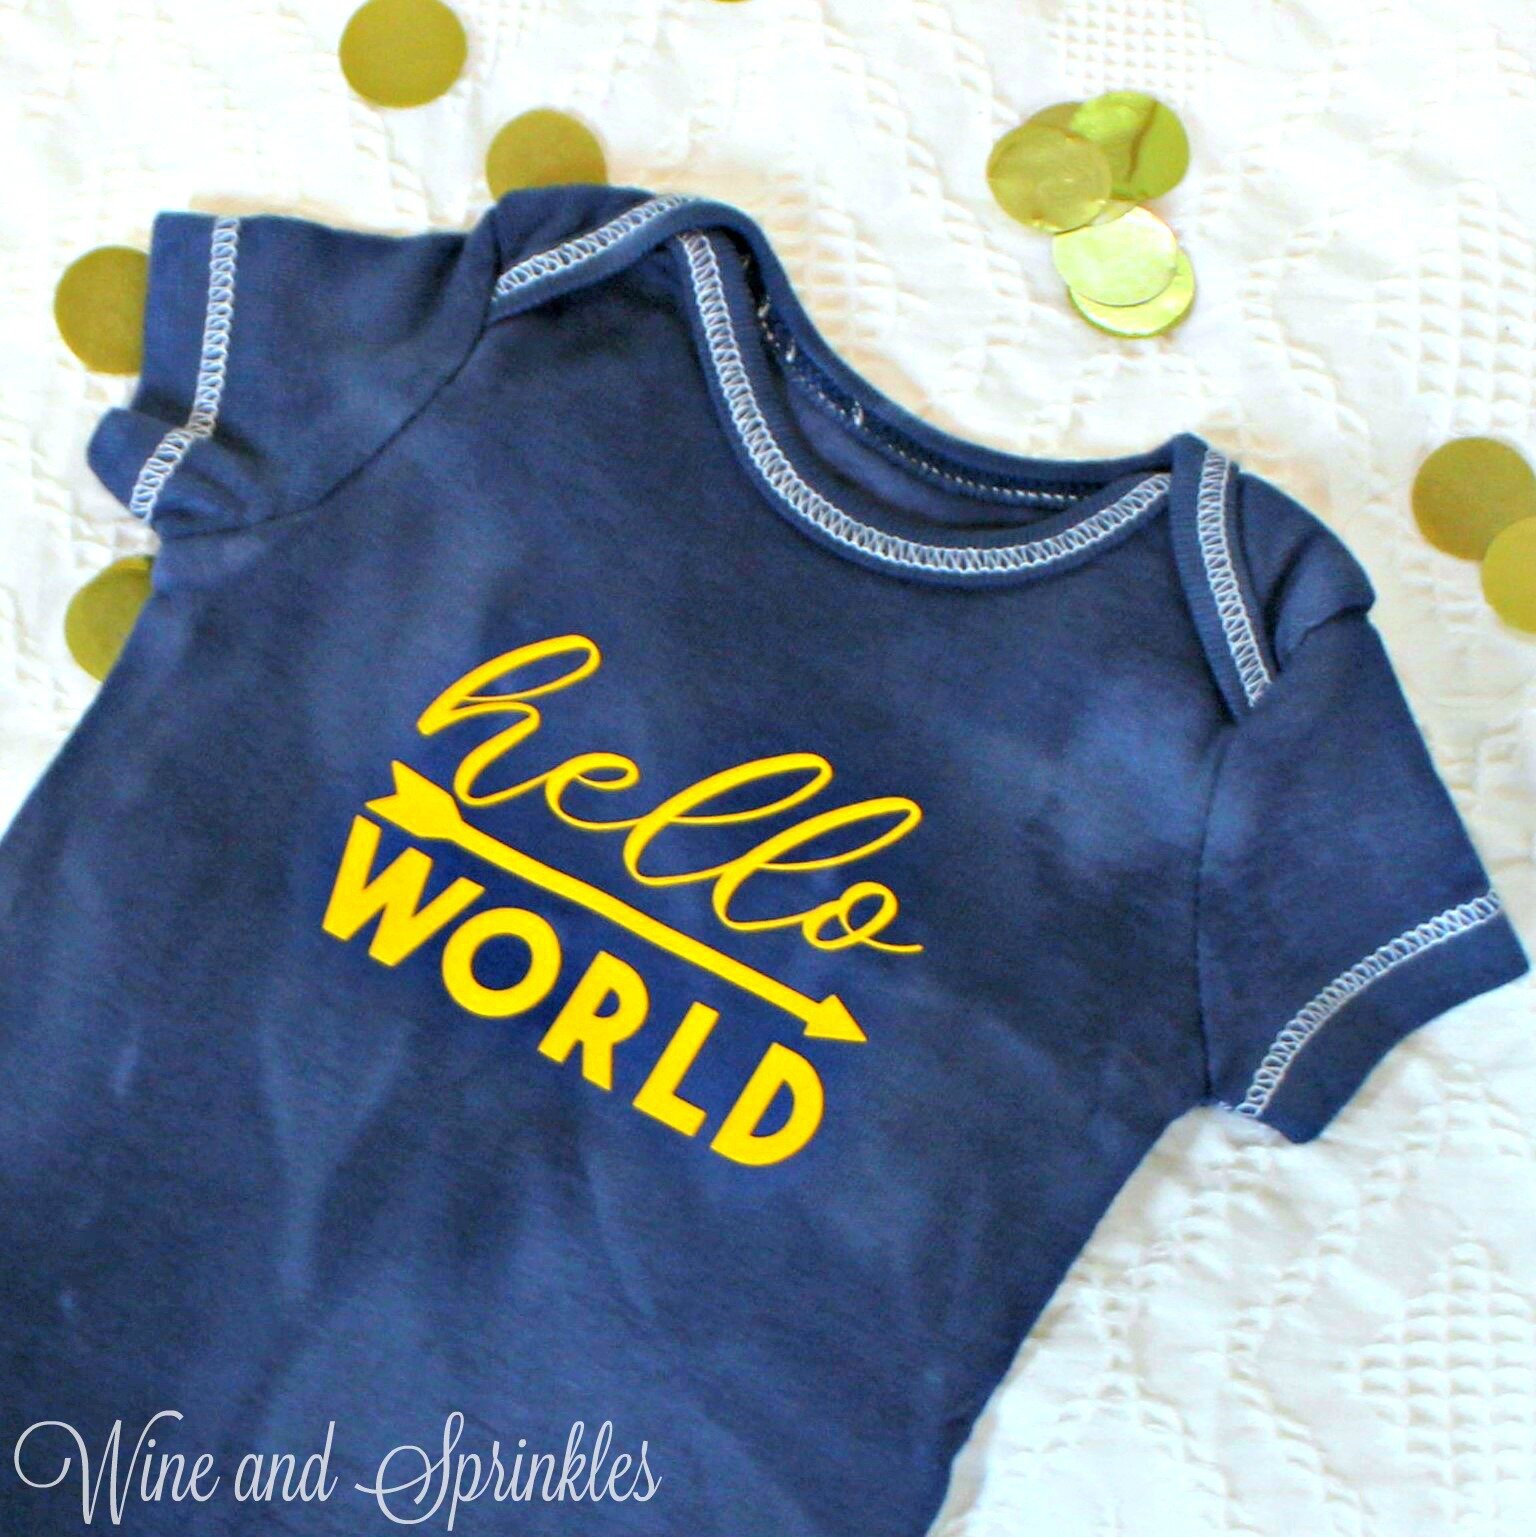
I had so much fun designing all sorts of onesies for my sister’s new baby, so we are starting our onesie designs of the year with a very appropriate newborn onesie that literally tells the world hello! :) This Hello World Onesie is a perfect choice for any newborn ensemble and is a beautiful handmade gift for any mama to be! 

I made the decal in Yellow Easyweed Heat Transfer Vinyl on a Hand Dyed Denim Onesie and I absolutely adore the color combination! This project is a great beginner HTV transfer project; the decal is easy to cut, weed, and small enough to fit entirely under your iron in one press. It's also a means to use up those little bits of colorful HTV you may save (like me), sure that you will find something to use them on! 

DIY HTV Hello World Newborn Baby Onesie for Baby Shower Gifts #onesies #babygift #babyshower

Make sure to check out our other Baby Onesie Projects for more DIY Baby Shower Gift Inspiration!


DIY HTV Hello World Newborn Baby Onesie for Baby Shower Gifts #onesies #babygift #babyshower
  1. After downloading the cut files, import them into the Cricut Software. After creating a new project, select Upload Image. Select the file you wish to upload and it will automatically take you to the final upload screen, where you can name the file, then select Save. The SVG Files are sized so that they will automatically cut to the size you see in the photos, but if you want to change the size you can do so to fit your onesies the way you like.

  2. After selecting “Make It” Make sure to select the Mirror Mode on the cutting screen. Cut the design in your choice of heat transfer vinyl with the Iron On (for Easyweed HTV) or Iron On+ (for Glitter HTV) Setting on your Cricut, with the shiny side of the material down.

DIY HTV Hello World Newborn Baby Onesie for Baby Shower Gifts #onesies #babygift #babyshower

3. Weed the additional material off of the backing material so that, looking down with the shiny side up, you can see your design with the correct orientation.Iron your onesie to remove any creases, then center the design over the top half of the onesie. Arrange the design shiny side up, then cover with parchment paper. Make sure to keep the parchment paper between the design and the iron.

4. Set your Iron to the second Highest setting. Cover the parchment paper and decal with your iron, pressing down firmly on the design. Using your iron like a small heat press, press the design for at least 20-30 seconds, repeating and overlapping the last position as you move across the design. Luckily, onesie decals are so small, you should be able to fit the whole decal under the iron in a single press!

5. Remove the parchment paper and peel the clear  backing from the decal, leaving the design on the onesie.

DIY HTV Hello World Newborn Baby Onesie for Baby Shower Gifts #onesies #babygift #babyshower

Check out our other Baby Onesie Projects for more DIY Baby Shower Gift Inspiration!

DIY HTV Hello World Newborn Baby Onesie for Baby Shower Gifts #onesies #babygift #babyshower

DIY Hand Dyed Baby Onesies

This post contains affiliate links, meaning that if you click on a link I will recieve a small comission. This costs you nothing extra and I only promote products I use and love! You can read our full disclosure here

DIY Hand Dyed Baby Onesies for Homemade Baby Shower Gifts #babygift #babyshower #babyeonesie #onesie

In honor of my sister’s first child, we are adding Baby Shower Gifts to the Wine and Sprinkles DIY arsenal! :) When I was thinking of baby shower gifts the first thing that came to mind was all the fun HTV decals I could make for onesies! But since white onesies weren’t quite colorful enough for me, I decided to dye them first!

 If you are looking to make some onesies for a special mama's little one, I would highly recommend dying them some fun colors beforehand! It's a super easy project that is a couple hours of time of letting clothes sit in dyes and wash in the washing machines for super fun colored onesies!


DIY Hand Dyed Baby Onesies for Homemade Baby Shower Gifts #babygift #babyshower #babyeonesie #onesie

Since I wanted to dye multiple colors all at the same time, I bought a multipack of these 16 qt Sterilite Containers and it worked out so well! I was able to dye all my onesies at the same time and, for a couple hours or work, made dozens of onesies in a rainbow of colors for my nephew!


  1. Start by washing and drying all the onesies you want to dye to remove any starches or detergents currently in the fabric. Put on gloves to start preparing the dye baths.

DIY Hand Dyed Baby Onesies for Homemade Baby Shower Gifts #babygift #babyshower #babyeonesie #onesie

2. Now, prep the dye bath for your onesies in a sink or plastic container. For each color you want to dye your onesies, you will need a separate bath. For each color bath, make a dye mixture consisting of:

1 gallon Hot (140-160° F) Water
½ cup salt
4 - 6 oz Clothing dye
½ tsp Liquid Dish Detergent 

For the colors I made, I used the following combinations of dyes:
Red- 6 oz. Cherry Red
Orange - 4 oz. Lemon Yellow + 1 oz. Cherry Red
Yellow - 4 oz. Lemon Yellow
Emerald - 4 oz. Emerald
Blue/Green - 4 oz. Emerald + 2 oz. Denim Blue (I’d recommend 1 oz)
Blue - 4 oz. Denim Blue
 If you are using a dye other than the ones I used, make sure to check the instructions on their dye mix ratios!

DIY Hand Dyed Baby Onesies for Homemade Baby Shower Gifts #babygift #babyshower #babyeonesie #onesie

3. Once the bath is made, add your onesies to the dye mixture, completely submerging and soaking each individually as you add it. Once all the clothes are added, stir the dye-onesie mix and cover with the container lid (if you are using containers like me).  I made 4-5 onesies in each color.

4. Let the onesies soak for one hour, stirring every few minutes to mix the dye with the onesies. I ended up not stirring them, but I should have! Mine came out a little marbley, which I thought was super fun but if you are looking for a more consistent color, stirring often is key! :) I also let the Yellow and Orange Onesies soak for an extra 30 minutes because they were a lighter color and I wanted to make sure it got dyed all the way!

DIY Hand Dyed Baby Onesies for Homemade Baby Shower Gifts #babygift #babyshower #babyeonesie #onesie

Now what do you do when you are done dying your onesies? Add some super cute HTV decals to personalize them for a perfect handmade baby shower gift! You can check out our Baby Onesie Projects Here for lots of different design options to perfectly customize your gift to delight your mama to be!

5. After the onesies are dyed to your desired shade, remove them from the bath and wash them in the sink under cold water until the water begins to run clear. Then, wash them on warm with a mild detergent and an old towel in a washer; dry, and you’re done! I ended up washing and drying each color of onesies individually, to make sure the colors didn’t run.

DIY Hand Dyed Baby Onesies for Homemade Baby Shower Gifts #babygift #babyshower #babyeonesie #onesie
 
DIY Hand Dyed Baby Onesies for Homemade Baby Shower Gifts #babygift #babyshower #babyeonesie #onesie

Painted Wine & Martini Glass Candles

This post contains affiliate links, meaning that if you click on a link I will recieve a small comission. This costs you nothing extra and I only promote products I use and love! You can read our full disclosure here

I always love receiving those special painted wine glasses as gifts, but then I never end up using them! Either I want them all to match or I don’t want to deal with hand washing it every time I use it. Since I’ve been on a candle kick lately, I decided to turn them into candles! I made both Wine Glass Candles and Martini Glasses; both came out beautiful!

I used regular wicks on these candles but you could just as easily use the wood wicks as I previously did for my jar candles. Regardless of your choice of wick, this is a great way to use the extra unique glasses in your collection that or to turn into prizes for your next bridal shower or baby shower!

Supplies:

Wine or Martini Glasses
Candle Wax
Wicks
Candle Melting Pot
Essential Oils and Coloring (Optional)


1.     Melt down candle wax in pot over low heat. If, like me, you are using old candle stubs, remove the wicks from the wax when melted with a fork or tongs.

2.     Remove wax from heat. Let cool for 5-10 minutes; then stir in coloring and fragrance if desired. I used pink and purple for my glasses and a peppermint –lemon fragrance.

3.     Dip the end of your wick (the metal stand bit) into the wax then press it into the bottom of your glass. Wait for the wax to harden before pouring the candle. Note: I had no issues with the glasses and hot wax, but if you are worried about the wax being too hot, soak your glasses in hot water and dry them just prior to placing your wicks.

4.     Pour melted wax into the glasses. Reserve 25% of your wax to top off the candles as they cool. The cooler your wax prior to pouring, the less you will need to fix divots that form while cooling. Your wicks may not want to stand up straight when you pour the wax; I used a wooden stick placed on the top of the glass to balance the wick in the right position.

5.     Once the wax in the glass has hardened and cooled, re-melt the excess wax if needed and top off the candle to create a smooth top.

And there you have it, super easy prizes or as fun accessories to your house! What glasses or containers would you make candles out of?

Bath Salts Favor Bar

This post contains affiliate links, meaning that if you click on a link I will recieve a small comission. This costs you nothing extra and I only promote products I use and love! You can read our full disclosure here

Bath Salts Favor Bar Title.jpg

I don’t know about you but one of my favorite trends in the wedding industry are food bars; smore’s bars, mashed potato bars, mac and cheese bars, I love them all! With that in mind, I thought to myself, why not do a favor bar?

bath salts 1

Favors seem to be falling out of style with budget conscious brides and maids, but I am still a huge fan! I always want my guests to feel valued and thanked for attending and even if it’s just a little something, I think favors are a nice touch of appreciation. That being said, favors don’t have to be crazy expensive to be unique and fun for guests!
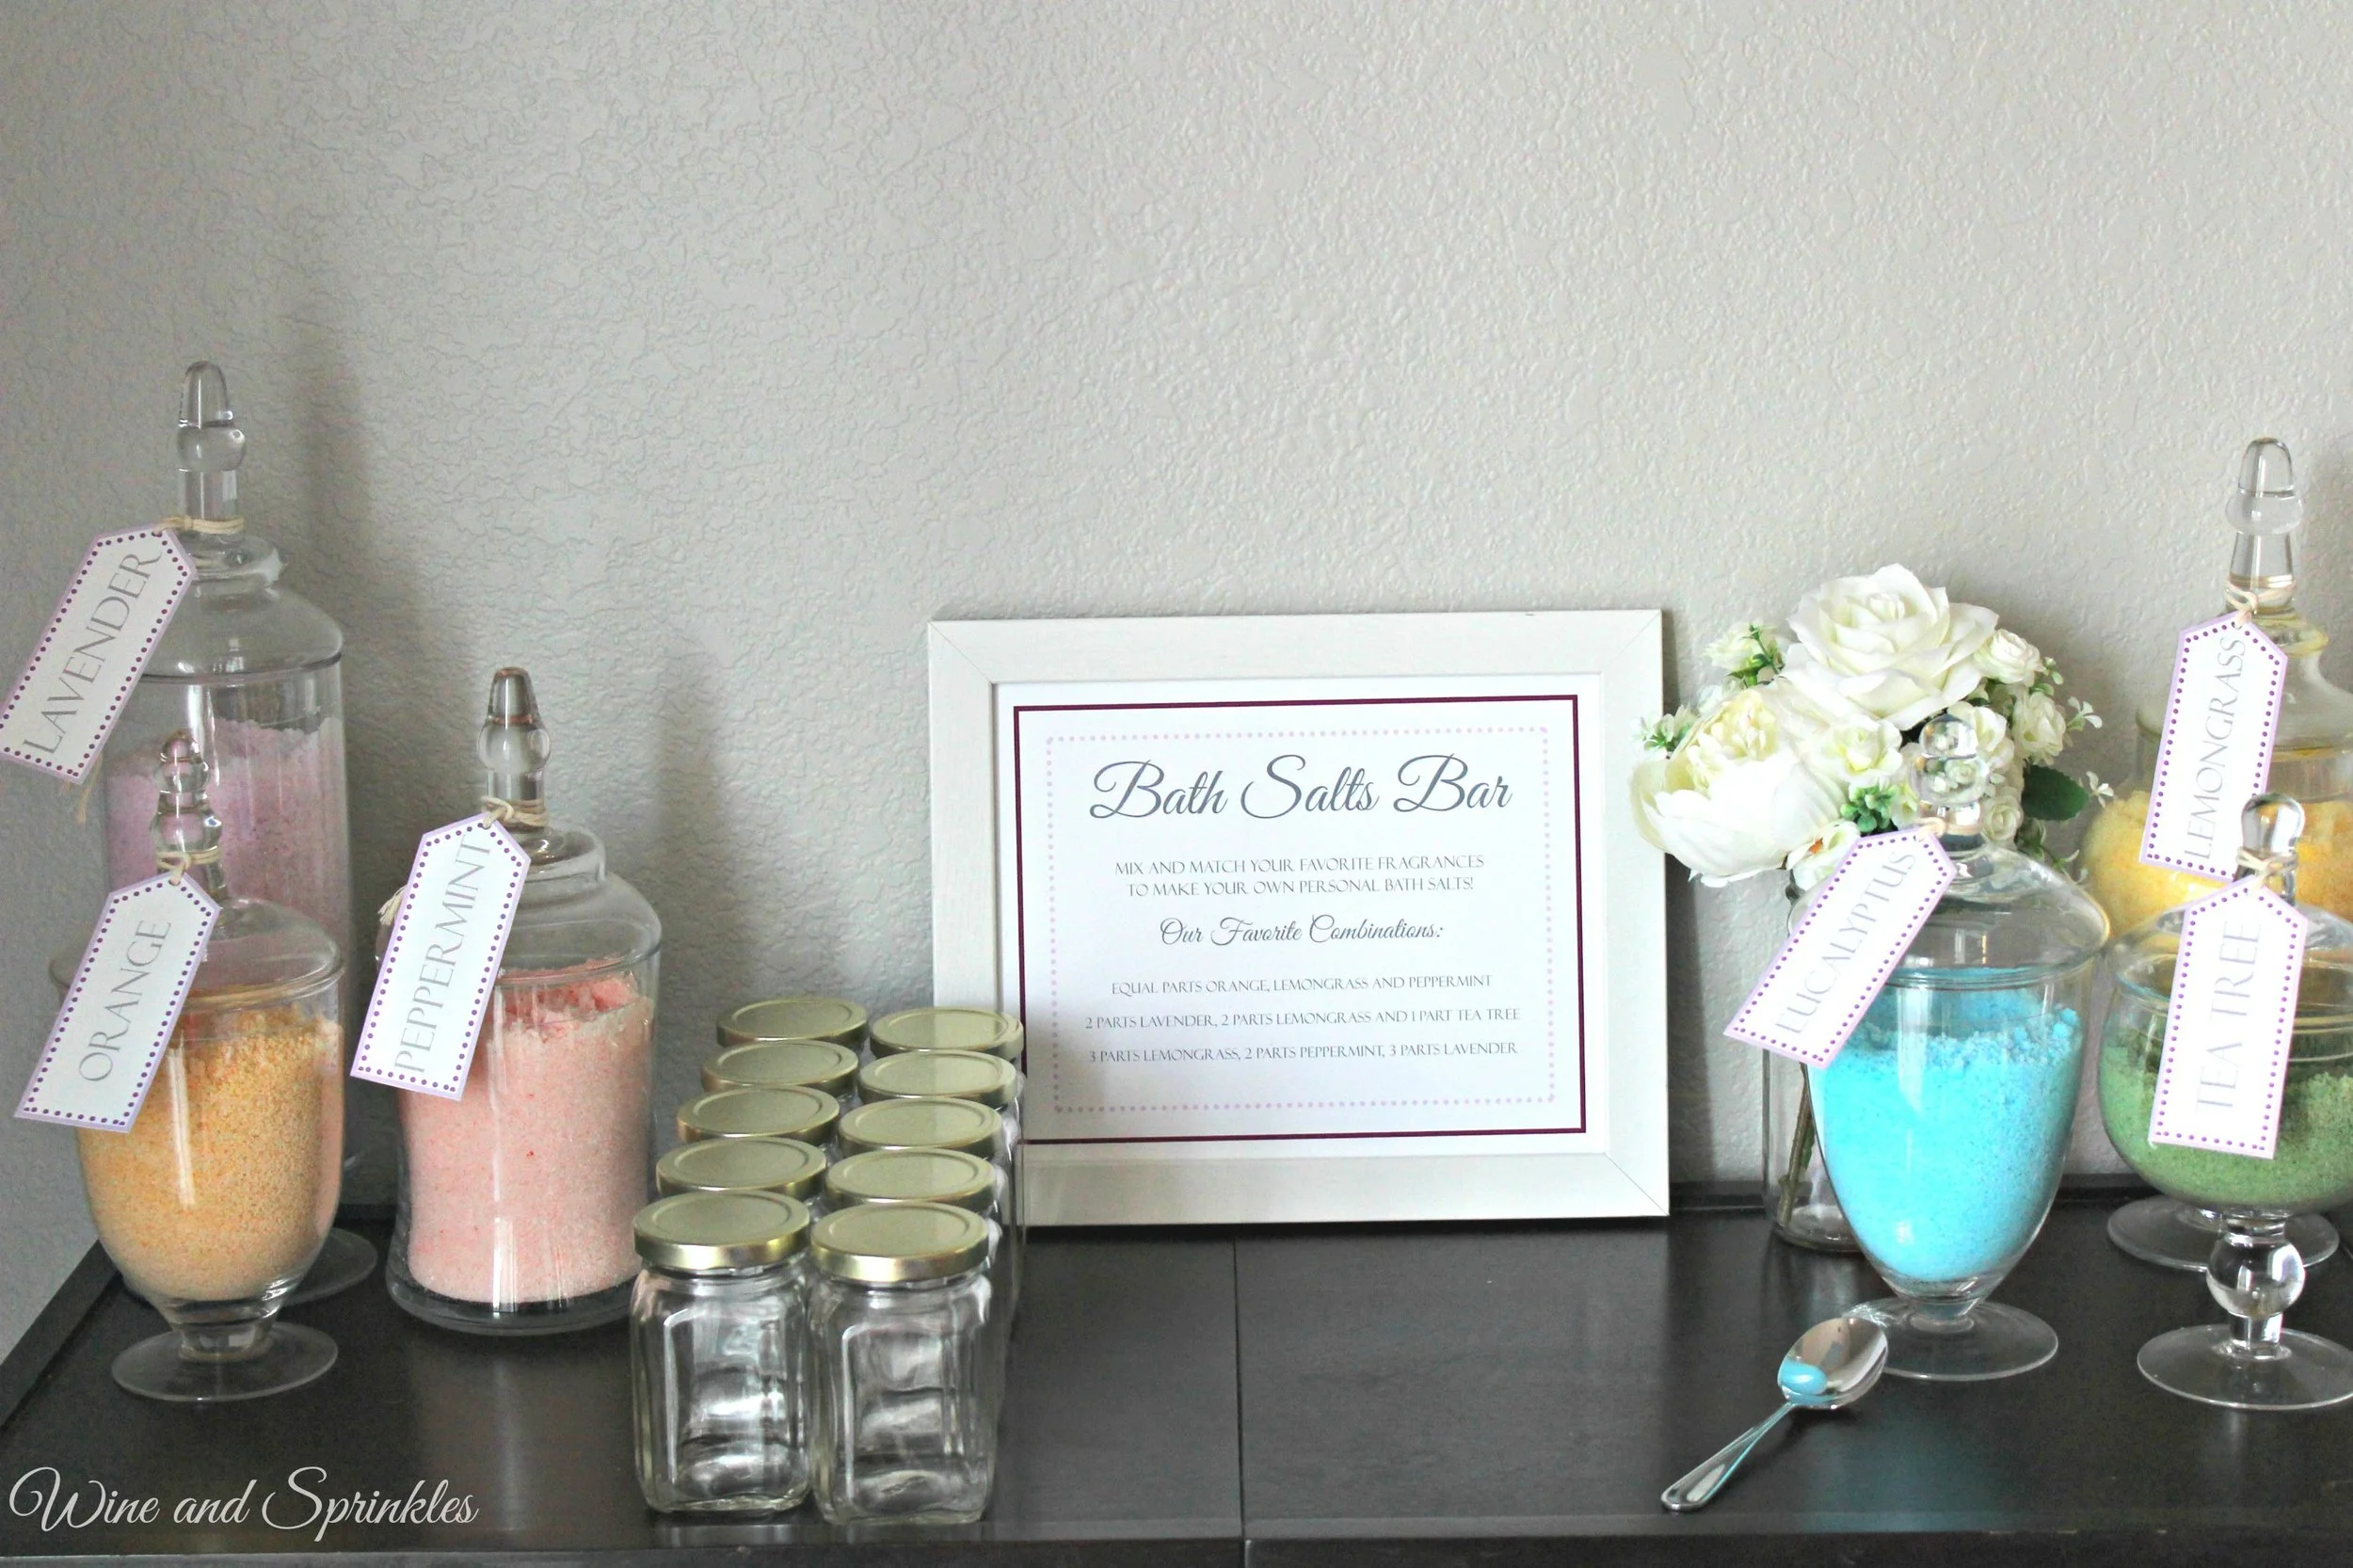
For my first favor bar, I went with bath salts! Why? Because you can easily make multiple types and colors with the same set of ingredients, then let your guests mix together their favorite combination and take it home in a cute little jar! Better yet, you can store your extra salts in Tupperware or bags to use yourself.

bath salts finished

Supplies:
Baking Soda
Epsom Salt – 5lb Bag
Deep Sea Salt – Fine Grain, 5 lb Bag
Essential Oils
Powdered Dye
Bath Salt Tags
Bath Salts Bar Sign

1.     First, start by making the basic bath salt mixture. You will use this same base for all your fragrances and colors. Mix together the following proportions of salts and baking soda:

4 cups Deep Sea Salt
5 cups Espom Salt
1 cup Baking Soda

Each 5 lb bag contains approximately 10 cups of salt so you will be able to make almost 20 cups of Bath Salts from one set of bags. I mixed my salts as two batches of the above recipe because I didn’t have a bowl big enough for 20 cups!

2.     Now, decide what containers you will display your bath salts in. I personally adore apothecary jars and have used my two sets (linked here and here :) ) for almost every party I have had. They give such a great finishing touch to any display and you can use them again and again! Whatever you decide to display your salts in, record how many cups of salts they can hold. For my jars, they hold anywhere between 2 – 4 cups of bath salts.

3.     Once you know how much each jar holds, you can start mixing in coloring and fragrance. For my salts, I used the following fragrances and colors.

Yellow – Lemongrass
Blue – Eucalyptus
Orange – Sweet Orange
Green – Tea Tree
Purple – Lavender
Pink – Peppermint

Measure the desired amount of premixed bath salts into a separate bowl. Add ¼ tsp. of color and 5-10 drops of oil depending on your preference. Whisk in oils and color until fully combined, then transfer the mixture into its associated jar. Repeat with the additional colors until you have all the fragrances you want. The great thing about the essential oils starter set is that you have a popular fragrance assortment that go well with the powdered colors!

4.     Now the final thing to do is to make sure that your guests understand what they need to do, that’s where the signs and tags come in! If you are using the fragrances and colors I have recommended, you can use the free printables available on this post! Punch a hole in each bath salts tag and tie around your apothecary jars and simply place the bath salts bar sign into an 8 x 10 frame. Make sure to place out some spoons to scoop salts and you are done!

Now I can’t take credit for the combinations on the sign, they came straight from the essential oils set I bought. But, I love what they came up with! I use the dyes and essential oils over many projects; including candles, soaps, bath bombs, and salts. You will see with my Bath Salts Bar I provided 6 oz jars to be filled and taken home, making almost 30 favors if each jar got completely filled!

blue bath salts