This post contains affiliate links, meaning that if you click on a link I will recieve a small comission. This costs you nothing extra and I only promote products I use and love! You can read our full disclosure here
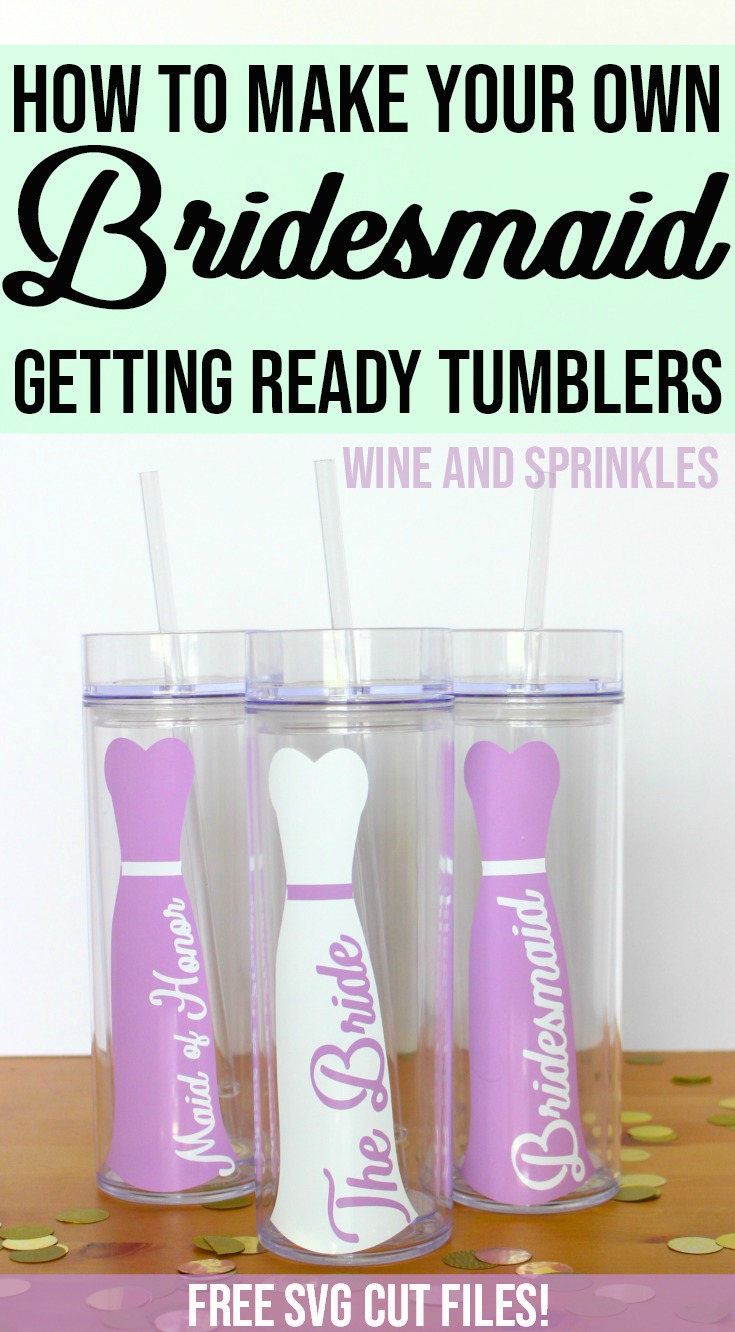
I always see Bridesmaid Dress getting ready tumblers on Etsy and decided to try my hand at making my own! I’ve been designing skinny tumblers lately, so it was a perfect choice to attempt a long and lean evening gown option!
I made both a light colored and a dark colored dress set and both came out beautifully! The combinations I used were: Oracal 651 Lavender Vinyl Dress with White Vinyl Lettering and Amethyst Glitter Vinyl Dress with White Vinyl Lettering. The Bride’s tumblers have lettering in the color of the bridesmaid dresses with a Oracal 651 White Vinyl Dress.
Transferring these designs is easiest in layers, similarly to the Princess Inspired Tumblers. It was far easier and cleaner to transfer the designs to the tumblers in layers as well as limiting the air bubbles from transferring and keeping the whole design smooth as its transferred to a curved surface.
Supplies:
Skinny Tumblers
Permanent Adhesive Vinyl
Transfer Paper
Craft Cutter and Tool Set
Adhesive Mat
Dress and Text Design Cut Files
1. After downloading the cut files, import them into the Cricut Software. After creating a new project, select Upload Image. Select the file you wish to upload and it will automatically take you to the final upload screen, where you can name the file the select Save.
2. Cut the design(s) in your choice of permanent adhesive vinyl with the Vinyl Setting on your Cricut. The SVG Files are sized so that they will automatically cut to the size you see in the photos, but if you want to change the size you can. :)
3. Once the designs are cut, weed away the extra vinyl and cut a piece of transfer tape to 2.5" x 7" for the dress decal and 2” x 5.5” for the lettering. Cut away any excess backing from the vinyl design and smooth transfer tape over the design, aligning it along the top of the dress, with one set of 1/2” blocks above the decal, as shown Below. For the text, I aligned it along the bottom of the belt as shown in the pictures. Using the smoother tool, smooth the tape to the vinyl, removing any air bubbles.
4. Now, transfer the dress design to your tumbler. Remove the tape and decal from the backing and smooth the dress onto the tumbler, aligning it along the top lip of the tumbler as shown in the photo. It is easiest to start at the top and smooth from top to bottom, center to outside edges.
5. Remove the transfer tape from the tumbler, leaving the dress decal on the tumbler. If there are air bubbles (mine had some), smooth out the ones you can with the smoother tool and for smaller or hard to smooth bubbles, prick them with a needle and smooth them to remove them. :)
6. Now, transfer the lettering to you tumbler. Align the text along the skirt of the dress, working from bottom to top and using the waistband as a guide on height.If your waistband is a little off, you can always trip the belt with an exacto knife, so go for overlap on the waistband.
I absolutely adore how these turned out and they are suprisingly easy to make once you’ve done one of them, so don’t be afraid! :)
7. Trace the letters to smooth them onto the dress on the tumbler, as shown above. Once the design is set, remove the transfer tape from the tumbler, leaving the text layer of the design on the tumbler. Repeat with all remaining tumblers.


